Advertisement
Quick Links
1.0 Introduzione
General Guide
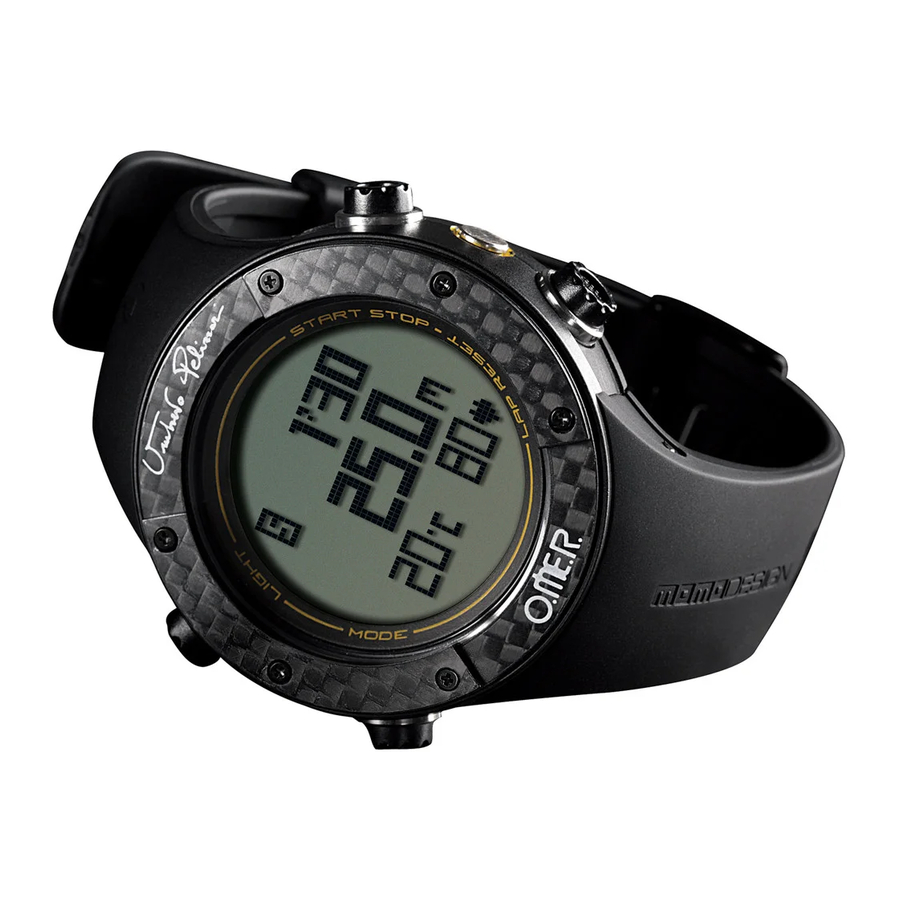
Thank you for your purchase of this Watch.
•
With this Watch, you can get your diving
•
information easily! In addition to the diving
function, this Watch can record your diving
information for your future review. Simply put on
the Watch with the Chest strap and dive with it,
the diving information like diving depth, diving
duration, water temperature, your heart rate and
etc. will be exhibited on the display and stored in
the watch! You can also use the USB connector
and the Diver Master to transfer all the Dive
records in the watch to your personal computer for
further storage and review.
This Watch includes 6 functional modes; they are
•
Clock mode, Dive mode, Chronograph Mode,
Countdown Timer Mode, History Mode and Setup
Mode.
Your watch is carefully designed and produced.
•
In order to utilize the features of your watch, it is
advisable to use the watch in conformity with the
notes mentioned below:
Read this user manual carefully before you use the
•
Watch and keep this manual in a safe place for
future reference.
– Avoid exposing the Watch to extreme
conditions for an unreasonable time.
– Avoid rough usage or severe impacts on the
Watch.
– It is recommended to replace the battery by
a certifi ed service agency because this watch
contains delicate electronic sensors and
components, and the water proof function and
standard can be maintained on your watch.
– Keep the Watch away from magnets
or appliances which contain magnetic
components such as mobile phones, speakers
or motors as these items may ruin the sensors.
– Clean the Watch occasionally with a soft cloth.
– DO NOT expose the Watch to strong
chemicals such as gasoline and alcohol as
they will damage the watch.
Advertisement

Subscribe to Our Youtube Channel
Summary of Contents for momoDESIGN O.ME.R Umberto Pelizzari UP-X1
- Page 1 1.0 Introduzione General Guide Read this user manual carefully before you use the • Watch and keep this manual in a safe place for Thank you for your purchase of this Watch. • future reference. With this Watch, you can get your diving •...
- Page 2 1.0 Introduction WARNING! Always get proper training, instruction and • qualifi cation before starting diving. Make sure that Diving is one of the highest risk sports. Committing • you fully understand the functions and limitations a careless mistake may lead to serious injury or of the Watch and you may have back-up devices fatal accident, hence safety is the fi...
- Page 3 2.0 Buttons and Its Functions Light Start/Stop [ EL ] [ S/S ] Sensors Mode Lap/Reset [ M ] [ L/R ]...
- Page 4 2.1 Buttons and Its Functions Mode [M] To select among the Clock, Dive, Chronograph, Timer, History and Setup modes, just press the [M] button until the • desired mode/icon appears on the screen and wait for 2 seconds, it will go to the main screen of the corresponding mode automatically.
- Page 5 3.0 Major Function Modes [ M ] [ M ] Clock Mode Dive Mode Chronograph Mode [ M ] [ M ] [ M ] [ M ] Set Up Mode History Mode Countdown Timer Mode...
- Page 6 4.0 Clock Mode How to select the Current Time Select this mode by pressing the [M] button until • the CLOCK icon appears on the screen and wait for 2 seconds, it will go to the Home time or Dual time mode automatically.
- Page 7 4.1 Clock Mode - Dual Time Display Dual Time Display The fi rst row shows the name of this mode – DUAL • TIME mode. 1st row The second row shows the hour and minute of the • desired time zone. 2nd row The third row shows the hour and minute of the •...
- Page 8 5.0 Dive Mode How to select the Dive Function Select this mode by pressing the [M] button until • the DIVE icon appears on the screen and wait for 2 seconds, it will go to the Dive mode automatically. When the watch is in another mode, it will go to the Dive mode automatically when the watch is submerged in the water deeper than 1.0 meter provided that the Dive mode setting has been...
- Page 9 5.1 Dive Mode - Depth Display Depth Display The fi rst row shows either icon ‘ ’(Sea water) or • icon ‘ ’(Lake – fresh water) on the left and the 1st row duration of an individual diving activity on the right; The second row shows the depth of the dive •...
- Page 10 5.2 Dive Mode - Heart Rate Display Heart Rate Display The fi rst row shows either icon ‘ ’ (Sea water) or • icon ‘ ’ (Lake – fresh water) on the left, the ‘ ’ 1st row icon in the middle will appear and fl ash and an audible alert alarm will beep for 30 seconds when it reaches the maximum depth pre-set by the user 2nd row...
- Page 11 5.3 Dive Mode - Precaution / Tips for Heart Rate Measurement Heart Rate Features This Watch includes a chest strap, thus the Watch • can provide a continuous supply of heart rate data Elastic Nylon PC+Glass Silicon Rubber to user for guiding them to achieve their fi tness TPU Black Band Black Fibre Black...
- Page 12 5.3.1 Dive Mode - Wearing the chest strap How to Wear the Chest Strap Refer to the below steps to wear the chest strap on one’s chest: 1. Extend the elastic band for allowing a loose fi tting the chest strap on your chest. 2.
- Page 13 5.4 Dive Mode - Heart Rate Alert Heart rate Visual Audio Heart Rate Alert (beats per minute) Indication Indication When your heart rate is higher than the pre-set • heart rate, the icon ‘ ’ above the ‘ ’ appears and the alert alarm will beep twice every 10 beep twice seconds.
- Page 14 5.4.1 Dive Mode - Estimated Maximum Heart Rate (EMHR) and %EMHR Estimated Maximum Heart Rate (EMHR) and %EMHR In doing exercise or sports, your heart naturally • speeds up in pumping blood to the body in Percentage Heart rate accordance with your increased energy level. This of estimated in bpm maximum...
- Page 15 5.4.2 Dive Mode - What is Heart Rate Zone What is Heart Rate Zone Some particular training/exercise objectives may require trainee/exerciser maintaining his/her heart rate (exercise • pace) within one particular heart rate zone (upper and lower limits) during the exercise. You may set your upper and lower heart rate limits in the H.R.
- Page 16 5.5 Dive Mode - Countdown Diving duration Countdown Diving Duration You may set your diving duration by using this • function. Pre-set the Countdown interval in the Setup menu before using this function (please check chapter 9.1.4 for the setting). Press and hold the [S/S] button for 2 seconds to •...
- Page 17 5.6 Dive Mode - Interval Alarm Interval Alarm This function can alert you the depth of your dive • in a multiply of the pre-set value. The value can be set to 10m, 20m, 30m, 40m and 50m. It will beep for 2 seconds when it reaches a multiply of the pre-set value.
- Page 18 5.7 Dive Mode - Surface Time Counter Surface Time Counter When you emerge to the water surface from the • last dive and the depth is less than 1 meter, the display of the watch will change to the surface mode.
- Page 19 5.8 Dive Mode - Surface Time Counter When the surface time counter reaches the pre-set value (the pre-set value is set in the Setup menu, please check • the chapter 9.1.3 for more details), it will beep for 2 seconds. This alert function can be switched on/off in the Setup menu.
- Page 20 6.0 Chronograph Mode Chronograph Display Select this mode by pressing the [M] button until • the CHRONO icon appears on the screen and wait for 2 seconds, it will go to the Chronograph mode automatically. In this mode, your heart rate can be shown on the •...
- Page 21 6.1 Chronograph Mode - Using the Chronograph Using the Chronograph The fi rst row of the display shows the heart rate on • the left with the “Heart icon” in the middle when 1st row you put on the Chest Strap and the lap number with a maximum of 10 laps on the right.
- Page 22 6.1 Chronograph Mode - Using the Chronograph Using the Chronograph Press the [S/S] button to start or stop counting. • After you press the [S/S] button, the ‘ ’ appears and the chronograph starts counting. During this time, when you press the [L/R] button, the lap time will be recorded.
- Page 23 6.2 Chronograph Mode - Recalling the Lap records Recalling the Lap records When the chronograph is stopped, press the [L/R] • button to show the time of corresponding lap 1st row record and the accumulated elapsed time. The fi rst row shows the Lap number and it is •...
- Page 24 6.3 Chronograph Mode - How to reset the Chronograph How to reset the Chronograph When the stopwatch is stopped, press and hold • the [L/R] buttons until the stopwatch resets. 1st row When you review your lap records, press the [S/S] •...
- Page 25 7.0 Countdown Timer Mode Countdown Timer Display Select this mode by pressing the [M] button until • the Timer icon appears on the screen and wait for 2 seconds, it will go to the Countdown Timer mode automatically. The fi rst row shows Timer icon. •...
- Page 26 7.0 Countdown Timer Mode Countdown Timer Display The Timer starts counting from the pre-set value • to zero and stops at zero. The timer will beep once per minute at the last 10 minutes; beep once per 10 seconds at the last minute; beep once per second at the last 5 seconds.
- Page 27 8.0 History Mode History Display Select this mode by pressing the [M] button • until the History icon appears on the screen and wait for 2 seconds, it will go to the History mode automatically. In this mode, Daily Total, Odometer and Erase •...
- Page 28 8.1 History Mode - Individual record Individual record Please note that this individual record appears • 1st row after you have done diving activity. Otherwise, no record is shown. 2nd row Press the [S/S] or [L/R] button to change the •...
- Page 29 8.2 History Mode - Daily Total Daily Total The summary with daily total of the last day diving • activity is recorded and shown in this mode. Press the [S/S] button to change the screen forward or backward respectively. The sequence of the screen is in a cycle: Total number of Dives >...
- Page 30 8.3 History Mode - Odometer Odometer mode In this mode, this is the same as the Daily Total • except that this is the summary and accumulation of all records and diving activities recorded up- to-date. The display is the same as the Daily Total except the legend is Odometer instead.
- Page 31 8.4 History Mode - Erase mode Erase mode You may erase either All Record, Daily Total or • Odometer data by selecting the desired one to erase. Press the [S/S] or [L/R] button to select the desired deletion. Press [EL] to confi rm the deletion and the ‘YES’...
- Page 32 9.0 Setup Mode Setup Display Select this mode by pressing the [M] button • until the Setup icon appears on the screen and wait for 2 seconds, it will go to the Setup mode automatically. Setup Mode Auto entry after 2 seconds Setup Display...
- Page 33 9.0 Setup Mode Setup Display In this mode, press [S/S] or [L/R] button to select • among Dive, H.R.Zone, Daily Alarm, Timer, Clock, User and System. After you choose your desired item, press the [EL] button to confi rm your selection.
- Page 34 9.1 Setup Mode - Dive Dive In this menu, you can choose among Depth Alert, • Interval Alarm, Surface Alarm, Countdown, Dive On/Off, Sea/Lake and Log Rate. Press the [S/S] or [L/R] button to select the desired item and press the [EL] button to confi rm and go to the corresponding menu.
- Page 35 9.1.1 Setup Mode - Dive - Depth Alert Depth Alert Display On this display, the Depth Alert can be set from 2 • to 100m. Press the [EL] button to select between the depth value and the ON/OFF switch. Press the [S/S] or [L/R] button to select/confi rm the •...
- Page 36 9.1.2 Setup Mode - Dive - Interval Alarm Interval Alarm Display On this display, the Interval Alarm can be set to 10, • 20, 30, 40 or 50m. Press the [EL] button to select between the interval value and the ON/OFF switch. Press the [S/S] or [L/R] button to select/confi...
- Page 37 9.1.3 Setup Mode - Dive - Surface Alarm Surface Alarm Display On this display, press the [S/S] or [L/R] button to • select between the ON/OFF or Setting. Press the [EL] button to confi rm your selection. Surface Alarm Display [ M ] [ EL ] [ S/S ] or [ L/R ]...
- Page 38 9.1.3.1 Setup Mode - Dive - Surface Alarm Surface Alarm Display On the ON/OFF display, press the [S/S] or [L/R] • button to select the ON or OFF. Press the [EL] button to confi rm the selection. Press the [M] button to exit this display and return to the previous display.
- Page 39 9.1.3.2 Setup Mode - Dive - Surface Alarm Setting Dive Time Screen When the “Preset” is highlighted/selected, press • the [S/S] or [R] button to change it to the Dive Times screen. Press the [EL] button to select the value of times in the Dive Times menu. Press the [S/S] or [R] button to increase or decrease the Surface Alarm Display value from 1 to 6.
- Page 40 9.1.4 Setup Mode - Dive - Countdown Timer Setup Display Press the [EL] button to move the cursor to the • second, minute and hour fi elds. Press the [S/S] or [R] button to increase or • decrease the value of these fi elds. Pressing and holding the [S/S] or [L/R] button •...
- Page 41 9.1.5 Setup Mode - Dive - Dive On / Off Dive ON / OFF Press the [S/S] or [L/R] button to select between • the “ON” or “YES” option, press the [EL] button to confi rm the selection. Press the [M] button to exit to the previous menu. •...
- Page 42 9.1.6 Setup Mode - Sea/Lake Sea/Lake Press the [S/S] or [L/R] button to select between • the “Sea” or “Lake” option, press the [EL] button to confi rm the selection. Press the [M] button to exit to the previous menu. Note: Since the densities of the sea water and lake fresh water are different, in order to let the watch function in an accurate manner, it is better to state...
- Page 43 9.1.7 Setup Mode - Dive - Log Rate Log Rate Press the [S/S] or [L/R] button to change the time • interval for the log. The values for this function are 1, 2, 5 and 10 seconds. Press the [M] button to confi...
- Page 44 9.2 Setup Mode - Heart Rate Zone Heart Rate Zone Press the [S/S] or [L/R] button to select among • the Limits, High Alert and Low Alert and press the [EL] button to confi rm the selection. Press the [M] button to exit this menu and return to the previous menu.
- Page 45 9.2.1 Setup Mode - Heart Rate Zone - Limits Limits On the screen, you can choose either the HI value • or LO value by pressing the [EL] button. Press the [S/S] or [R] button to increase or decrease the value respectively. Holding these buttons will increase the pace of change of the values.
- Page 46 9.2.2 Setup Mode - Heart Rate Zone - High Alert High Alert On this screen, you can switch on or off the High • heart rate alert. Press the [S/S] or [L/R] button to select the “ON” • or “OFF”, then press the [EL] button to confi rm the selection.
- Page 47 9.2.3 Setup Mode - Heart Rate Zone - Low Alert Low Alert On this screen, you can switch on or off the Low • heart rate alert. Press the [S/S] or [R] button to select the “ON” or • “OFF”, then press the [EL] button to confi rm the selection.
- Page 48 9.3 Setup Mode - Daily Alarm Daily Alarm Setup Display Press the [EL] button to select among the Hour, • Minute and ON/OFF fi elds. Press the [S/S] or [L/R] button to select the “ON” • or “OFF” while the cursor is in this fi eld. When this function is set to “ON”, the watch will beep for 30 seconds at the pre-set alarm time daily.
- Page 49 9.4 Setup Mode - Timer Timer Setup Display Press the [EL] button to select among the Hour, • Minute and second fi elds. Press the [S/S] or [L/R] button to increase or decrease the value of these fi elds. Holding these buttons will increase the pace of change of the value.
- Page 50 9.5 Setup Mode - Clock Clock Setup Display Press the [S/S] or [L/R] button to select among the • Time, Date, Dual Time and Format. Press the [EL] button to confi rm the selection. Setup Display [ S/S ] [ S/S ] Time Format [ L/R ]...
- Page 51 9.5.1 Setup Mode - Clock - Time Time Display This is for setting the current time. Press the [EL] to • select among the Hour, Minute and Second fi elds. Press [S/S] or [L/R] button to increase or decrease the value of these fi elds. Holding these buttons will increase the pace of change of the value.
- Page 52 9.5.2 Setup Mode - Clock - Date Date Display This is for setting the current date. Press the [EL] • to select among the Year, Month and Day fi elds. Press [S/S] or [L/R] button to increase or decrease the value of these fi elds. Holding these buttons will increase the pace of change of the value.
- Page 53 9.5.3 Setup Mode - Clock - Dual Time Dual Time Display This is for setting the time for another time zone. • Press the [EL] to select among the Hour and Minute fi elds. Press [S/S] or [L/R] button to increase or decrease the value of these fi...
- Page 54 9.5.4 Setup Mode - Clock - Format Format Display Press the [S/S] or [L/R] button to select between • Time or Date format. Press the [EL] button to confi rm the selection Setup Display [ S/S ] Time [ S/S ] [ L/R ] Date Press [EL] to...
- Page 55 9.5.4.1 Setup Mode - Clock - Format - Time Format Time Format Display Press the [S/S] or [L/R] button to select between • the 24 Hour or 12 Hour format. Press the [EL] button to confi rm the selection. Press the [M] button to exit this menu and return to the previous menu.
- Page 56 9.5.4.2 Setup Mode - Clock - Format - Date Format Time Format Display Press the [S/S] or [L/R] button to select between • the MM/DD or DD/MM format. Press the [EL] button to confi rm the selection. Press the [M] button to exit this menu and return to the previous menu.
- Page 57 9.6 Setup Mode - User User Display Press the [S/S] or [L/R] button to select among the • Gender, Birthday and Weight. Setup Display [ S/S ] Gender [ L/R ] [ S/S ] [ S/S ] [ L/R ] [ L/R ] Birthday Weight...
- Page 58 9.6.1 Setup Mode - User - Gender Gender Display Input your gender in this setting. Press the [S/S] or • [L/R] button to select between “Male” or “Female”. Press the [EL] button to confi rm the selection. Press the [M] button to exit this menu and return to the previous menu.
- Page 59 9.6.2 Setup Mode - User - Birth year Birth year Display Input your birthyear in this setting. Press the [S/S] • or [L/R] button to increase or decrease the value. Holding these buttons will increase the pace of change of the values. Press the [M] button to exit this menu and return to the previous menu.
- Page 60 9.6.3 Setup Mode - User - Weight Weight Display Input your body weight in this setting. Press the • [S/S] or [L/R] button to increase or decrease the value. Holding these buttons will increase the pace of change of the values. Press the [M] button to exit this menu and return to •...
- Page 61 9.7 Setup Mode - System System Display Press the [S/S] or [L/R] button to select among • the Sound, Contrast, Units, Power Save, Sleep and About. Press the [EL] button to confi rm the selection. Setup Display [ S/S ] [ S/S ] Sound About...
- Page 62 9.7.1 Setup Mode - System - Sound System Display Press the [S/S] or [L/R] button select between “Key • Tone” or “Chime” settings. Press the [M] button to exit this menu and return to the previous menu. System Display [ EL ] Key Tone [ S/S ] [ L/R ]...
- Page 63 9.7.1.1 Setup Mode - System - Sound - Key Tone Key tone Setup Display Press the [S/S] or [L/R] button to select between • “ON” or “OFF”. Press the [EL] button to confi rm the selection. Press the [M] button to exit this menu and return to the previous menu.
- Page 64 9.7.1.2 Setup Mode - System - Sound - Chime Chime Setup Display Press the [S/S] or [L/R] button to select between • “ON” or “OFF”. Press the [EL] button to confi rm the selection. Press the [M] button to exit this menu and return to the previous menu.
- Page 65 9.7.2 Setup Mode - System - Contrast Contrast Display The contrast values are from 1 to 10. 1 represents • the lightest display and 10 represents the brightest display. Press the [S/S] or [L/R] button to increase or • decrease the value. Holding these buttons will increase or decrease the pace of change of the values.
- Page 66 9.7.3 Setup Mode - System - Units Unit Display Press the [S/S] or [L/R] button to select between • General or Temperature. Press the [EL] button to confi rm the selection. Press the [M] button to exit this menu and return to the previous menu. System Display [ EL ] General...
- Page 67 9.7.3.1 Setup Mode - System - Units - General General Display Press the [S/S] or [L/R] button to select between • Metric or Imperial. Press the [EL] button to confi rm your selection. Press the [M] button to exit this menu and return to the previous menu.
- Page 68 9.7.3.2 Setup Mode - System - Units - Temperature Temperature Display Press the [S/S] or [L/R] button to select between • “ °C” or “ °F ”. Press the [EL] button to confi rm your selection. Press the [M] button to exit this menu and return to •...
- Page 69 9.7.4 Setup Mode - System - Power Saving Power save Display Press the [S/S] or [L/R] button to select between • ON or OFF. Press the [EL] button to confi rm your selection. Press the [M] button to exit this menu and return to the previous menu.
- Page 70 9.7.5 Setup Mode - System - Sleep Sleep Display Press the [S/S] or [R] button to select between • “ON/OFF” or Time Set. Press the [EL] button to confi rm your selection. Press the [M] button to exit this menu and return to the previous menu. System Display [ EL ] ON / OFF...
- Page 71 9.7.5.1 Setup Mode - System - Sleep - ON / OFF ON/OFF Display Press the [S/S] or [R] button to select between • ON or OFF. Press the [EL] button to confi rm your selection. Press the [M] button to exit this menu and return to the previous menu.
- Page 72 9.7.5.2 Setup Mode - System - Sleep - Time Set Time Set Display Press the [S/S] or [L/R] button to increase or • decrease the value of the time you prefer for the Sleep function. Press the [EL] button to select the wake up status LCD ON or sleep status LCD OFF.
- Page 73 9.7.6 Setup Mode - System - About About Display This shows the latest software version in this watch • for future update reference. Press the [M] button to exit this menu and return to the previous menu. About Display...
- Page 74 10.0 PC Link Mode PC Link Mode This watch comes with a PC USB link cable and • software for you to keep track of your diving activities. This software can help you store all the Diving • activities and show the summary of the individual records with Daily Total.
- Page 75 10.1 PC Link Mode - Connect the watch to the computer How to connect the watch to the computer using the USB cable with a Clip 1. Run the software Diver Master in your computer. 2. Align the clip guide and pins with the notch and contacts at the bottom of the watch.
- Page 76 10.2 PC Link Mode - Software to review How to use the software to review your Dive activities 1. You may transfer the Dive information in your watch to the computer to review all the activities. Click the pull down menu “Data Transfer” and click the “receive Watch Data”, the Dive records will be transferred from your watch to the software and stored for your review.
- Page 77 10.3 PC Link Mode - Other usage of this software Other usage of this software 1) File You may import or export the Dive data fi les in • DIVE format. You may print the current graphs as shown on the •...
- Page 78 10.3 PC Link Mode - Other usage of this software You may synchronize the computer’s time with • your watch by clicking on the “Sync PC time to watch” icon. Watch fi rmware update You may check the latest version of the software •...
- Page 79 11.0 Power Saving Mode Power Saving Mode This Watch has a Power Saving Function which • can turn off the LCD display so that the battery can last longer. In the Power Saving Mode, the watch function is • working normally. (i.e. The timekeeping function is running normally in the Power Saving Mode.) How to enter/exit the Power Saving Mode Home Time Display...
- Page 80 12.0 Specifi cation Time Count Down Timer Show hour, minute, second, date and day of week Max 23:59:59 • • Calendar Range : 2000 ~ 2099 1 second resolution • • 12/24 hour format Bi once per minute at last 10 minute; bi once •...
Need help?
Do you have a question about the O.ME.R Umberto Pelizzari UP-X1 and is the answer not in the manual?
Questions and answers