Table of Contents
Advertisement
Quick Links
Advertisement
Chapters
Table of Contents

Related Manuals for OPPO Mobile Reno3 5G

Summary of Contents for OPPO Mobile Reno3 5G
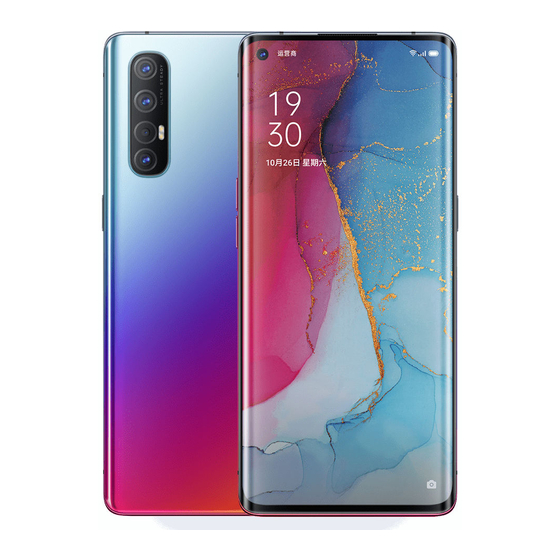
- Page 1 OPPO Reno3 5G User Guide...
-
Page 3: Table Of Contents
About the User Guide............3 Getting Started Parts & Functions.............. 6 SIM Card................7 Phone Storage..............9 Charging Battery..............9 Power On/Off..............10 OPPO Reno3 5G Making Initial Settings............ 11 User Guide Contents Setting a Google Account..........13 Locking Screen..............16 Basic Operations Basic Operation..............18 Using Touchscreen............ - Page 4 Handset Settings Handset Settings.............. 62 Data Usage Settings............63 Display & brightness Settings........64 Sound & Vibration Settings..........64 Fingerprint, Face, and Password Settings......65 Security Settings..............68 Battery Settings...............70 Additional settings............70 Other Settings..............71 Global Services Global Roaming..............78 Making Calls while Abroad..........79 Warranty/Specifications/Customer Service Warranty &...
-
Page 5: About The User Guide
Introduction About the User Guide Most operation descriptions are based on default settings. Unless noted otherwise, descriptions are for Home Screen. Some operation descriptions may be omitted. Before Using This Product Read "Safety Precautions" and this guide thoroughly beforehand for proper usage. Accessible services may be limited by subscription contract conditions. -
Page 7: Getting Started
Getting Started Parts & Functions.............. 6 SIM Card................7 Phone Storage..............9 Charging Battery..............9 Power On/Off..............10 Making Initial Settings............ 11 Setting a Google Account..........13 Locking Screen..............16... -
Page 8: Parts & Functions
Parts & Functions Handset (Back/Side) Handset (Front) Part Description Part Description Sub-Mic Hear the other party's voice here. Hear the other party's voice as well as Receiver Ultra- music and video here. Capture still images and videos with an Wide-Angle Front Use to shoot still images, videos of ultra-wide-angle lens. -
Page 9: Sim Card
SIM Card Handset Keys SIM Card is an IC card containing phone number and other customer information. Handling SIM Card For SIM Card handling, see following items. IC chip Part Description For SIM Card handling, see SoftBank Website. https://www.softbank.jp/mobile/support/protect/usim/ Power Key Long Press for power on/off. - Page 10 Removing SIM Card Insert SIM Card Slot Pin (complimentary sample) in hole in SIM Always power off beforehand. Card Tray Insert SIM Card Slot Pin (complimentary sample) in hole in SIM Card Tray Pull out SIM Card Tray Pull out SIM Card Tray Set SIM Card in SIM Card Tray ・Place gently, noting orientation of SIM Card (notch/IC (gold) Remove SIM Card from SIM Card Tray...
-
Page 11: Phone Storage
Phone Storage Charging Battery Use phone storage to save data (captured still images and Display while Charging videos, music, applications, etc.). "Charging" and battery remaining in "%" appear in Lock Phone Storage Screen. If rapid-charging, "VOOC" appears below battery remaining. Information saved in phone storage can become lost ・Rapid charging available only when using AC Charger or changed accidentally or as a result of damage. -
Page 12: Power On/Off
Power On/Off Plug AC Charger (complimentary sample) into power outlet Powering On Power Key & Screen Lock Key (Long Press) Charging starts. When charging is complete, unplug AC Charger (complimentary sample) and remove USB Type-C plug on USB Type-C™ Cable Lock Screen appears. -
Page 13: Making Initial Settings
Making Initial Settings Select Wi-Fi network to connect to When powering on the first time, an initial settings wizard appears for optionally making Wi-Fi, Google™ account, and other settings. Follow onscreen instructions to set items. Making Initial Settings Select English (United States) , then Tap Next ・... - Page 14 Follow onscreen instructions to set a Google account Next ・For details on Google accounts, see "Setting a Google Account." ・ If not making Google account settings, Tap Skip Get Started Set/check Google Services Accept Settings are complete. Follow onscreen instructions to set Google Assistant™ Follow onscreen instructions to set Lock Screen Password ・For details on Lock Screen Password, see "Setting Password...
-
Page 15: Setting A Google Account
Setting a Google Account Google Use a Google account and get more convenience with Google services. A Google account is required to use some services or fully use some applications. Google Account Cautions Be careful not to forget your Google account mail address or password. - Page 16 Enter date of birth Select gender Next Next Select Gmail address Next Check the privacy policy and terms of usage, I agree Enter password Enter password again (for confirmation) Set Google service Accept Next Account is created. Yes, I'm in ・...
- Page 17 Logging In with a Google Account In window for logging in to Google account, enter mail address Next In Home Screen, (Settings) Enter password Next Users & accounts Follow onscreen instructions Add account You are logged in to your Google account. Google Window for logging in to a Google account opens.
-
Page 18: Locking Screen
Locking Screen Unlocking Screen Display is locked after a set period of inactivity. Alternatively, Press Power Key & Screen Lock Key for manual screen lock. This saves battery power and prevents accidental While screen is locked, Press Power Key & Screen Lock Key touchscreen operation. -
Page 19: Basic Operations
Basic Operations Basic Operation..............18 Using Touchscreen............18 Silent Mode............... 19 Airplane Mode..............20 Text Entry.................20 Updating Software............21... -
Page 20: Basic Operation
Basic Operation Using Touchscreen Handset uses a touchscreen-type Display. Operate with your Selecting Options and Navigating fingers on Display. Screens Tap items, icons, onscreen keys, etc. to open assigned items. Contact Display lightly and briefly. ・ Tap to go back to previous screen. Touch &... -
Page 21: Silent Mode
Silent Mode Pinch/Spread Set ringtone, operation sounds, etc. not to sound to avoid Contact Display lightly, then close/widen fingers. disturbing others around you. Silent Mode Cautions Camera shutter, video start/stop tones, Alarm, video/ music, etc. sound even in Silent mode. Entering Silent Mode (Mute) Press Volume Key On volume adjustment bar,... -
Page 22: Airplane Mode
Airplane Mode Text Entry Disable all functions that emit signals. Handset stays powered Keyboards Enter text with onscreen QWERTY keyboard by Tapping each Using Airplane Mode character individually, or by using Glide typing feature and sliding finger from character to character (on by default). Touch &... -
Page 23: Updating Software
Updating Software Switching Character Types (Entry Modes) Check whether updates are required via the network, and update as required. In QWERTY keyboard, Tap Before Updating Software Saved data may be lost depending on condition of handset (malfunctioning, damaged, water exposure, etc.). It is recommended that you back up important data before updating software. - Page 24 Check for update Follow onscreen instructions Software update starts.
-
Page 25: Handset Interface
Handset Interface ColorOS................24 Handset Screens............... 24 Status Bar................. 25 Using Notifications Window..........26 Using Control Center............27... -
Page 26: Coloros
ColorOS Handset Screens ColorOS Home Screen Layout Handset uses ColorOS. ColorOS is an Android operating system, based on Android and uniquely customized by OPPO. Designed so that anyone can operate it, it has a simple and easy-to-view user interface, a selectable icon design, animated display, and other features. -
Page 27: Status Bar
Status Bar Navigation Buttons Status Bar appears at the top of Display. Notification Tap icons in Navigation Buttons (Display bottom) for the Indicators for new mail, etc. and Status Indicators for handset following functions/operations. appear here. ・ Available when navigation mode set to Virtual Buttons . -
Page 28: Using Notifications Window
Using Notifications Window Main Status Indicators Flick/Swipe Status Bar down for Notifications Window. Open Status Indicators appearing in Status Bar include the Notification Indicators to check details. following. Opening Notifications Window Indicator Description Bluetooth ® Silent Mode (Mute) Flick/Swipe Status Bar down Do Not Disturb 5G Data in Use 4G LTE/4G Data in Use (With Carrier... -
Page 29: Using Control Center
Using Control Center Control Center Layout Flick/Swipe Notifications Window down for Control Center. Tap icons to toggle functions on/off, etc. Open Control Center Flick/Swipe Status Bar down Mobile Data on/off Wi-Fi on/off Mode (Standard Mode / Focus Mode / Driving Mode) on/ Flashlight on/off Auto Rotate on/off Activate Screen Recording... -
Page 31: Phone
Phone Placing/Answering Calls........... 30 Optional Services..............32 Phone Number..............37 Using Contacts..............37... -
Page 32: Placing/Answering Calls
Placing/Answering Calls Placing Calls Phone Function In Home Screen, (Phone) Emergency Location Report Making emergency calls (110, 119 or 118) automatically reports handset location to corresponding agency (police, etc.). This system is referred to as Emergency Location Report, and notifies location based on positioning from base stations. - Page 33 Answering Calls To end the call, Flick/Swipe up when call is arriving Call ends. Call begins. Calling the Emergency Number When the Phone's Screen is Locked To end the call, Flick/Swipe Lock Screen up Emergency call Enter number for emergency service ・Available only when screen lock is set.
-
Page 34: Optional Services
Optional Services In-Call Screen Layout/In-Call Operations Use the following optional services. Optional Services Use the following optional services. Service Description Call Divert calls to a preset number when out Forwarding of service area or unable to answer. Divert calls to a Voicemail Center to take Show image registered for contact Voicemail messages when out of service area or... - Page 35 Using Call Forwarding Ring Time Select ring time In Home Screen, (Phone) Telephone Number of Forwarding Destination Enter Phone opens. phone number to forward to REGISTER Settings Call Service Settings CONFIRM Call service settings open. Voice Mail / Call Forwarding Call Forwarding is activated.
- Page 36 Using Voicemail Ring Time Select ring time In Home Screen, (Phone) CONFIRM Phone opens. Settings Call Service Settings Voicemail is activated. ・ appears in Status Bar for new message. Dial "1416" then follow voice guidance. Call service settings open. Voice Mail / Call Forwarding Voice Mail / Call Forwarding Voice Mail ON...
- Page 37 Using Call Waiting Using Group Calling This service requires subscription. This service requires subscription. In Home Screen, (Phone) During a call, Add Call Phone opens. Enter number Settings Call Service Settings When the other party answers, Merge Call service settings open. for Call Waiting ( Group Calling starts.
- Page 38 Using Caller ID Notification Using Call Barring Restrict outgoing calls to specific numbers. ・When attempting to place call while dialing is restricted, a In Home Screen, (Phone) message appears. Message may take time to appear in some areas. In Home Screen, (Phone) Phone opens.
-
Page 39: Phone Number
Phone Number Using Contacts Save phone numbers, mail addresses, etc. to Contacts. Checking Your Phone Number Contacts Cautions Information saved in Contacts may be lost or changed In Home Screen, (Settings) About Phone if Internal Battery is left uncharged for a long period. Accident or malfunction may also cause loss or change to information. - Page 40 Enter items ・ Tap Add More Info to add a still image, mail address, etc. Save Contact is added. Saving Contacts from Dialing Screen Save a number entered in dialing screen directly to Contacts. In Home Screen, (Phone) Tap dialpad to enter number to save New Contact Enter each item...
-
Page 41: Messaging
Messaging Sending Messages (+Message)......... 40 Using Gmail............... 41... -
Page 42: Sending Messages (+Message)
Sending Messages (+Message) Tap destination Sending New Messages In Home Screen, (+Message) Message window opens. ・To send to a phone number/email address not saved in contacts, Tap destination entry field at top of Display Enter phone number/email address create message. Tap message entry field Enter message Message is sent. -
Page 43: Using Gmail
Using Gmail Enter recipient/subject/mail text Use Google's webmail service. Use this service to exchange email. Creating/Sending Mail In Home Screen, (Google) (Gmail) Message is sent. Operations when Composing Mail Adding Cc/Bcc In mail composition window, for recipient Enter recipient Mail list opens. Attaching Files In mail composition window, Attach file... -
Page 45: Internet
Internet Using Chrome..............44... -
Page 46: Using Chrome
Using Chrome Enter words to search or URL Use Chrome simply by entering words to search and URLs. TLS (Transport Layer Security) is a protocol for encrypting sent/received data. While in a screen connected by TLS, data is encrypted to safely send/receive private information, credit card numbers, corporate secrets, etc., and provide protection against online threats (eavesdropping, falsification, impersonation, etc.). - Page 47 Bookmark Operations Adding Bookmarks Editing Bookmarks In Chrome, Bookmarks Touch & Hold target In Home Screen, (Chrome) bookmark Edit items Deleting Bookmarks In Chrome, Bookmarks Touch & Hold target bookmark Chrome opens. Show Website to add Current Website is added to Bookmarks.
-
Page 49: Camera
Camera Capturing Still Images/Videos......... 48 Viewing Still Images/Videos (Photos)......49... -
Page 50: Capturing Still Images/Videos
Capturing Still Images/Videos PHOTO Capturing Still Images/Videos File Format for Still Images File format for still images is JPEG. File Format for Videos File format for videos is MPEG-4. Camera Cautions Photo Viewfinder appears. ・Alternatively, Drag shooting mode left/right. If Lens Becomes Dirty Fingerprints/smudges on lens prevent capturing of clear still images/videos. -
Page 51: Viewing Still Images/Videos (Photos)
Viewing Still Images/Videos Capturing Videos (Photos) In Home Screen, (Camera) Showing Still Images/Videos Show captured or downloaded still images/videos. Supported file formats are as follow. Type File Format Still image BMP, GIF, JPEG, PNG, WebP, HEIF H.264, MPEG-2, VP8, VP9, HEVC, HEIF/ Video HEIC, MPEG-4, H.263 ・If confirmation appears, follow onscreen instructions. - Page 52 Tap still image/video Still image/video window opens. ・ For videos, Tap to play. ・If confirmation appears, follow onscreen instructions. ・To select other files, return to still image/video window and select file, or Flick/Swipe still image/video window left or right and select. Operations when Viewing Still Images/ Videos Zooming In or Out Still Image...
-
Page 53: Application Basics
Application Basics Applications...............52 Adding Applications............53... -
Page 54: Applications
Applications Other Ways to Set Required Permissions for Applications Setting Required Permissions for Setting Functions to Use for Each Application Applications In Home Screen, (Settings) App management App list Tap application Permissions Set the operation of applications when activating for the Tap each function Allow Deny... -
Page 55: Adding Applications
Adding Applications Install Download a variety of applications (free/paid) from Google Play. Change the setting of downloaded applications to enable manual or automatic updates. Log in to your Google account beforehand. Installing Applications Many different kinds of applications can be installed on handset from Google Play (provided by Google LLC). - Page 56 Purchasing Paid Applications Enter password for Google account Verify In Home Screen, (Play Store) ・If confirmation appears, follow onscreen instructions. Google Play appears. ・If confirmation appears, follow onscreen instructions. Tap paid application Application is downloaded and installed. Purchased Applications Payment Tap amount Pay only once.
- Page 57 Updating Applications Setting Automatic Updates for Individual Applications In Google Play, My apps & games In Home Screen, (Play Store) application Enable auto update ・If confirmation appears, follow onscreen instructions. ・Automatic updates are unavailable for some applications. Google Play appears. ・If confirmation appears, follow onscreen instructions.
-
Page 59: Wi-Fi/Bluetooth
Wi-Fi/Bluetooth Connecting by Wi-Fi............58 Using Bluetooth Function..........59 ®... -
Page 60: Connecting By Wi-Fi
Connecting by Wi-Fi Tap Wi-Fi network Handset supports Wi-Fi (wireless LAN). Access the Internet via a household Wi-Fi connection environment. Automatic Updates for Optimizing Wi- Fi Connection While using Wi-Fi, updates for optimizing connection may be received or applied automatically. Selecting a Network Connection Enter password Join... -
Page 61: Using Bluetooth ® Function
Using Bluetooth Function ® Bluetooth Connect to a Bluetooth -capable wireless phone, etc. for calls ® or to a hands-free device such as a headset. Hints Cannot use Bluetooth ® Is handset in Airplane mode? Bluetooth turns off in ® Airplane mode. - Page 63 Handset Settings Handset Settings.............. 62 Data Usage Settings............63 Display & brightness Settings........64 Sound & Vibration Settings..........64 Fingerprint, Face, and Password Settings......65 Security Settings..............68 Battery Settings...............70 Additional settings............70 Other Settings..............71...
-
Page 64: Handset Settings
Handset Settings Software View and update the software version. Update "Updating Software" for details. Main setting options are described. About Phone View device name, phone number, etc. Make application settings. management Handset Settings App cloner Set application cloning. Customize operation of handset functions. Handset settings Game Space Make Game Space settings. -
Page 65: Data Usage Settings
Data Usage Settings Data Usage Check mobile data traffic and set limit. Data Usage Operations Setting Data Saving In Home Screen, (Settings) SIM Card & Mobile Data Data Usage Data Saving Data Saving ・ Tap Data Saving to toggle on ( )/off ( ・If confirmation appears, follow onscreen instructions. -
Page 66: Display & Brightness Settings
Display & brightness Settings Sound & Vibration Settings Set screen brightness, font size, etc. Set ringtone, touch sounds, etc. Display & brightness Settings Sound & Vibration Settings can be made for the following items. Settings can be made for the following items. Item Description Item... -
Page 67: Fingerprint, Face, And Password Settings
Fingerprint, Face, and Password Settings Confirm the cautions, then Tap Continue Setting Password to Unlock Screen With In Home Screen, (Settings) Enter new password Fingerprint, Face & Password ・If confirmation appears, follow onscreen instructions. Enter new password again Set Lock screen password Password is set. - Page 68 Unlock Screen by Tracing Pattern Other Encryption Methods In Home Screen, (Settings) Pattern Code Fingerprint, Face & Password Enter new pattern Set Lock screen password Enter new pattern again Confirm the cautions, then Tap Continue Pattern is set. ・If confirmation appears, follow onscreen instructions.
- Page 69 Using Face Authentication Follow onscreen instructions to set Lock Screen password In Home Screen, (Settings) ・See "Setting Password to Unlock Screen With" for details on Lock Screen password. ・If Lock Screen password is already set, unlock screen. Fingerprint, Face & Password Continue Add face Position your face frontward in the onscreen circle...
-
Page 70: Security Settings
Security Settings Security Codes Set a screen lock, passwords, etc. Operation Password and Center Access Code are required for using handset. Operation Password is a code required for using some Security Settings functions. Unset at time of purchase. Center Access Code is a four-digit code set in subscription Settings can be made for the following items. - Page 71 Enabling SIM PIN Changing SIM PIN When PIN is enabled, a window for entering PIN appears to First enable SIM PIN to change PIN. allow handset use each time handset is powered on with SIM Card installed. In Home Screen, (Settings) Security In Home Screen,...
-
Page 72: Battery Settings
Battery Settings Additional settings Check battery usage and make settings to save battery power. Check and make system settings for date and time, default reset, etc. Battery Settings Additional settings Items that can be checked/set are the following. Settings can be made for the following items. Item Description Item... -
Page 73: Other Settings
Other Settings Setting Voice Input In Home Screen, (Settings) Additional settings SIM Card & Mobile Data Keyboard & input method Google voice typing Set items Check information and make settings for SIM Card, network, data usage, etc. Settings can be made for the following items. Enabling Text-to-Speech Output Item Description... - Page 74 Notifications & status bar Home Screen & Lock Screen Magazine Make notification and Status Bar settings. Settings can be Make settings for Home Screen, wallpaper, etc. Settings can made for the following items. be made for the following items. Item Description Item Description...
- Page 75 Smart Services Privacy Make settings for notifications and incoming calls while Make privacy settings. Settings can be made for the following driving. Settings can be made for the following items. items. Item Description Item Description Make settings for muting notifications Set permissions required by applications.
- Page 76 Location Language & Region Make settings for location. Settings can be made for the Set language. Settings can be made for the following items. following items. Some functions require that you log in to your Google account. Item Description Language Set the language shown on Display.
- Page 77 App management App cloner Make application settings. Settings can be made for the Clone applications to add to Home Screen. Cloned applications following items. run independently of originals. Item Description Check and make settings for installed In Home Screen, (Settings) App list applications.
- Page 78 Game Space Users & accounts Make Game Space settings. Settings can be made for the Automatically update data and create and add accounts. following items. Settings can be made for the following items. Item Description Item Description Manage My Auto sync Enable automatic updating of data for Add applications to (Game Space).
- Page 79 Global Services Global Roaming..............78 Making Calls while Abroad..........79...
- Page 80 Global Roaming Tap network to connect to Handset is Global Roaming Service eligible. Use the same handset number outside Japan. Handset connects to an appropriate cellular provider automatically by default. A specific carrier can also be selected manually. Change communications method and Data Roaming settings as needed.
- Page 81 Making Calls while Abroad See SoftBank Website to learn about roaming areas/services, etc. https://www.softbank.jp/en/mobile/service/global/ International Calls to Japan and Other Countries from Abroad In Home Screen, (Phone) Handset dials number. Call begins when other party answers. Phone opens. ・If confirmation appears, follow onscreen instructions. Touch &...
- Page 82 Calls to Landline Phones/Cell Phones in Country of Stay Place calls the same way you would within Japan. ・Do not enter country code or omit first 0 from phone numbers. In Home Screen, (Phone) Phone opens. Tap dialpad to enter the other party's number Handset dials number.
- Page 83 Warranty/Specifications/ Customer Service Warranty & After-Sales Service........82 Specifications..............82 Customer Service.............. 83...
- Page 84 Warranty & After-Sales Service Specifications Warranty Handset ・The warranty period is 1 year from the date of newly Item Description purchase. Dimensions (W ・Repairs will be done based on terms of free repair service. Approx. 72 × 159 × 7.7 mm x H x D) Terms of free repair service is referred to SoftBank website.
- Page 85 Customer Service Protective Case (Complimentary Sample) If you encounter any difficulties or are unsure of anything, Item Description contact customer service. Dimensions 75.76 × 163.09 × 10.83 mm SoftBank Customer Support ・From a SoftBank handset, dial toll free at 157 ・From a landline/IP phone, dial toll free at 0800-919-0157 ・Business hours : Call 10:00 am - 7:00 pm / Chat 9:00 am - 8:00 pm...
- Page 87 Safety Precautions Safety Precautions............86 Material List..............94 Important Product Information........96 Bluetooth /Wi-Fi (WLAN)..........98 ® Intellectual Property Rights..........99 Export Controls and Regulations........100 Declaration..............101 Radio Wave Exposure and Specific Absorption Rate (SAR) Information..............101...
-
Page 88: Safety Precautions
Safety Precautions Handset, AC Charger (Complimentary Sample), USB Type-C™ Cable (Complimentary Sample), SIM Card Read safety precautions before using handset. Slot Pin (Complimentary Sample), Observe precautions to avoid injury to self or others, or Headphones (Complimentary Sample), damage to property. Protective Case (Complimentary Sample) (Common) Safety Precautions... - Page 89 Do not subject handset to excessive force or break it. Especially when carrying it in your Do not drop, stomp, throw, or otherwise pocket, do not hit it or press it between other subject to strong force, impact, or vibration. objects.
- Page 90 Take the following actions, exercising caution, in case of abnormal smell, noise, smoke, heat Do not use damaged handsets or related generation, discoloring or deformation while accessories. using, charging, or storing. May cause fire, burns, injury, etc. -Disconnect the power plug from an outlet -Power off handset Continued use may cause fire, burns, injury, electric shock, etc.
- Page 91 Handset temperature may become high when used continuously or while charging. Avoid Do not light up or flash the light with the continued contact with handset for a long time light-emitting part close to other people's involuntarily such as by placing handset in eyes.
- Page 92 For use in hospitals, follow the medical If Display or Camera lens is broken, do not facility's instructions. touch the broken parts or exposed inside of handset. Power off handset in a place where its use is prohibited. Cancel any functions that turn on handset automatically. Touching the broken or exposed part may cause burns, Handset radio waves may affect electronic devices or other injury, electric shock, etc.
- Page 93 Before using handset in a car, check with the car manufacturer or dealer for information When using the motion sensor, ensure the about the effects of radio waves. safety of the surroundings and hold handset firmly, not swinging around more than Handset radio waves may affect the vehicle's electronic necessary.
- Page 94 AC Charger (Complimentary Sample) / USB Type-C™ Cable (Complimentary Sample) Do not apply unnecessary force where connected when handset and USB Type-C™ Cable (complimentary sample) are connected. May cause fire, burns, injury, electric shock, etc. Do not use USB Type-C™ Cable (complimentary sample) if the cord is damaged.
- Page 95 SIM Card Insert or remove the connector of USB Type- C™ Cable (complimentary sample) straight against the port without applying force such as pulling the cord. When handling SIM Cards, be careful of the cut Incorrect insertion or removal may cause fire, burns, injury, surface so as not to hurt your body parts such electric shock, etc.
-
Page 96: Material List
Material List OPPO Reno3 5G Main Unit Adjust the sound volume adequately when playing games or playing back videos or music. Part Material/Surface Treatment Listening to loud sound continuously for a long time may Display Strengthened glass/AF coating cause hearing impairment or other difficulty. - Page 97 AC Charger (Complimentary Sample) Headphones (Complimentary Sample) Part Material/Surface Treatment Part Material/Surface Treatment Charger USB Type-C Copper/nickel plating (exterior PC/- Plug case) USB Type-C Power Plug Plug (exterior PC + ABS/- Copper/nickel plating (metal) case) Power Plug Cable TPE/- PC/- (insulation) Headphones USB Terminal...
-
Page 98: Important Product Information
Important Product Information Internal Battery ・Battery is built in and is not removable. Handset, AC Charger (Complimentary ・Internal Battery is capable of charging and discharging at Sample), USB Type-C™ Cable least several hundred times, but will ultimately wear out. (Complimentary Sample), SIM Card Internal Battery needs to be replaced if operating time Slot Pin (Complimentary Sample), shortens noticeably. - Page 99 To Ensure Safe Driving Display (Touchscreen) ・Using handset while driving risks safety. Follow laws and ・Touchscreen-type display, operate with your fingers on regulations of countries and regions where using handset. Display. Before using handset, stop vehicle in a safe place. ・Display is designed to be contacted lightly by your fingers.
-
Page 100: Bluetooth ® /Wi-Fi (Wlan)
Bluetooth /Wi-Fi (WLAN) ® Protective Case (Complimentary Sample) Connection/operation may not be possible with some ・Wipe clean Protective Case (complimentary sample) with Bluetooth /Wi-Fi (wireless LAN) devices. ® a cloth dampened with cleaning alcohol if soiled. It is Handset Bluetooth /Wi-Fi (wireless LAN) communication is ®... -
Page 101: Intellectual Property Rights
Intellectual Property Rights Cautions for General Use The frequency band used by handset Bluetooth /Wi-Fi ® Copyrights and Portrait Rights (wireless LAN) functions is also used for operation by household appliances (microwave ovens) and industrial/ scientific/medical equipment as well as by in-place radio Copyrighted contents you recorded or obtained from Websites stations (requiring a license) and specific low-power radio pages using this product by downloading or other means, such... -
Page 102: Export Controls And Regulations
® ® trademarks of Wi-Fi Alliance. ・OPPO is a registered trademark of Guangdong OPPO Mobile Telecommunications Corporation Ltd. © 2010 OPPO All rights reserved. ・USB Type-C™ is a trademark of USB Implementers Forum. ・FeliCa is a contactless IC card technology developed by Sony Corporation. -
Page 103: Declaration
Radio Wave Exposure and Specific Absorption Rate (SAR) Information Declaration "A001OP" here refers to this mobile phone "OPPO Reno3 5G". ・OPPO has a policy of ongoing development. Thus, OPPO Specific Absorption Rate (SAR) for This reserves the right to make changes or improvements to any... - Page 104 FCC RF exposure requirements, and Simplified Declaration of Conformity for 【A001OP】 should be avoided. The FCC has granted an Equipment Hereby, Guangdong OPPO Mobile Telecommunications Corp., Authorization for this model handset with all reported SAR Ltd. declares that the radio equipment type 【A001OP】 is levels evaluated as in compliance with the FCC RF emission in compliance with Directive 2014/53/EU.
- Page 105 A About the User Guide............3 Adding Applications............53 Additional settings............70 Airplane Mode..............20 Applications...............52 B OPPO Reno3 5G Basic Operation..............18 User Guide Index Battery Settings...............70 Bluetooth /Wi-Fi (WLAN)..........98 ® C Capturing Still Images/Videos......... 48 Charging Battery..............9 ColorOS................24 Connecting by Wi-Fi............58 Customer Service..............
- Page 106 M V Making Calls while Abroad..........79 Viewing Still Images/Videos (Photos)......49 Making Initial Settings............ 11 Material List..............94 W Warranty & After-Sales Service........82 O WLAN..................98 Optional Services..............32 Other Settings..............71 P Parts & Functions.............. 6 Phone Number..............37 Phone Storage..............
- Page 108 OPPO Reno3 5G User Guide August 2020, First Edition SoftBank Corp. Visit SoftBank Shop for assistance Model : OPPO Reno3 5G Importer : OPPO Japan K.K. Manufacturer : Guangdong OPPO Mobile Telecommunications Corp., Ltd.
Need help?
Do you have a question about the Reno3 5G and is the answer not in the manual?
Questions and answers