
Related Manuals for PEHA Easyclick 450 FU-HS128

Summary of Contents for PEHA Easyclick 450 FU-HS128
- Page 1 Elektro GmbH & Co. KG Easyclick 450 FU-HS128 GB450 FU-HS128 (126497-01)
-
Page 2: Table Of Contents
ContEntS AppliCAtion ..........4 Timers .............. 17 Set Timers (Timers) ..........18 SAFEty & tECHniCAl SpECiFiCAtionS ..5 Set special functions (Timers) ......19 Switching times for switching functions (Timers) ..20 RAnGE ............. 6 Switching times for special functions (Timers) ..21 Days of the week (Timers) ........ - Page 3 ContEntS SwitCHinG liSt ........39 GEnERAl inFoRmAtion ......52 New item ............40 Disposal of the device ......... 52 Templates (Switching list) ........41 Warranty conditions ..........52 Name..............42 Conformity declaration ........52 Icon ..............43 Channel number ..........44 Delete ............... 45 SwitCHinG FUnCtion ......46 Icons for switching functions ........
-
Page 4: Application
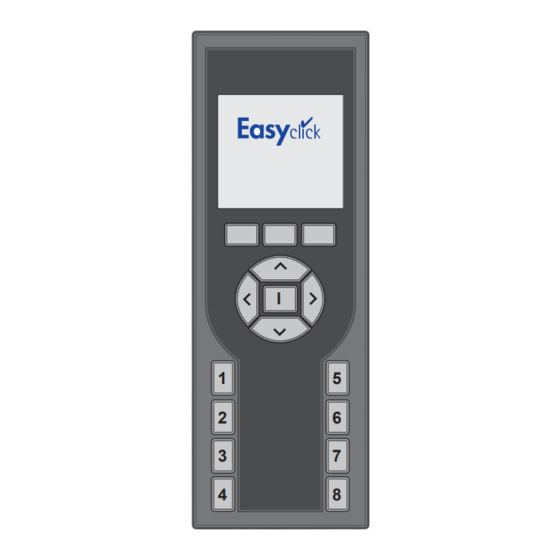
AppliCAtion The hand-held transmitter is part of the Easyclick radio system developed by PEHA. The system is based on radio transmit- ters and receivers which operate at 868.3 MHz frequency, allowing consumers to be wirelessly controlled by radio telegram. Pressing a button on the hand-held transmitter (radio transmitter) can, for example, activate lighting systems or drive mo- tors (shutters, blinds). -
Page 5: Safety & Technical Specifications
SAFEty & tECHniCAl SpECiFiCAtionS This device is only intended to be used for its stated application. Unauthorised conversions, modifications or changes are not permissible! This device may not be used in conjunction with other devices whose operation could present a hazard to people, animals or property. -
Page 6: Range
For receivers installed in walls or corners of rooms, receivers with internal aerial or narrow corridors. Through 1-2 Depending on ceiling/wall armouring and type of aerial in the receiver. ceilings/walls note: Go to www.peha.de for further information on “Range”. GB - 6... -
Page 7: Commissioning
CommiSSioninG Batteries The supplied AAA / NiMH batteries must be inserted in the battery compartment of the hand-held transmitter. Make sure the battery poles are correct. The batteries are supplied charged. They may need charging if they have been in storage for a longer period. -
Page 8: Description
USB cable connection: For charging the batteries or programming the hand-held transmitter using the "Configuration tool" PC software. The software is available on the internet, together with instructions for use, at the following address: www.peha.de GB - 8... -
Page 9: Start Screen
StARt SCREEn Call up the list with switching commands Page 10 12:29 Settings (Heating OFF) Page 12 23.5°C Press button briefly: Set the heating Page 38 Press button for a long time: Settings Page 12 Mo 25.10.2010 Switch to energy-saving mode Turn on device Call up the list with switching commands ... -
Page 10: List With Switching Commands
SwitCHinG liSt Edit switching list Page 39 Back (Start Screen) Page 9 List 01 - 32 Channel 001 Channel 002 Settings Page 12 Channel 003 Channel 031 Select list (32 lists) Channel 032 Assign switching function/channel (32 per list) Activate switching function/channel ... -
Page 11: Move Switching Function/Channel
SwitCHinG liSt move switching function/channel press simultaneously (approx. 5s) move switching function List 01 - 32 Move switching function/channel up: ..........List 01 - 32 Channel 002 Channel 001 Confirm and back (to switching list): ..........Channel 001 Channel 002 Channel 003 ... -
Page 12: Settings
SEttinGS Settings Settings Back (to switching list): ............List 01 - 32 New list 1.00 Firmware version: ............... Edit list name Channel 001 Channel 002 Delete list Activate menu item: ............Timer Channel 003 Time Select menu item: ............... Channel 031 Shortcuts Channel 032... -
Page 13: New List
SEttinGS new list new list List Show templates Page 15: ........Settings List 04_ Toggle to digits + special characters: ...... New list B C D E F G H I Edit list name Toggle between upper and lower case: ....... J K L M N O P Q R Delete list S T U V W X Y Z Ä... -
Page 14: Edit List Name
SEttinGS Edit list name Edit list name List Show templates Page 15: ........Settings Living Room Toggle to digits + special characters: ......New List B C D E F G H I Edit list name Toggle between upper and lower case: ....... J K L M N O P Q R Delete list S T U V W X Y Z Ä... -
Page 15: Templates (List)
SEttinGS templates (list) Cancel: Settings Page 12 templates List Templates Cancel without change: ............Cancel Bedroom 1/14 Template / Number: ............. Templates Living Room Children Room Confirm and back: ............... Kitchen Corridor Select template: ..............Workroom ... -
Page 16: Delete List
SEttinGS Delete list Delete list Delete list Cancel without change: ..............Settings Press for approx. 2s to delete and go back (Settings): ...... List New list Edit list name List 01 Delete list delete? Timer Time Shortcuts ... -
Page 17: Timers
SEttinGS timer programme the timer Timer Confirm and back (Settings): ..........Settings ID 01 Activate menu item: ............New list ID 01 Edit list name Select timer (ID 01 - ID 32): ..........Delete list 07:30 - 21:00 Timer ... -
Page 18: Set Timers (Timers)
SEttinGS Set switching functions (timer) Set switching functions Deactivate timer: ID 01 ID 01 Timer Function = off Function Function ID 01 ID 01 Lighting Shutter Channel Channel 07:30 - 21:00 MoTuWeThFrSaSu lighting on/oFF Shutters or Blinds Up/Down Assign channel (1-512) Assign channel (1-512) -
Page 19: Set Special Functions (Timers)
SEttinGS Set special functions (timer) Set special functions Deactivate timer: ID 01 ID 01 Timer Function = off Function Function ID 01 ID 01 Heating User-Fct. Func. 21.0°C 07:30 - 21:00 Name (User-Fct.) 17.0°C MoTuWeThFrSaSu ... -
Page 20: Switching Times For Switching Functions (Timers)
SEttinGS Switching times for switching functions (timer) Set switching times ID 01 ID 01 Timer ID 01 07:30 07:30 ID 01 Down 21:00 21:00 07:30 - 21:00 MoTuWeThFrSaSu ... -
Page 21: Switching Times For Special Functions (Timers)
SEttinGS Switching times for special functions (timer) Set switching times ID 01 ID 01 Timer Stop ID 01 07:30 07:30 ID 01 Start 21:00 21:00 07:30 - 21:00 MoTuWeThFrSaSu ... -
Page 22: Days Of The Week (Timers)
SEttinGS Days of the week (timer) Select days of the week Selection: ............ID 01 Timer ID 01 Settings: ............ ID 01 Confirm and back (Timer): ........ 07:30 - 21:00 MoTuWeThFrSaSu ... -
Page 23: Time And Date
SEttinGS time and date Set time and date Time Back (Settings): ................Settings Confirm and back (Settings): ............12 : 29 New list Setting Time / Date: ..............Edit list name Delete list Selection: ................... Mo 2010.11.22 Timer Time ... -
Page 24: Shortcuts
SEttinGS Shortcuts Select shortcut button Shortcuts Back (Settings): ..............Settings Configure shortcut button Page 25: ........New list Edit list name Select button: ..............Delete list Timer Time Shortcuts 1.00 Programmed switching functions from the lists can be as- signed to the 8 shortcut buttons Equally, a channel can be directly assigned, or the button... -
Page 25: Configuration (Shortcuts)
SEttinGS Configuration (Shortcuts) Configure shortcut button 1 - 8 Shortcut 1-8 Shortcut 1-8 Shortcut 1-8 Shortcuts Activate Activate Activate Channel User-Fct. List Shortcut O/ List 1 Func. Index Name (User-Fct.) Switching func. ... -
Page 26: Display
SEttinGS Display Set the display Display Cancel without change: ............Settings Light Confirm and back (Settings): .......... Display Time 15,0s Cont. Set light / time / contrast: ............ Language Temperature Selection: ................Heating control EnOcean Service ... -
Page 27: Pin Code And Login
SEttinGS pin code and login Set pin code Assigning a PIN code prevents editing of the settings and switching lists. The PIN code is standard set to "0000". Entering this code also deactivates a programmed editing lock and/or PIN code. Settings Display ... -
Page 28: Language
SEttinGS language Set language Language Cancel without change: ............Settings Deutsch Confirm and back (Settings): ..........Display English Selection: ................Language Temperature Heating control EnOcean Service 1.00 German or English are the standard choices. A further language can be transferred using the "Configuration tool" PC software. GB - 28... -
Page 29: Temperature Measurement
SEttinGS temperature measurement Depending on the location of use, the measurement and/or display of the temperature may differ from the room tempera- ture. The temperature offset can be adjusted to ensure the correct temperature is displayed. Set temperature offset and mode Temperature ... -
Page 30: Heating Control
SEttinGS Heating control Activate heating control Heating control Back (Settings): ..........Settings Activate Display Confirm and back (Settings): ......Intervall 300s Language A5-10-01 Settings: ............Temperatur Heating control Selection: ............ EnOcean Service ... -
Page 31: Enocean Eeps (Heating Control)
SEttinGS Enocean EEps (Heating control) temperature target value Absence/ Day / night Contact sensor setting speed presence control 07-10-01 — — 07-10-02 — — 07-10-03 — — — — 07-10-04 —... -
Page 32: Enocean Service Monitor
SEttinGS Enocean Service monitor The EnOcean Service Monitor allows you to analyse the signal from a radio transmitter. It measures and displays the field strength, quality and type of signal. Each radio transmitter has a fixed ID for positive identification! monitor EnOcean Monitor EnOcean Monitor... -
Page 33: Enocean Service Repeater
SEttinGS Enocean Service Repeater The hand-held transmitter can be used as a 1-level or 2-level repeater for testing purposes while the EnOcean Service Repeater is activated. Repeater EnOcean Monitor Repeater Settings Display Language 1 Level Temperature Heating control ... -
Page 34: Enocean Service Radiolinktest
SEttinGS Enocean Service Radiolinktest Test the range between two hand-held transmitters using the EnOcean Service RadioLinkTest. The first transmitter must be configured as the master, and the second as the slave. The master transmitter analyses (RLT result) the range test (signal). Radiolinktest EnOcean Monitor RadioLinkTest... - Page 35 SEttinGS Radiolinktest (Rlt Result) RLT Result RLT Result RadioLinkTest 10:15:14 28.08.2011 0100440B ID 0100440B Master: RLT runs. Lev: -43dBm Wait Sub: 3 Qual: 99 % Rlt Result (Radio signal) Rlt Result (Quality) Time + date Hand-held transmitter (ID) Hand-held (transmitter ID) Lev: RSSI Level...
-
Page 36: Factory Settings
SEttinGS Factory settings load factory settings Factory settings Back (Settings): ................. Settings Confirm and back (Settings): ............Resetting Factory settings the device (long press) 1.00 Caution: Loading the factory settings removes all settings and functions from the memory! You must then re-commission the device! GB - 36... - Page 37 GB - 37...
-
Page 38: Set The Heating
SEt tHE HEAtinG Set the heating 12:29 Confirm and back (Start Screen): ..........12:29 23.5°C Set presence/absence: ..............23.5°C Set fan speed / automatic: ............ 21.°C Raise target value: ..............Lower target value: ..............Mo 25.10.2010 icon Description Absence / Presence Day / Night control Contact... -
Page 39: Switching List
SwitCHinG liSt Edit switching list Edit Back (to switching list): ............List 01 - 32 New Item 1.00 Channel 001 Name Firmware version: ............... Channel 002 Icon Activate menu item: ............Channel 003 Channel number Delete Channel 031 Select menu item: ............... -
Page 40: New Item
SwitCHinG liSt new item Create a new switching function Load templates Page 41: ........Edit Channel 005_ Toggle to digits + special characters: ...... New Item B C D E F G H I Name Toggle between upper and lower case: ....... J K L M N O P Q R Icon S T U V W X Y Z Ä... -
Page 41: Templates (Switching List)
SwitCHinG liSt templates (Switching list) Cancel: Edit switching list Page 39 templates Name Templates Cancel without change: ............Cancel Lighting 1/23 Template / Number: ............. Templates Ceiling lighting Wall lighting Confirm and back: ............... Dimmer Shutter Select template: .............. -
Page 42: Name
SwitCHinG liSt name Edit function names Name Show templates Page 41: ........Edit Lighting_ Toggle to digits + special characters: ......New Item B C D E F G H I Name Toggle between upper and lower case: ....... J K L M N O P Q R Iconl S T U V W X Y Z Ä... -
Page 43: Icon
SwitCHinG liSt icon Select icon for switching function Icon Cancel without change: ............Edit 1/19 Function / Number: ............. New Item Name Confirm and back (Edit): ............– Icon Channel number Selection: ................ Delete ... -
Page 44: Channel Number
SwitCHinG liSt Channel number Assign channel or user function Transmit Radio signal: ..Channel number Channel number Edit (Assign channel to receiver) Func. Func. New Item User-Fct. 1 Name Channel 1 Icon Name (User-Fct.) Channel number ... -
Page 45: Delete
SwitCHinG liSt Delete Delete switching function Delete Cancel without change: ..............Edit Press for approx. 2s to delete and go back (Edit): ......Action New Item Name Switching fun. Icon delete? Channel number Delete 1.00 GB - 45... -
Page 46: Switching Function
SwitCHinG FUnCtion Activate switching function/channel (using light as an example) Lighting Back to list with switching commands: ........... List 01 - 32 Lighting Activate switching function/channel using Channel 002 Channel 003 Switch off lighting Channel 031 Channel 032 Switch on lighting ... -
Page 47: Icons For Switching Functions
An icon can be selected for each switching function (see page 43). Further icons for switching functions can be transferred to the remote control using the "Configuration tool" PC software. The software can be downloaded from www.peha.de. GB - 47... -
Page 48: Batteries
BAttERiES inserting the batteries The supplied AAA / NiMH batteries must be inserted in the battery compartment of the hand-held transmitter. 868,3 MHz Caution – Only AAA / NiMH batteries may be used. – Make sure the battery poles are correct! Insert the batteries as illustrated. –... -
Page 49: Charging The Batteries
BAttERiES Charging the batteries First connect the USB cable to the underside of the hand-held transmitter. To charge the batteries, connect the cable to a USB interface (e.g. PC) or to a socket using the enclosed adapter. Battery charge status: Display Description The remote control is connected via USB to the voltage supply and is charging. -
Page 50: Replacing The Batteries
BAttERiES Replacing the batteries Caution – Only AAA / NiMH batteries may be used. – The frequency and duration of use of your hand-held transmitter will dictate how often you need to replace the batteries. – Make sure the battery poles are correct! Insert the batteries as illustrated. –... -
Page 51: Troubleshooting
• Devices which emit high-frequency signals (e.g. audio and video systems, computers, electronic ballasts). note: Maintain a distance of at least 0.5 m. Contact Telephone: ... +49 (0)2351 185-0 Fax: ..... +49 (0)2351 27666 Internet: ....www.peha.de E-Mail: ....peha@peha.de GB - 51... -
Page 52: General Information
Conformity declaration PEHA products may be sold and operated in EU countries as well as in CH, IS and N. PEHA herewith declares that the hand- held transmitter (450 FU-HS128) is in compliance with the fundamental requirements and other relevant provisions of R&TTE Directive 1999/5/EC. - Page 54 PEHA Elektro GmbH & Co. KG • Postfach 1727 • D-58467 Lüdenscheid • Tel.: +49 (0)2351 185-0 • Fax: +49 (0)2351 27666 e-mail: peha@peha.de • Internet: www.peha.de...
Need help?
Do you have a question about the Easyclick 450 FU-HS128 and is the answer not in the manual?
Questions and answers