
Subscribe to Our Youtube Channel
Related Manuals for IS5 COMMUNICATIONS RAPTOR

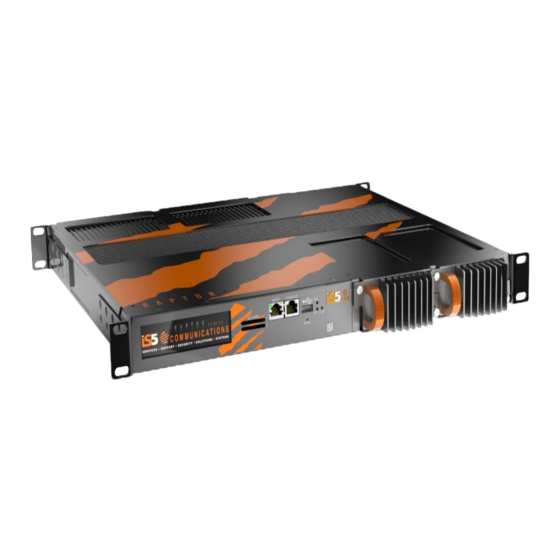
Summary of Contents for IS5 COMMUNICATIONS RAPTOR
- Page 1 Quick Start Guide RAPTOR™ Intelligent Cyber Secure Platform Version 6, Dec 4, 2019 © 2019 iS5 Communications Inc. All rights reserved. QG-Raptor-6-EN.doc © 2019 IS5 COMMUNICATIONS. CONFIDENTIAL & PROPRIETARY.
- Page 2 QUICK START GUIDE COPYRIGHT NOTICE © 2019 iS5 Communications Inc. All rights reserved. No part of this publication may be reproduced in any form without the prior written consent of iS5 Communications Inc. (iS5). TRADEMARKS iS5Com is a registered trademark of iS5. All other trademarks belong to their respective owners.
-
Page 3: Table Of Contents
2.5.3 Restoring Configuration from USB ............. 6 Software Upgrade from USB ..............6 CHAPTER 3: WEB INTERFACE _______________________________________________ 7 Ethernet Connectivity to the Raptor from a Computer ..... 7 Starting WebUI ..................8 3.2.1 Login ......................8 3.2.2 Home Page ....................9 Configuring the Switch Name and Prompt ......... - Page 4 Figure 12: Example of IP Route Configuration ....................14 Figure 13: Save configuration Screen ......................15 Figure 14: Save configuration Screen ......................16 Figure 15: Startup Configuration Restore Source Screen ................17 Figure 16: System Upgrade Screen ......................... 18 QG-Raptor-6-EN.doc © 2019 IS5 COMMUNICATIONS. CONFIDENTIAL & PROPRIETARY.
-
Page 5: Chapter 1: Introduction
Save configuration. • Restore configuration • Upgrade the Raptor • 1.1 Purpose and Scope This document covers the startup procedures and specifies the basic configuration commands. For more information or support, email support@is5com.com. QG-Raptor-6-EN.doc © 2019 IS5 COMMUNICATIONS. CONFIDENTIAL & PROPRIETARY. -
Page 6: Chapter 2: Command Line Interface
A link to download Putty is https://www.chiark.greenend.org.uk/~sgtatham/putty/latest.html Form a serial connection from your computer to the console port of the Raptor. Figure 1: COM Port Connectivity To determine the communications port being used on your laptop/computer, open the Device Manager (see Figure 2 and Figure 3) . -
Page 7: Figure 2: Device Manager, Ports ( Com & Lpt )
CHAPTER 2: COMMAND LINE INTERFACE Figure 2: Device Manager, Ports ( COM & LPT ) Figure 3: Device Manager, Example of Ports Shown QG-Raptor-6-EN.doc © 2019 IS5 COMMUNICATIONS. CONFIDENTIAL & PROPRIETARY. -
Page 8: Logging Into The Command Line Interface
To access the command line interface (CLI) shell, at the iS5Com login prompt, use the user name admin and password admin. IS5FIRMWARE login: admin Password: admin iS5comm# 2.3 Configuring the Switch 2.3.1 Configuring Admin Password iS5comm# configure terminal QG-Raptor-6-EN.doc © 2019 IS5 COMMUNICATIONS. CONFIDENTIAL & PROPRIETARY. -
Page 9: Configuring Switch Name
1 iS5comm(config-if)# ip address <IP Address> <IP Address Mask> iS5comm(config-if)# no shutdown iS5comm(config-if)# exit iS5comm(config)# exit iS5comm# 2.4.2 Default Route iS5comm# configure terminal iS5comm(config)# ip route 0.0.0.0 0.0.0.0 192.168.32.254 iS5comm(config)# exit iS5comm# QG-Raptor-6-EN.doc © 2019 IS5 COMMUNICATIONS. CONFIDENTIAL & PROPRIETARY. -
Page 10: Saving Configuration
2.6 Software Upgrade from USB 1. Rename sw-pack to “firmware-upgrade.tgz” and copy the file to the USB stick. 2. Power the Raptor and wait until system is running. 3. Insert USB stick into front panel USB connector. iS5comm# firmware upgrade usb firmware_upgrade.tgz QG-Raptor-6-EN.doc... -
Page 11: Chapter 3: Web Interface
System and Protocol level. Before configuring the Raptor from a PC, confirm accessibility of Raptor’s firmware by pinging it from the PC. 3.1 Ethernet Connectivity to the Raptor from a Computer Figure 5: Ethernet/IP Connectivity An Ethernet cable must connect the switch and a computer. -
Page 12: Starting Webui
QUICK START GUIDE 3.2 Starting WebUI Launch a web browser to enter the Raptor’s default IP address. The IP address of the Raptor’s interface is 192.168.10.1. Enter http://192.168.10.1 in the address bar of the web browser to access Raptor WebUI. The Login page appears. -
Page 13: Home Page
CHAPTER 3: WEB INTERFACE 3.2.2 Home Page After clicking Login, the Raptor Web GUI Home page appears. Figure 7: Home Page 3.3 Configuring the Switch Name and Prompt To configure the switch through Web UI, execute the following steps: In the Home page, go to System > System Information > System Settings Figure 8: System Settings Screen 1. -
Page 14: Ip Address Configuration
In this case it will be VLAN interface #1. VLAN Interface —enter “1”. • Switch • —default. Admin State • —select “Up from the dropdown list. IPv4 Enabled State —select the status of IPv4 on the interface. The default • QG-Raptor-6-EN.doc © 2019 IS5 COMMUNICATIONS. CONFIDENTIAL & PROPRIETARY. -
Page 15: Ipv4 Interface Settings
VFI ID accepted in the management interface is restricted. For example, if 100 VFIs are supported, the maximum number of VFI supported will be restricted to maximum number of VLANs + 100. An error message is QG-Raptor-6-EN.doc © 2019 IS5 COMMUNICATIONS. CONFIDENTIAL & PROPRIETARY. - Page 16 Delete—deletes the selected entry • 1. In the appropriate fields, enter IP Address and Subnet Mask address for your network. Consult your network administrator if you do not know these values. 2. Click Modify. QG-Raptor-6-EN.doc © 2019 IS5 COMMUNICATIONS. CONFIDENTIAL & PROPRIETARY.
-
Page 17: Ip Route Configuration
255. The default value is 1. Routing Protocol —displays the status of the routing protocol through which • the route was learnt if the route is not a directly connected network or a static QG-Raptor-6-EN.doc © 2019 IS5 COMMUNICATIONS. CONFIDENTIAL & PROPRIETARY. -
Page 18: Figure 12: Example Of Ip Route Configuration
Leave the interface blank. The switch should be “default” and the distance should be 0. 5. Click Add. The result should be as shown below. Click Apply. Figure 12: Example of IP Route Configuration QG-Raptor-6-EN.doc © 2019 IS5 COMMUNICATIONS. CONFIDENTIAL & PROPRIETARY. -
Page 19: Saving And Restoring Configuration
Use the default file name. This file name is used for saving the switch configuration, irrespective of the configuration Save Option which can be Flash or Remote Save. 2. Click Apply to save the changes. QG-Raptor-6-EN.doc © 2019 IS5 COMMUNICATIONS. CONFIDENTIAL & PROPRIETARY. -
Page 20: Saving Configuration To Usb
Save Option which can be Flash or Remote Save. 2. Insert the USB fob into the USB port on the front of the switch. 3. Click Apply to save the changes. QG-Raptor-6-EN.doc © 2019 IS5 COMMUNICATIONS. CONFIDENTIAL & PROPRIETARY. -
Page 21: Restoring Configuration From Usb
—enter the configuration file name available in the USB device. The default file name is iss.conf. 2. Insert the USB device into the USB port of the switch. 3. Click Apply to restore the configuration. QG-Raptor-6-EN.doc © 2019 IS5 COMMUNICATIONS. CONFIDENTIAL & PROPRIETARY. -
Page 22: System Upgrade From Usb
—Select the type of server from which the image is to be • downloaded. Select “USB”. File Name —Enter the name of the image to be downloaded from the remote • system. 2. Click Apply to upgrade the switch. QG-Raptor-6-EN.doc © 2019 IS5 COMMUNICATIONS. CONFIDENTIAL & PROPRIETARY.
Need help?
Do you have a question about the RAPTOR and is the answer not in the manual?
Questions and answers