Advertisement
HANDSFREE TALKBACK PLUG-IN BOARD
INTRODUCTION
The V-9956 Handsfree Talkback Plug-In Board,
designed to be used with the V-2006A, allows the
V-2006A to be converted to a V-2006AHF to permit
handsfree operation.
These instructions contain the specifications and
information necessary to install and operate the
V-9956 used in conjunction with the V-2006A.
DIMENSIONS/WEIGHT
•
9.8" H x 4.5" W x 1.75" D
(24.89cm H x 11.43cm W x 4.44cm D)
•
1.5 lbs (.68 kg)
CONNECTIONS
The V-9956 can be purchased as an "add on" feature
after the initial purchase of a V-2006A. By adding a
V-9956 Handsfree Talkback Plug-In Board, the
V-2006A unit can be modified to a V-2006AHF.
The V-2006AHF is programmable on a per zone
basis for one-way or talkback communication. When
using talkback speakers, the zone must be
programmed for talkback communication. A single
zone may have both one-way or talkback speakers.
One-way amplified speakers should be connected to
the low level outputs for zone 1 (W-S pair), zone 2
(R-O pair), zone 3 (R-BR pair), zone 4 (BK-BL pair),
zone 5 (BK-G pair), and zone 6 (BK-S pair). These
speakers will act as one-way speakers for its
associated zone whether or not the zone is
programmed for one-way or talkback paging. If 45
ohm speakers are connected to the handsfree output
and the zone is programmed for one-way, the
speakers will receive the page. The page volume
control located on the V-9956 board regulates the
volume of the 45 ohm Talkback Speakers under these
circumstances and also provides volume adjustment
of Talkback Speakers during group call. The All Call
volume adjustment controls the volume of talkback
speakers during all call.
When using Talkback speakers, the zone must be
programmed for Talkback communication.
V-9956
Do not connect amplified speakers to the V-9956
talkback zones as they are already amplified.
__ 1.
Unplug the V-2006A from the AC power
source; unplug the battery backup if one is
used.
__ 2.
Remove the cover of the V-2006A unit by
first removing the 6-32 screws that attach the
cover to the base.
__ 3.
Remove the jumper on the V-2006A to
allow handsfree operation. Refer to Figure 1
for location of the jumper.
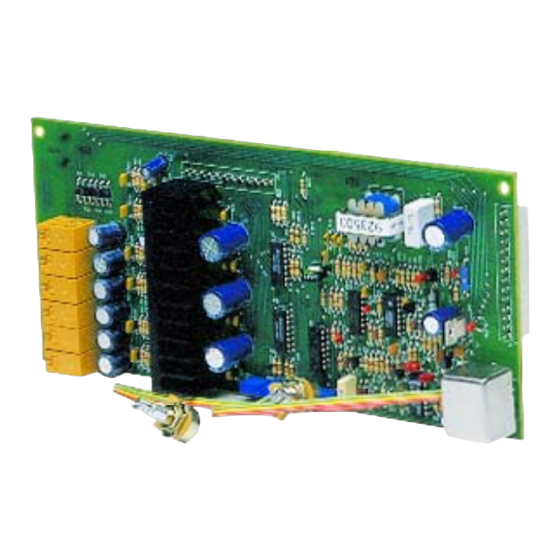
__ 4.
Plug the V-9956 board into the chassis of
the V-2006A as shown in Figure 2. Insure
the proper alignment of all pins for proper fit
and operation.
__ 5.
Secure the V-9956 board to the V-2006A
chassis using the two (2) screws and washers
provided.
__ 6.
Insert the Phone to Speaker and Speaker to
Phone volume controls into the cover of the
V-2006A as shown in Figure 2. The control
with the long shaft is Phone to Speaker; the
control with the shorter shaft is Speaker to
Phone. Secure these controls with the
washers and nuts provided.
1
VSP-V-9956
Issue 3
947208
Advertisement
Table of Contents

Related Manuals for Valcom V-9956

Summary of Contents for Valcom V-9956
- Page 1 Do not connect amplified speakers to the V-9956 CONNECTIONS talkback zones as they are already amplified. The V-9956 can be purchased as an "add on" feature after the initial purchase of a V-2006A. By adding a __ 1. Unplug the V-2006A from the AC power V-9956 Handsfree Talkback Plug-In Board, the source;...
- Page 2 This warranty is in lieu of and excludes all other warranties, expressed or implied, and in no event shall Valcom, Inc. be liable for any anticipated profits, consequential damages, loss of time or other losses incurred by the buyer in connection with the purchase, operation, or use of the product.
- Page 3 947208...
- Page 4 FIGURE 3 66 BLOCK CONNECTIONS FOR THE V-9956 System Tip W/BL System Ring BL/W Override Tip Override Ring Music Input W/GR Music Input GR/W Page Port Contact Closure W/BR Inhibit BR/W Zone 1 - Low Level Output Tip Zone 1 - Low Level Output Ring...
Need help?
Do you have a question about the V-9956 and is the answer not in the manual?
Questions and answers