Table of Contents
Advertisement
Advertisement
Table of Contents

Summary of Contents for Amrobt SI-350
- Page 1 Amrobt Sweeping Robot Product Manual...
-
Page 3: Table Of Contents
3.3 How Amrobt Clean Your Home ........ -
Page 4: Important Safety Information
Children shall not play with the appliance. Cleaning and user maintenance shall not be made by children without supervision. The robot must be used in accordance with the directions in this Instruction Manual. Amrobt inc cannot be held liable or responsible for any damages or injuries caused by improper use. -
Page 5: Battery And Charging
• Before every use, check the battery pack for any sign of damage or leakage. Do not charge damaged or leaking battery packs. • If the battery pack is leaking, contact Amrobt Customer Service for disposal. The battery pack must be removed from the robot before disposal. -
Page 6: Product Diagram
2. Product Diagram 2.1 Robot Power On / Cleaning Press to Power on or Power Off Hold on : Enter into network connecting Press to Start Cleaning... - Page 7 Bumper Release Button Dust Collector Charing Entrance Infrared Sensor Anti-Drop Sensors Charing Contacts Universal Wheel Side Brushes Battery Pack Driving Wheels Main Brush Power Switch Dust Bin...
-
Page 8: Accessories
2.2 Accessories 1 x Charging Dock 1 x Adapter 1 x Remote Control 1 x Dust Bin 4 x Side Brushes 1 x High Efficiency Filter 1 x Brush 1 x Main Brush Water Tankand Cleaning Cloth... -
Page 9: Charging Dock
2.3 Charging Dock Charging Indicator Signal Transmission Area Power Interface Butting Charging Pole Piece... -
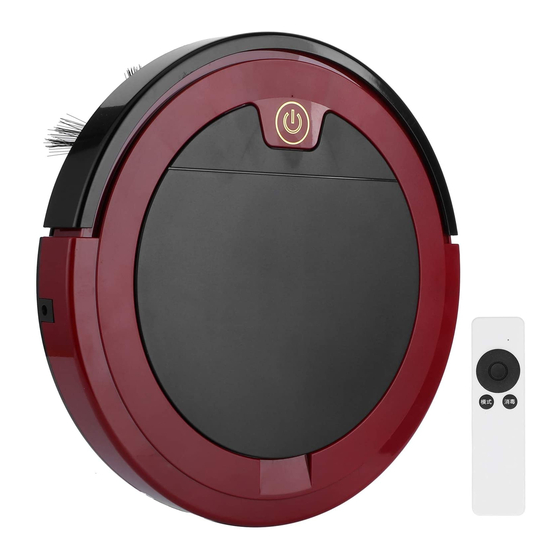
Page 10: Remote Control
2.4 Remote Control Mode and Time Display Screen Automatic Re-charging Button Automatic Cleaning Start / Pause Button Direction Buttons Non Function Time Setting Schedule Setting Edge Cleaning Button Spot Cleaning Button Zigzag Cleaning Button... -
Page 11: Operating And Programming
3 Operating and Programming 3.1 Notes Before Cleaning Before using Robot, pick up objects like clothing, loose papers, pull cords for blinds or curtains, power cords, and any fragile objects. If the Robot passes over a power cord and drags it, there is a chance an object could be pulled off a table or shelf. -
Page 12: Quick Start
3.2 Quick Start Install Side Brushes • Attach Side Brushes to the bottom of Amrobt by pressing a brush into Plug in the Charging Dock and place the remaining wire into each slot until it clicks. the trunking at the bottom of the Charging Dock... - Page 13 Start Cleaning Cycle Pause • Press the power button once to wake up the robot. • To pause the robot during a cleaning cycle press the button on robot or press the button on the Remote Control. • Press the power button again to start a cleaning cycle (or button on Remote Control).
-
Page 14: How Amrobt Clean Your Home
Floor Mopping Cleaning Amrobt support wet mopping function, the robot can floor mops cleaning Amrobt continues this process until it has cleaned an entire level of your for your home. home. If its battery gets low before finishing a cleaning cycle, Amrobt returns to the Charging Dock to recharge. - Page 15 Cleaning Preferences Edge Cleaning After robot finishes cleaning the open areas of your floor, it uses Edge Spot Cleaning Clean to ensure that it has cleaned along walls and around furniture When you select Spot Cleaning, robot intensely cleans a localized legs.
-
Page 16: Cleaning Schedule
3.4 Cleaning Schedule Amrobt has cleaning schedule settings which allow you to customize when Robot cleans your home. These settings are available through Remote control and APP. Note: Please make sure the Remote Control near by the Robot while setting the Clock or Schedule. - Page 17 Setting Cleaning Schedule 08:30 08:30 00:00 Press button to select the desired And then press the button, the robot will “Ding Press button on Remote Control and long figures. Press the button to select the Dong” when the schedule setting successfully. press button, the hour section begins to flash Note: If you don’t hear ding dong, it means...
-
Page 18: App Connecting
③ O n t h e l e f t s i d e : C l i c k s m a l l h o m e same WiFi appliance, And then click Robot Vacuum ② Click “+” to add your Amrobt cleaner 5. Turn on the power, Dingdong rings. When you long press botton, Dingdong rings again. Pls long press the key botton about 4 seconds untill the light blinks rapidly and meanwhile click "confirm"... - Page 19 8. Interface ① It shows cleaning modes: Zigzag, Random, Edge and Spot. When the state of charge shows 20%, your Amrobt will automatically recharge. ! Trouble shooting: If connecting fails, pls turn off power. Click retry and repeat a b o v e p r o c e d u r e 4 , 5 , 6 t o connect.
- Page 20 9. Schedule your Amrobot 10. If Amrobt doesn't work for a long time, it will turn to standby mode and interface will become Add and choose time for your Amrobt, you can choose repeat every Monday or etc and make dark.
-
Page 21: Regular Robot Care
After each use Front Caster Wheel Side Brush Cliff Sensors Charging Contacts Once per month Floor Tracking Sensor Note: Amrobt manufactures various replacement parts and assemblies. If you think you need a replacement part, please contact Amrobt Customer Care for more information. -
Page 22: Emptying Robot's Bin
4.1 Emptying Robot’s Bin Press dust bin release button to remove it Open dust bin door to empty it. 4.2 Cleaning Robot’s Filter Remove filter by grasping the white tab. Shake off debris by tapping the filter against your trash container... -
Page 23: Cleaning Robot's Side Brush
4.3 Cleaning Robot’s Side Brush Wipe the charging contacts on Robot and the Charging Base with a clean, dry cloth. Remove the brush Clean the brush and the brush stand, and reinstall the brush. 4.4 Cleaning Robot’s Cliff Sensors and Charging Contacts Wipe Robot’s Cliff Sensors with a clean, dry cloth. -
Page 24: Cleaning Robot's Floor Tracking Sensor
Clean the rolling brush with the provided cleaning tool or a vacuum cleaner. 4.5 Cleaning Robot’s Floor Tracking Sensor Use a clean, dry microfiber or soft cotton cloth to wipe any debris that has accumulated in the round sensor opening on the right side of the bottom surface. -
Page 25: Battery And Charging Information
4.7 Battery and Charging Information Lithium Ion Battery Important: Lithium ion batteries and products that contain lithium ion batteries are subject to stringent transportation regulations. If you need to ship this product (with the battery included) for service, travel or any other reason, you MUST comply with the following shipping instructions: Remove the lithium ion battery from the product Place a piece of tape over the battery’s metal charging contacts Reinstall the battery (with the tape on it) in the product and secure the battery door... - Page 26 Battery Removal Reinstall the battery with the battery label and tabs facing Follow these instructions to remove and reinstall robot’s bat- tery: Unscrew the door and the two screws on the battery door, then remove. Reinstall the battery door and the two screws. Take care not to pinch the side brush in the battery door when re-installing the battery.
-
Page 27: Troubleshooting
5. Troubleshooting Problems Solution • Avoid working in high light intensity environments. • Avoid working on deep dark carpets. The robot keeps moving backwards • Clean the stair detection sensors by using a soft cloth. • Check the bumper and clean. •... - Page 28 • If you still have trouble, turn off the main power switch, wait for 2 seconds, and then turn it back on. suddenly. • Make sure the main power switch on the bottom of Amrobt is turned on. Make sure the time, time of day (AM/PM), and the You cannot schedule scheduled time have been set correctly.
-
Page 29: Specifications
Problems Solutions • Remove objects within 3 ft/1 m to the left and right side and within 6 ft/2 m of the front of the Charging Base. When Amrobt is in Amrobt cannot return to the vicinity of the Charging Base (distance within 26ft/8M), it returns more quickly. However, if the Charging Base is located the Charging Base. -
Page 30: Customer Service
7. Customer Service Dear customer, thank you for purchasing our products. If the appliance should become defective within the warranty period, please contact the customer service at customerservice-Amrobt@ outlook.com to resolve the issue. - Page 32 Model: SI-350 E-mail: customerservice-Amrobt@outlook.com...
Need help?
Do you have a question about the SI-350 and is the answer not in the manual?
Questions and answers