Advertisement
Quick Links
Advertisement

Summary of Contents for MAG MT81
- Page 1 MT81 MONITOR ARM User Manual...
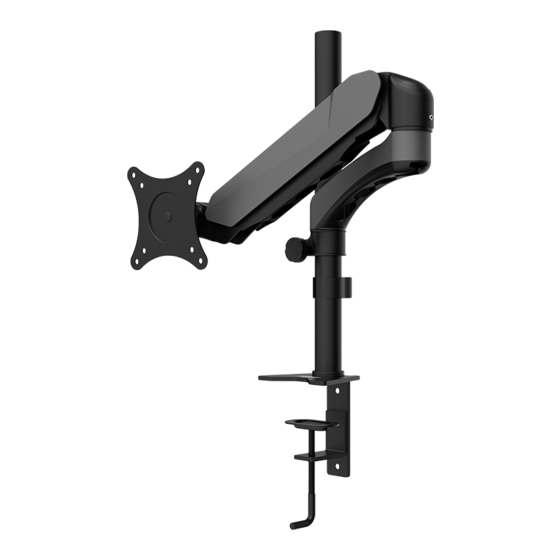
- Page 2 Overview Spring-loaded Pole Fixed arm Locking VESA mount collar Locking Cable guide knob Tension screws Cable clip Tension screws Upper clamp bracket Lower clamp bracket Hex screws Clamp locking lever Overview...
-
Page 3: Specifications
Specifications Monitor display size 15” ~ 27” Maximum load capacity 8 kg (17.6 lb.) VESA standards 75x75, 100x100 Tilt -90° / +85° Swivel 180° Roll 360° Maximum arm extension 560 mm (22 in.) 360° 180° -90° / +85° +/-45° 360° Max. -
Page 4: Safety Warnings
Safety Warnings ⚠ WARNING ∙ Before installing this product, you must read and fully understand the installation instructions. Otherwise, it may cause personal injury, property loss or factory warranty failure. The table clamp can support a maximum thickness of 7cm. Confirm the desktop ∙... - Page 5 Attaching the Pole 1. Use a Phillips screwdriver to remove 3 screws from the bottom of the pole. 2. Align the upper clamp bracket with the bottom of the pole and secure it with 3 screws . Attaching the Pole...
- Page 6 3. Align the holes in the clamp brackets according to the thickness of the edge of the desktop. Attach the lower clamp bracket and use the included hex key wrenches to screw it with 2 included M6x10 screws. 4. Loosen the clamp locking lever and fit the clamp over the edge of the desk.
- Page 7 Attaching the Fixed Arm 1. Slide the locking collar onto the pole. Adjust the locking collar to the height as needed, and then tighten the knob to lock it in place. 2. Slide the fixed arm onto the pole. Attaching the Fixed Arm...
- Page 8 Attaching the Monitor to the VESA Mount ⚠ IMPORTANT Place the monitor on a soft, protected surface to avoid scratching the display panel. 1. Align the mounting holes in the VESA mount with the corresponding mounting holes in the monitor. 2.
- Page 9 Attaching the Spring-Loaded Arm 1. Slide the spring-loaded arm onto the fixed arm. 2. Insert the included M6x25 screw through the bottom of the joint. 3. Insert the included joint cap onto the screw. 4. Use a Phillips screwdriver to tighten the screw.
-
Page 10: Adjusting The Tension
Adjusting the Tension Adjust the monitor’s position and orientation as desired. Use the included hex key wrenches to adjust the tension screw as shown to hold the monitor in position. Adjusting the Tension... - Page 11 Organizing the Cables 1. Insert monitor cables into the cable guide on the underside of the arms. 2. Clip cables on the pole. Organizing the Cables...
Need help?
Do you have a question about the MT81 and is the answer not in the manual?
Questions and answers