Table of Contents
Advertisement
Quick Links
Application Tool
Application Tool
RD 110 V
RD 110 V
Follow these instructions for safe and proper use.
Follow these instructions for safe and proper use.
Keep instructions for future use.
Keep instructions for future use.
INSTRUCTIONS FOR USE
INSTRUCTIONS FOR USE
Product Type
Product Type
Product Number
Product Number
Product Version
Product Version
Document Version
Document Version
Issue Date
Issue Date
Language
Language
Accessory
Accessory
1295
1295
1.2.x
1.2.x
2.0
2.0
2019-04-01
2019-04-01
en-us
en-us
Advertisement
Table of Contents

Summary of Contents for fos4X RD 110 V
- Page 1 INSTRUCTIONS FOR USE INSTRUCTIONS FOR USE Application Tool Application Tool RD 110 V RD 110 V Product Type Product Type Accessory Accessory Product Number Product Number 1295 1295 Product Version Product Version 1.2.x 1.2.x Document Version Document Version Issue Date...
- Page 2 Brand names and protected trademarks are the property of their respective owners. The naming of brand names and protected trademarks has only descriptive character. Named trademarks are not part of any partnership or cooperation with fos4X. 1295_1.2.x_4-10-2.0-en-us © fos4X 2019...
-
Page 3: Table Of Contents
3.2.3 Environmental Conditions....................14 3.2.4 Specification of the Vacuum Supply................14 3.2.5 Product Specific Data...................... 15 Markings on the Product......................15 3.3.1 Type Plate..........................15 3.3.2 Warning Labels........................16 Display and Control Elements....................16 1295_1.2.x_4-10-2.0-en-us © fos4X 2019 3 / 28... - Page 4 Troubleshooting......................24 Maintenance........................26 Preventive Maintenance......................26 9.1.1 Maintenance Table......................26 9.1.2 Cleaning the Application Tool..................26 Corrective Maintenance......................27 fos4X Support..........................27 Taking out of Service and Disposal................ 28 10.1 Taking out of Service........................28 10.2 Disassembly............................ 28 10.3 Disposal.............................28 1295_1.2.x_4-10-2.0-en-us ©...
-
Page 5: About This Document
Risk which, if not avoided, could result in death or serious injury. CAUTION Risk which, if not avoided, could result in minor injury. NOTICE Risk which, if not avoided, will result in damage to property. 1295_1.2.x_4-10-2.0-en-us © fos4X 2019 5 / 28... -
Page 6: Non-Safety-Related Information
Cross reference Information, page 5 Highlighting of particularly important Bold Text information Designation of a control element of the CONTROL ELEMENT product Abbreviations Alternating Current GTIN Global Trade Item Number Maximum Protective Earth 1295_1.2.x_4-10-2.0-en-us © fos4X 2019 6 / 28... -
Page 7: Safety
The product is in conformity with the relevant Union harmonisation legislation. The EU Declaration of Conformity is available on request. Contact details see fos4X Support, page 2.2 Qualification of Personnel Definitions Instructed personnel: Personnel instructed in the tasks assigned to them. -
Page 8: Intended Use
Working Environment Blade Manufacturing Facility The use of the Application Tool in a blade manufacturing facility requires special measures to avoid risks. Measures for risk prevention in blade manufacturing facilities: Obtain and observe safety and work regulations: 1295_1.2.x_4-10-2.0-en-us © fos4X 2019 8 / 28... -
Page 9: Adhesives
Allow the Application Tool to cool down for at least 15 minutes after switching off. Wear protective gloves (protection against contact heat performance level 2 according to DIN EN 407). 1295_1.2.x_4-10-2.0-en-us © fos4X 2019 9 / 28... -
Page 10: Mechanical Risks
Figure 1: Maximum angle for using the Application Tool Do not stay under the suctioned Application Tool. Secure the Application Tool against falling down before switching off the vacuum supply. Use the transport case to transport the Application Tool. 1295_1.2.x_4-10-2.0-en-us © fos4X 2019 10 / 28... -
Page 11: Vacuum
(nitrile, min. 0.4 mm). Safety Goggles For all tasks with adhesives: Wear safety goggles with side protection according to DIN EN 166. Protective Clothing For all tasks: Wear protective clothing (long-sleeved work clothing). 1295_1.2.x_4-10-2.0-en-us © fos4X 2019 11 / 28... -
Page 12: Product Description
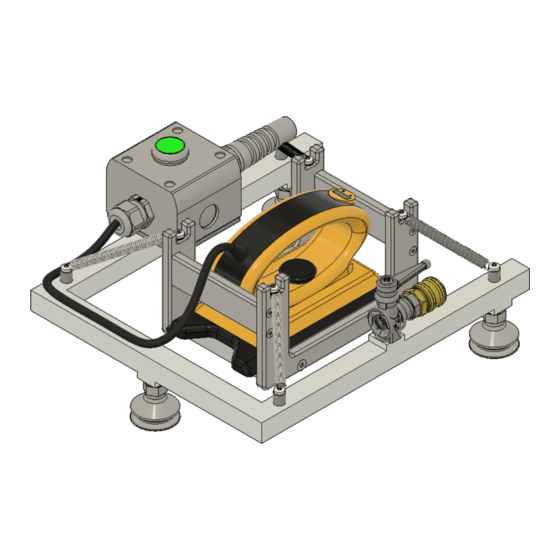
Figure 3: Bottom 9 Suction cups 10 Heating plate The Application Tool consists of the following components: Temperature knob: Adjusts the temperature of the heating plate. On/Off switch: Turns the Application Tool on and off. 1295_1.2.x_4-10-2.0-en-us © fos4X 2019 12 / 28... -
Page 13: Technical Data
The adhesive is then cured. Temperature and duration depend on the sensor type. See operating instructions of the sensor. 3.2 Technical Data 3.2.1 Mechanical Data Table 3: Mechanical Data Property Value Unit Length 314.0 Height 133.2 1295_1.2.x_4-10-2.0-en-us © fos4X 2019 13 / 28... -
Page 14: Electrical Data
Permitted temperature -10 … +40 °C (Operation) Permitted relative humidity 5 ... 80 (Operation) 3.2.4 Speci cation of the Vacuum Supply The vacuum pump for the vacuum supply is not part of the product. 1295_1.2.x_4-10-2.0-en-us © fos4X 2019 14 / 28... -
Page 15: Product Specific Data
Product category and number: ABC1234 Produkt version: v1.2.3 Serial number: S/N: 1234-5678 QR-code of the serial number CE marking RoHS-marking Power supply: 230V Power consumption: 1200W Figure 4: type plate GTIN: P/N: 4251112345678 (exemplary contents) 1295_1.2.x_4-10-2.0-en-us © fos4X 2019 15 / 28... -
Page 16: Warning Labels
Description/function Pushbutton ON/OFF SWITCH Turns the Application Tool on and off. Ball valve Connects and disconnects the frame and suction cups with the compressed BALL VALVE air hose to the vacuum pump. Positions: 1295_1.2.x_4-10-2.0-en-us © fos4X 2019 16 / 28... - Page 17 3. Product Description Operating element Description/function Figure 5: Opening the Figure 6: Closing the ball valve ball valve Rotary control TEMPERATURE KNOB Adjusts the temperature of the heating plate. 1295_1.2.x_4-10-2.0-en-us © fos4X 2019 17 / 28...
-
Page 18: Packaging And Transport
3. Open the transport case. 4. Remove the Application Tool from the transport case. 5. Check the scope of delivery. See Scope of Delivery, page 6. If parts of the scope of delivery are missing: Contact fos4X Support. See fos4X Support, page 4.4 Packing Packing the Application Tool: 1. -
Page 19: Transport
Storing the Application Tool: Store the Application Tool in a dry and clean place. Store the Application Tool in a transport packaging. See Packing, page Observe the environmental conditions. See Environmental Conditions, page 1295_1.2.x_4-10-2.0-en-us © fos4X 2019 19 / 28... -
Page 20: Installation
4. Check all cables of the Application Tool for damage. 5. If cables are damaged: Do not use the Application Tool and contact support. See fos4X Support, page 6. Connect the Application Tool to the power supply. 7. Make sure the Application Tool is switched off. -
Page 21: Commissioning
6. Commissioning 6 Commissioning No further commissioning steps are necessary after installation. Continue with Operation, page 1295_1.2.x_4-10-2.0-en-us © fos4X 2019 21 / 28... -
Page 22: Operation
5. Position the Application Tool over the sensor so that the heating plate rests on the sensor surface. See operating manual of the sensor. 6. Lightly press the Application Tool so that the suction cups have good contact with the surface. 1295_1.2.x_4-10-2.0-en-us © fos4X 2019 22 / 28... - Page 23 4. Wait until the vacuum is decreased and the Application Tool can be moved. Figure 9: Closing the ball valve 5. Remove the Application Tool from the sensor. 6. Place the Application Tool on the supplied temperature-resistant underlay. 7. Switch off the vacuum pump. 1295_1.2.x_4-10-2.0-en-us © fos4X 2019 23 / 28...
-
Page 24: Troubleshooting
8 Troubleshooting Observe the safety instructions. See Safety, page Tasks that are not described in these operating instructions may only be done by fos4X. WARNING Electric shock caused by touching a damaged cable. Serious injury or death. Before connecting the Application Tool to the power supply, check all cables for damage. - Page 25 Vacuum Supply, page Set the temperature on the Temperature set too low. . See TEMPERATURE KNOB Heating plate does not Operation, page heat up. Contact fos4X Support. See Heating plate defective. fos4X Support, page 1295_1.2.x_4-10-2.0-en-us © fos4X 2019 25 / 28...
-
Page 26: Maintenance
1. Check the Application Tool for damage and wear. 6 Months Application Tool Check 2. In case of damage or heavy wear: Contact fos4X Support. See fos4X Support, page 9.1.2 Cleaning the Application Tool CAUTION Burns caused by touching the hot heating plate. -
Page 27: Corrective Maintenance
3. Clean the suction cups with a dry, lint-free cleaning cloth. For stubborn dirt, slightly moisten the cleaning cloth. 9.2 Corrective Maintenance Corrective maintenance work may only be carried out by fos4X. Contact fos4X Support. See fos4X Support, page 9.3 fos4X Support Contact The support of fos4X is available via support@fos4X.de. -
Page 28: Taking Out Of Service And Disposal
Let the Application Tool cool for 15 minutes. 2. Pack the Application Tool. See Packing, page 10.2 Disassembly The product may only be disassembled by fos4X or a specialized disposal company. 10.3 Disposal NOTICE Risk to the environment due to incorrect disposal of the product.
Need help?
Do you have a question about the RD 110 V and is the answer not in the manual?
Questions and answers