Table of Contents
Advertisement
Quick Links
Advertisement
Table of Contents

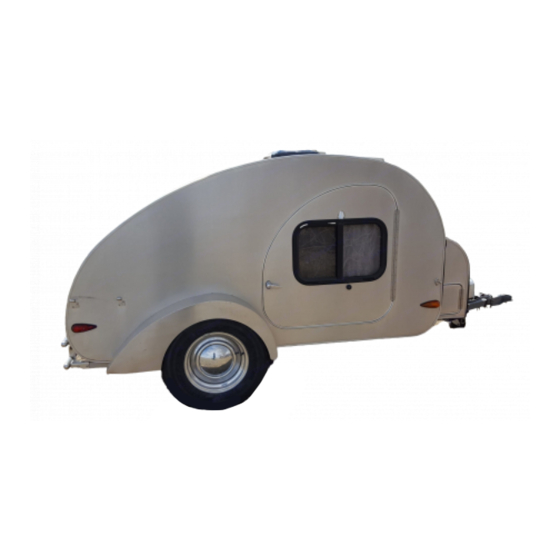
Summary of Contents for Camp-Inn 550 Street
- Page 1 T eardrop T ravel T railers Owner’s Manual Great Little campers… For the great Big outdoors. Camp-Inn Travel Trailers Petenwell Industries LLC 555 Kucirek Street, Necedah, Wisconsin www.TinyCamper.com ©2020 Petenwell Ind. LLC Revised 2/10/2020...
-
Page 3: Table Of Contents
Table of Contents Table of Contents Raindrop Safety Instructions Couch / Bunk Beds 32-33 VIN tag & Serial # Options Packing Your Camp-Inn™ 5 Alcan Cover Setting Up Receiver Hitch Locks Windscreens Kitchen Furnace 35-38 Hatch Air Conditioner Table Door Screens... -
Page 4: Safety Instructions
NEVER use the leveling jacks to lift both wheels off the ground at the same time, while the trailer is in use. If you are new to trailer towing, refer to “Towing Basics” section before hitching, unhitching or towing your Camp-Inn trailer. This list does not include all possible hazards. -
Page 5: Vin Tag & Serial
Packing your Camp-Inn™ The first rule for happy camping in your Camp-Inn™ is: "Take only what you need! " It is very easy to over pack and take along too much STUFF. After a few trips you should be able to weed out the extras. -
Page 6: Setting Up
™ Setting Up Your Camp-Inn When you arrive at your campsite, select a suitable spot for setting up your trailer. You should pick an area that is fairly level. Care should be taken to ensure that there is adequate clearance for opening of side doors and the rear hatch. -
Page 7: Locks
Locks When locking the doors and hatch, you may need to move the handle slightly up and down to allow the locking mechanism to properly engage. Do not force the lock, as this may damage the locking mechanism or break off the key. If the lock does not turn freely even when wiggling the handle, it may need to be lubricated. -
Page 8: Kitchen Hatch
Kitchen Hatch To open the rear hatch Unlock the handle and rotate it vertically. Slowly raise the hatch. If the hatch gives any resistance, look under it to make sure the prop rod is sliding smoothly. On new trailers, you may need to assist the prop rod, with one hand, sliding it along the groove on the bottom end. -
Page 9: Table
Table - The kitchen table is easily set up at the campsite or roadside stop. Fully read through this step-by-step procedure before attempting to set the table up for the first time. 1. Before removing the table from the stowed position, Pull leg and pivot, while pulling, to the vertical position. -
Page 10: Stove
Stove - The Camp-Inn™ stove gives you a two-burner stove with a propane tank mounted on the trailer tongue. The stove slides under the left cabinet during travel or when not needed. When needed, the stove slides into the cooler storage area. -
Page 11: Propane Tank
4. Subtract the measured weight from the Tare Weight. Result is the weight of propane in the tank. (18 – 13.4 = 4.6 lbs of propane) 5. The small Camp-Inn tank, when full, will hold about 9-10 lbs of propane. (example tank above is about 1/2 full) 6. -
Page 12: Reserve Propane
Reserve Propane Adapter: Your Camp-Inn trailer is supplied with a reserve propane adapter. This adapter allows you to use a disposable 1 lb. propane tank, if you run out of propane in the trailer’s main tank. To INSTALL the Reserve Propane Adapter: 1. -
Page 13: Counter Lids
The lids are adjusted to fit one side and thus are not interchangeable. Sink / Water System: If your Camp-Inn™ has a water system, you can operate the sink either from the onboard water tank or connected to city water. Your trailer comes with an eight-gallon fresh water tank, an electric, on demand, water pump and an eight gallon ―gray‖... -
Page 14: Tank Meter
– Water Tank Meter If your trailer has a water tank meter, you can easily monitor the level of the fresh water and gray water tank. Pushing the ―FRESH‖ button will display the current level of the fresh water tank. F (full), 2/3, 1/3, or E (empty) These levels are only approximate. -
Page 15: Water Hook-Up
Cleaning the sink trap- The sink trap and drain are best kept clean through regular preventative maintenance. If you use a liberal amount of soap when washing dishes, that will help keep grease from clogging the trap and gray water tank. If the sink seems to be draining slower, try the following: 1. -
Page 16: Fresh/Gray Tanks
The four foot long hose (B) has been supplied for connection to the water outlet. Use this hose to fill buckets, add a sprayer, fill the freshwater tank, or connect to other water accessories. If you want to fill the onboard freshwater tank when you are connected to city water, connect your four feet long hose to the water outlet and use the hose to fill the tank. -
Page 18: Winterize
Winterizing the water system- Before freezing weather, fully drain both the fresh water and gray water tanks. Turn on the pump switch and run the faucet until it starts bubbling air. Shut off pump switch. Reinstall the tank drain caps. ... -
Page 19: Sanitize Water
itizing the fresh water tank- If your water has a strange odor, color or taste: This process involves using bleach. Be careful to not spill or spray bleach or bleach/water onto clothing, skin or eyes. Refer to bleach container for safety precautions and what to do in case of spills or personal contact. -
Page 20: Lp Gas Outlet
Fill the rest of the tank with water Run water out of the faucet, sprayer, and side water outlet. Let sit overnight. Run the water through the faucet and into the gray water tank. Let that sit over night. ... -
Page 21: Electrical
Electrical 7-Prong Connector The trailer connects to the tow vehicle with a 7 prong connector. The connector has a raised rib along one side to orient the connector when mated. The cover or door on the tow vehicle side of the connector has a locking detent that engages with the raised rib to lock the connector when it is fully engaged. -
Page 22: Ac Power
AC Power (Alternating Current) - 110-120VAC **See Air Conditioner section for AC (air conditioner) info. Shore Power- Below the right taillight, there is an AC input receptacle. Plug in an extension cord connected to any 110/120V AC source (at home or a campsite with hookup, or generator). While you are plugged in, you will have 110V AC power to AC receptacles in the kitchen, cabin, front storage and the one for the air conditioner. -
Page 23: Bulb Replacement
License Plate Back-Up/Flood Light Camp-Inn* 6‖ Oval Module* Tail Light Incandescent Xenon Kitch-Cabin Light White #1141 10XE/12* Kitch-Cabin Light Red 10XE/12R* *LED & Xenon bulbs available from Camp-Inn Online Store Incandescent bulbs and 6‖ Oval Modules available at auto parts stores... -
Page 24: Fuses
DC Fuses - The fuse block is located behind an access cover on the right side, in the under counter storage box. Loosen the two screws on the corners of the access cover. Rotate the cover to remove it. There is a fuse diagram on the back of the cover. -
Page 25: Dc Disconnect
DC Load Disconnect Switch Located on the right side of the right, under-counter storage compartment is the DC Load Disconnect Switch. This switch disconnects all LOADS from the battery. If you are storing your trailer, just want to make sure everything is OFF, or minimize any drain on the battery, turn the DC Load Disconnect Switch to the OFF position. -
Page 26: Charging
BatteryCharging If your Camp-Inn™ is a Special, Classic or Ultra Model, it has it's own on-board battery and charger and your trailer has been wired for charging by the tow vehicle. The length of time you can go between charging depends on how many of the lights you use and how long they are on. -
Page 27: Trimetric
The charger is located in the right side under-counter storage compartment. Looking inside the compartment, it is mounted on the wall to the rear of the trailer. The charger has two LED Indicators to show the charge condition: TriMetric Battery Monitor (TM-2030) option The Tri-Metric battery monitor system allows more detailed monitoring of battery levels, battery use, and battery condition. -
Page 28: Solar Charging
AND – Use CPAP machine at night. Watts The Camp-Inn solar option has a 10 amp, built-in solar controller and a circuit that bypasses the controller. You may use a solar panel with its own solar controller or a solar panel without controller. Follow the chart below to wire your solar panel to the Male Solar Connector (provided). -
Page 29: Troubleshoot Charge
Charger Troubleshooting Flow Chart... -
Page 30: Battery Life
Battery Life Important information about battery charging to keep from killing your battery. Even if you abuse your batteries they will probably work just fine—for awhile. By knowing how to care for them you can extend their life to maximize their return to you. 1. -
Page 31: Battery Isolator
Remove the four screws on the sides of the access panel. The battery should only be replaced with a battery of the same size and type. Contact Camp-Inn, for more information, if you want to change battery types or sizes. -
Page 32: Raindrop
Raindrop Couch / Bunk Bed The Raindrop Models have a bench that converts into a couch and a set of bunk beds. Following are instructions on how to convert from one into another: Bench Mode: The frame is folded and placed on the floor as far forward as possible. - Page 33 Raindrop Couch / Bunk Bed (continued) Converting Bench to Bunk Beds: To make a set of bunk beds for smaller children. The beds are about 54‖ long. 1. Move all the cushions out of the way. 2. Fold the back rest flat onto the frame seat.
-
Page 34: Alcan Cover
Receiver Hitch Option If your Camp-Inn™ is equipped with a receiver hitch, you can use it to haul bicycles. The receiver hitch has a 150 lb. load limit (bikes and bike carrier weight combined). It is designed and intended only for a two bike carrier. -
Page 35: Furnace
Then, reset thermostat to desired setting. 10. If the appliance will not operate, after three ―reset‖ attempts call Camp-Inn 11. To turn off the furnace, set the thermostat to the OFF position. It will run through a ―cool down‖ cycle before stopping the fan. - Page 36 Furnace Altitude Compensator The Altitude Compensator boosts the voltage going to the furnace making the furnace fan turn faster, compensating for the thinner air at higher altitudes. The Altitude Compensator may be set on HIGH at lower altitudes to boost the amount of warm air being blown into the cabin, but due to the small size of the cabin, this is usually not necessary.
- Page 37 You are at too high an elevation for the burner to ignite properly. (move to lower altitude) If none of the above fixes the problem, there may be another failure in the furnace. (have furnace checked by trained RV Technician) If the furnace does ignite, there may still be problems at higher elevations.
- Page 38 ** If the kitchen stove operates normally, with both burners lit, for more than one minute, the propane tank valve is ON and there is sufficient propane to light the furnace.
-
Page 39: Air Conditioner
Air Conditioner Because of the small volume of the Camp-Inn cabin, it is recommended that you run the air conditioner on the lower settings. Running your air conditioner on higher settings will cause more rapid cycling and will not be as effective at removing the humidity from the cabin air. -
Page 40: Roof Fan
Roof Fan To open the roof vent, turn the opening knob. This will raise the vent top. The vent must be open for the fan to operate. The Fantastic Vent fan has three controls: Direction, Speed, and Thermostat. Direction: Select whether you want the fan to blow outward or inward. -
Page 41: Drop-Front Desk
Set both support arms to the same position. Roof Rack Option The Yakima brand roof rack system mounted on Camp-Inn trailers has a 200 lb. load limit when traveling. The roof rack will support more weight (like the Yakima roof mount tent plus two adults) when the trailer is parked. -
Page 42: Tv / Radio
TV/DVD Player If your Camp-Inn™ has the TV/DVD option, you can view TV, DVD movies and play music CD's. With the exception of the following instructions, refer to the TV/DVD owner's manual for operating the TV/DVD player. Your TV/DVD player will draw power even if it is OFF. A Power Shutoff Switch is provided to disconnect power to the TV/DVD player. - Page 43 Radio The Radio option allows the customer to select an alternative radio unit, speakers, or antenna, which meets their quality, feature, and cost expectations. Because of this variation, the functioning of every system will vary. Refer to the radio owner’s manual on operation of the radio. Following are some of the more common set-ups: The power shut-off switch for the radio is the same as the TV power shut-off switch.
-
Page 44: Gps Tracker
GPS Tracker The SPOT Trace GPS Tracker offers advanced theft-alert tracking. Receive a text or email when your trailer moves, or have family follow your travels on Google Maps by phone or computer. If trailer is stolen, contact Police for recovery. Do not attempt to recover trailer yourself. -
Page 45: Maintenance
Maintenance Camp-Inn™ With proper maintenance, your trailer will give you years of trouble-free service. Inspection Camp-Inn™ Your trailer should be inspected before every use. Here is a checklist of items to inspect: Tires - Check for proper inflation pressure and adequate tread. -
Page 46: Cleaning
Cleaning Always wash your trailer as soon as possible after traveling near a saltwater beach, or on winter roads where salt has been used. The salt will cause corrosion of the aluminum resulting in white spots and pitting on the aluminum surfaces. Always test cleaning methods or chemicals on a hidden area and allow to dry fully, before using on the rest of the trailer. - Page 47 In fair weather, leaving the windows and sunroof open during the day or when traveling will help keep the inside dry and aired out. Your Camp-Inn™ has been designed and built to keep out rainwater. Under normal circumstances very little if any water should leak into the cabin or kitchen areas.
-
Page 48: Wheel Bearings
Wheel bearings Wheel bearings should be checked every 2000 miles to check for proper adjustment. To check wheel bearing adjustment: Jack the trailer up so one wheel is off the ground. From the side, grab the wheel front and rear. ... - Page 49 Brake Inspection Your trailer brakes should be inspected and serviced at 2-year intervals or more often as use and performance requires. Magnets and shoes must be changed when they become worn or scored thereby preventing adequate vehicle braking. Clean the backing plate, magnet arm, magnet, and brake shoes. Make certain that all the parts removed are replaced in the same brake and drum assembly.
- Page 50 Autowbrake Controller Adjustment Check current setting anytime by pressing the gain/right button on Autowbrake controller. For Camp-Inn trailers, it should be on Setting 1. It should not need adjustment, but if it does... 1. Press and hold the brake pedal.
- Page 51 Parking Brake Adjustment Periodically check the parking brake. On a level surface, with the trailer unhitched, lock the parking brake handle then push on the trailer to test the parking brake. The trailer may move slightly (less than 6 inches) before the brakes engage. ...
-
Page 52: Jacks
Lubricating the Leveling Jacks Lower the jack until it touches the ground. Using a Popsicle stick or small brush, wipe a small amount of general purpose grease into the threads of the jack screw. It is only necessary to add it to one side of the screw. The grease will be distributed when the screw is turned. -
Page 53: Storage
RV non-toxic anti-freeze to the water system. See Section on Winterizing the water system. (p.18) ™ It is recommended that, your Camp-Inn should be stored in a building. Leaving the windows and hatch open for a while will help dry out the cabin and kitchen areas. -
Page 54: Towing Basics
Towing Basics ™ experience Camp-Inn Safe trailering is essential in making your pleasurable for years to come. If you do not have experience pulling trailers, please read through this section to familiarize yourself with the basics of safe trailering. Vehicle Towing Rating Camp-Inn™... - Page 55 All three Classes may not be available for your tow vehicle. Hitch Height To make your Camp-Inn trailer look right when it is being towed, the ball on your hitch should be set at the proper height for your trailer model.
-
Page 56: Hitching
Hitching trailer has a 2‖ ball type hitch. First, make sure that Camp-Inn™ Your the hitch ball size on your towing vehicle matches the hitch size on your Camp-Inn™ trailer. Then proceed as follows: 1. Remove the safety-locking pin or lock from the locking lever. -
Page 57: Unhitching
11. Lower rear leveling jacks to stabilize or level the trailer side to side. Your Camp-Inn™ trailer can be used for sleeping or cooking while it is still connected to your tow vehicle. You can lower the leveling jacks or tongue jack to stabilize the trailer while it is hitched to the tow vehicle. - Page 58 Using Trailer Brakes In order for the trailer brakes to function, the tow vehicle will need a brake controller installed or the trailer will need the Autowbrake option. When the brakes are applied in the tow vehicle, the brake controller applies a voltage to the electric trailer brakes to activate them.
-
Page 59: Using Trailer Brakes
Speed, Acceleration and Braking For safety, when towing a trailer, we recommend that you drive 5-10 MPH slower than normal. When towing a trailer, you must always keep in mind that you are adding load to your tow vehicle. Allow for slower acceleration when pulling out into traffic. -
Page 60: Overdrive
Anyone who has ridden a 10-speed bike understands that high gear is not the best gear for all conditions. Backing - To fully enjoy your Camp-Inn trailer, you must master backing your trailer. Backing a trailer takes a lot of practice and patience. -
Page 61: Tires
Tire Size: Street: 195/70R14 SUV: 205/75R14 Spare Tire The Camp-Inn spare tire is rated for a loaded trailer at highway speeds. Being smaller diameter, it will cause that side of the trailer to ride lower. You may use it to drive for extended distances, but it is recommended that you repair or replace the original tire as soon as practical so you will have a spare tire available. -
Page 62: Specifications
550 Street 550 SUV 560 Street 560 SUV Specifications Body Length 11' 11‖ Total Length 11' 11'' 13' 11'' 13' 11'' Body Width Width Fenders 6' 6'' 6' 6'' 6' 6'' 6' 6'' Height 61'' 64'' 61'' 64'' Interior Cabin Height... -
Page 63: Teardropping Tips
Teardropping Tips We are sure you will enjoy using your Camp-Inn teardrop and will find ways of making your travel experiences more enjoyable. Here are a few tricks that we have found to get you started. 1. To determine what is necessary to take with you, put a piece of masking tape on every item. - Page 64 As you can see, where you add the weight can affect the ride of the car and trailer. Since a Camp-Inn trailer is rated for 500-1000 lbs. of cargo carrying, you should use it to haul all your heavy gear. The best place to haul heavy items is to slide them into the footwell area of the bed (inside the cabin).
-
Page 70: Index
INDEX 110/120V AC See AC power inspection 110/120V parking 6, 51 7-prong See connector breaker, 110VAC AC (air conditioner) See air bunk bed 32, 33 conditioner charge meter AC power 110/120V charger breaker/fuse shore power 22, 26 troubleshoot battery air conditioner 22, 39, 45 solar Alcan cover... - Page 71 fire extinguisher 4, 5, 9 lug nut, torque flat tire See tire, flat maintenance 45, 62 freezing See winterize marker lights furnace meter altitude troubleshoot battery 14, 25 fuses volt gaskets, cleaning water tank gear, overdrive monitor gear, shifting battery GPS tracker packing gray water tank...
- Page 72 serial number charger setting up furnace seven-prong connectorSee connector water sewer TV/DVD shift ejecting disc shore power 22, 26 power switch side table See cooler stand TV/DVD player sink 13, 45 unhitching drain/trap vent See roof fan solar ventilation specifications VIN tag storage box, front volt meter...
Need help?
Do you have a question about the 550 Street and is the answer not in the manual?
Questions and answers