Table of Contents
Advertisement
Quick Links
Advertisement
Table of Contents

Summary of Contents for SolarGaps SGV1C80-6-W Series
- Page 1 VENETIAN BLINDS WITH SOLAR PANELS OPERATION MANUAL...
- Page 2 Dear Customer! SolarGaps would like to express its gratitude for your choice! Our experts use best working practices and modern technologies to ensure efficient utilisation of solar energy as you use our product. We provide quality control at every production stage: from design of...
-
Page 3: Table Of Contents
CONTENTS Functionality and field of application ....................EN. 4 Reference to standards ........................ EN. 5 3. Technical specifications and product range ................. EN. 6 Delivery set ........................... EN. 8 Product description and operating principle ................EN. 9 Preconditions for installation ..................... EN. 11 7. Product installation ........................EN. 16 8. Start-up and adjustment works ....................EN. 22 Product testing ........................... EN. 23 10. Mobile Application instructions ....................EN. 24 11. Transportation rules ......................... EN. 37 12. Storage rules ..........................EN. 38 Safety instructions ........................EN. 39 13. 14. Fire safety instructions ......................EN. 40 15. Operation conditions and useful life ..................EN. 41 16. Maintenance ..........................EN. 42 17. Troubleshooting ........................EN. 43 18. Warranty obligations ........................ EN. 44 Disposal……………………………………………………………………………………………………………………………….EN.47... -
Page 4: Functionality And Field Of Application
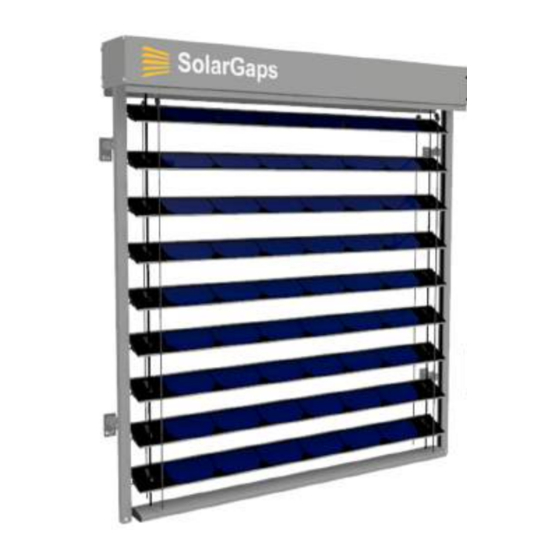
1. Functionality and field of application The SolarGaps solar panel blinds system (hereafter referred to as the BLINDS) is a smart blinds system using built-in photovoltaic elements, which generate the electrical power. You can use this electricity to power your home appliances, store it in batteries and/or sell the excess amount to your energy supplier. -
Page 5: Reference To Standards
2. Reference to standards EN 13561:2015 External blinds — Performance requirements including safety. EN 13659:2015Shutters and external Venetian blinds. Performance requirements including safety. EN 60335-1:2012 Household and similar electrical appliances — Safety — Part 1: General requirements. EN 60335-2-97:2006 Household and similar electrical appliances — Safety — Part 2-97: Particular requirements for drives for rolling shutters, awnings, blinds and similar equipment. -
Page 6: Technical Specifications And Product Range
- efficiency factor (EF), %, minimum Adjustment of slat angle: - slat angle adjustment range, degrees 70 to -30 special software application for smartphone SolarGaps Power network: - voltage, V 207-244 and 110 - frequency, Hz 50 or 60 ± 1... - Page 7 3.2. Product range of the BLINDS: SGV1C80-6-W-(WxH)(color)(QM); SGV1C80-10-W-(WxH)(color)(QM); SGV1C80-20-W-(WxH)(color)(QM); SGV1C80-6-R-(WxH)(color)(QM); SGV1C80-10-R-(WxH)(color)(QM); SGV1C80-20-R-(WxH)(color)(QM); EN.7...
-
Page 8: Delivery Set
4. Delivery set - SolarGaps BLINDS with solar panels ................. 1 set - operation documents (Manual) .................... 1 pcs. - packing ..............................1 pcs. EN.8... -
Page 9: Product Description And Operating Principle
5. Product description and operating principle 5.1. Product description 1 – casing containing electric drive motor, mechanisms and control unit installed under cornice; 2 - mushroom-shaped brackets; - slotted side guides; 4 – slats with solar cells and guiding rollers; 5 - ladder cords (2 pcs.) —... - Page 10 5.2.3. Slotted side guides (2 pcs.) ensure free motion of slats with solar panels during operation Figure 5.5. Slotted side guides 5.2.4. The electronic module installed in the casing receives commands transmitted by a smartphone via official application to control electric motor of the BLINDS, controls output voltage of solar panels and is connected to power consumption and accumulation circuit for appliances, which use...
-
Page 11: Preconditions For Installation
Preconditions for installation WARNING! It is recommend to read the technical description before proceeding with the installation (mounting) and start-up and adjustment works to be performed prior to operation of the BLINDS. 6.1. It is recommended to install the BLINDS outside of the building over a window or any other transparent aperture. - Page 12 CAUTION! The BLINDS contain components supplied by electrical power (~230 V 50 Hz and ~110 V 60 Hz) or generating it. Therefore, wiring and connection to the grid shall be performed by an authorised electrical technician having an appropriate permit. 6.2.
- Page 13 6.4. High-quality preparation of the window aperture is an essential precondition for installation of the BLINDS with minimum expenses, namely: the window aperture shall be rectangular in shape; the working surface of aperture shall be plain and smooth without plaster sags and cracks;...
- Page 14 Measure wall-to-wall window width in three locations. Record shortest width measurement Measure the height from the upper part of the windows aperture to the window sill in three locations. Record shortest height/drop measurement. Tolerance to be taken into account when taking width measurements.
- Page 15 If there is no architrave, perform the following steps Measure the width from one edge of the window aperture to the opposite one. Measure the height from the window aperture top to the location, which you plan to be the lowest point for your BLINDS.
-
Page 16: Product Installation
7. Product installation 7.1. General sequence of operations for installation of the BLINDS is as follows: install and fix the cornice that contains properly fixed casing with electric motor, mechanisms and control unit with the help of latch brackets; insert guiding rollers of slats with solar panels into slotted side guides; install the slotted side guides and fix them with mushroom brackets;... - Page 17 (by anchor or screw) in accordance with para. 7.3.2 of this Manual. See Figure on the right → кронштейни Latch 7.2.4. кронштейни -зачіпи Latch brackets -зачіпи brackets Hang up the cornice with casing on the latch brackets. ← See Figure on the left. NOTE: The package of BLINDS includes a hard casing made of extruded aluminium alloy and a cornice made of high strength aluminium section.
- Page 18 Insert caps of the mushroom -brackets into respective slots in the slotted side guides and fix them on the mushroom -brackets with fixing screws. ← See Figure on the left. Slotted side guide NOTE: Mount the slotted side guides made Slats with solar cells of aluminium section with inserts for smoother sliding of rollers of the slats...
- Page 19 7.4.4. Connect the motor cable to a plug from the product delivery set (see figure to the right). 7.4.5. Connect the electric cable to inverter connectors from the product delivery as follows: Strip off insulation at the end of each wire. Slip the plug pin onto the striped wire end.
- Page 20 heat shrink tube of appropriate diameter (5 mm) on wires with connectors. on heat shrink tube of appropriate diameter (9.5 mm) on the wire to be connected to MC4 connectors. Solder plug connector (marked with ‘+’ on the housing) to core marked with ‘2’ on insulation.
- Page 21 NOTE: It is necessary to have two free sockets for connection of the BLINDS (see Figure showing connection of the product): socket for power supply to the product; socket for power output to the grid. Connect the BLINDS to the grid using a socket with grounding contact; if necessary, use an extension cable or perform wiring works to install an equivalent individual socket according to the current standards.
-
Page 22: Start-Up And Adjustment Works
1 Mbit/s and RSSI value shall be in the range 0- 74 dBm. 8.3. Control the BLINDS using special SolarGaps smartphone application. 8.4. To download the application, go to Apple Store or Google Play respectively. -
Page 23: Product Testing
9. Product testing 9.1. Installation of the BLINDS and start-up works are considered to be completed only after mandatory functionality check of the product with the use of appropriate controls and devices. 9.2. First of all, check the following: slats move easily and smoothly up and down and change their tilt angle (open/close), and may be fixed in any end or intermediate positions;... -
Page 24: Mobile Application Instructions
10. Mobile Application instructions 10.1. First connection to the Application 10.1.1. Open SolarGaps Application (Fig. 1). 10.1.2. Get registered in the app by entering your email or log in using your Facebook or Google account. 10.1.3. If you are already a registered user, click Sign in. - Page 25 10.2.3. Click Connect to connect the BLINDS to Bluetooth (Fig. 2): 10.2.3.1. Make sure that Bluetooth is enabled on your smartphone and click Ok (Fig. 4). 10.2.3.2. The application is searching for the BLINDS (Fig. 5). 10.2.3.3. As soon as the BLINDS appear on the screen, swipe them to Drop Blinds Here (Fig.
- Page 26 Add new Houses, Rooms, Edit/delete Houses, Rooms, Scenarios, Blinds Scenarios, Blinds Select House to use Blinds Energy accumulated during the entire period of operation of the application List of rooms of the current House List of operating scenarios for Blinds of the current House List of Blinds in the current room/all rooms Application setup...
- Page 27 10.5.4. Click Save to save changes (Fig. 19). 10.6. Creation of a new room for operation of blinds Figure 16 Figure 17 Figure 18 Figure 19 10.6.1. Click + in the top right corner to start (Fig. 20). 10.6.2. Select Room from the menu options (Fig. 21). 10.6.3.
- Page 28 Figure 26 Figure 24 Figure 25 Tilt By – change the solar panels tilt angle by dragging “points” on the “virtual window” (available only if MAX. Efficiency is disabled) (Fig. 27). Roll Out – roll the BLINDS up/down to desired height in the “virtual window”, where 100% is fully open and 0% is fully closed position (available only if MAX.
- Page 29 10.8. Edit features of the current home 10.8.1. Click Edit tab in the top left corner to start (Fig. 31). 10.8.2. Select Home from the menu options (Fig. 32). 10.8.3. Edit appropriate data (Fig. 33): Home Name – edit the home name List of rooms –...
- Page 30 Figure 38 Figure 39 Figure 40 10.9.7. Click Add room (Fig. 41) to add a room to the current Home. 10.9.8. Enter the room name and click Save (Fig. 42). Figure 41 Figure 42 10.10. Edit/create operating scenario for the blinds 10.10.1.
- Page 31 Figure 43 Figure 44 Figure 45 Figure 46 10.10.5. To delete an operating scenario for the BLINDS: Click Edit (Fig. 47) Select the scenario from the list by clicking (Fig. 48) Click Delete (Fig. 49) Figure 47 Figure 49 Figure 48 EN.31...
- Page 32 10.11. Edit/delete blinds 10.11.1. Click Edit in the top left corner to start (Fig. 50). 10.11.2. Select Blinds from the menu options (Fig. 51). 10.11.3. Select appropriate BLINDS from the list, edit data or delete the blinds. 10.12. Overview of energy generation menu - Energy Figure 50 Figure 51 10.12.1.
- Page 33 10.13. Overview of operating scenarios for the blinds – Automation 10.13.1. Click at Automation menu option for operating scenarios of BLINDS (Fig. 55). 10.13.2. The menu allows viewing all operating scenarios for the BLINDS, their execution schedule, activate or stop execution of a certain scenario as follows: Now –...
- Page 34 Click Update to update individual BLINDS or Update All to update all BLINDS. WARNING: the most recent application version allows you to benefit from all functions of SolarGaps BLINDS. Check for regular updates of the application in AppStore (for IOS) or Play Market (for Android) and firmware updates to enjoy new functions and improvements.
- Page 35 Figure 71 Figure 72 Figure 70 10.15. Controlling blinds from the application All the connected blinds are shown in the application homepage (Fig. 73). If no scenarios are attributed to the BLINDS, their names are inactive (1), and the list of rooms shows standard scenario –...
-
Page 36: Transportation Rules
Switch between rooms for manual adjustment of the tilt angle or position of BLINDS in a specific room (7). Use Automation menu (para. 10.13) or Edit tab at the application homepage (para. 10.10) to remove an operating scenario for the BLINDS in a certain room or rooms. Figure 76 10.16. -
Page 37: Safety Instructions
Number of rows in case of stacking: max. 2 (two). IT IS PROHIBITED to store the BLINDS as follows: in premises with corrosive materials; in places, where distance to heating equipment is less than 1 m. 12.2. The term of storage of the BLINDS in the transportation packing – one year from the shipment date. -
Page 38: Maintenance
15.1. Design solutions and modern materials used in the BLINDS guarantee you the absolute safety and environmental sustainability during operation, subject to compliance with the safety requirements. 15.2. The BLINDS are made of non-toxic materials and do not emit any hazardous substances into the environment during operation. -
Page 39: Warranty Obligations
BLINDS. 18.3. In case of need of the warranty service of the BLINDS during the warranty period (a defect is found), the End User shall send request to support@solargaps.com or use the Help tab of the application. - Page 40 If the date of sale is missing in the Warranty Certificate, the warranty term is calculated from the date of manufacture of the product; The information shall be sent to support@solargaps.com. The service centre reserves the right to deny a request for warranty service or repairs, if the documents mentioned above will not be presented.
-
Page 41: Disposal
violation of rules of the product operation specified in this Manual. WARNING: In no event will the Manufacturer be liable for: any -special, accidental, penal or indirect losses of any -type, including without limitation income or profit loss, damage to property and claims of the Buyer or any -other third parties, even if the Manufacturer has been informed about the possibility of such losses;... -
Page 42: Annexes
Annex 1 WARRANTY CERTIFICATE Warranty Certificate No. ______________________________ Product Model ________________________________________ Date of manufacture ____________________________________ Manufacturer __________________________________________ WARNING! When purchasing the product, please, request for testing of its operability. Check the completeness and correctness of entries in this Warranty Certificate. Fields marked with * are mandatory for filling. - Page 43 Annex 2 EN.43...
- Page 44 Annex 3 EN.44...
- Page 45 I N F O R M A T I O N F O R N O T E S EN.45...
Need help?
Do you have a question about the SGV1C80-6-W Series and is the answer not in the manual?
Questions and answers