Advertisement
Quick Links
Advertisement

Summary of Contents for Safety Bath SO-LO
- Page 1 I N S T A L L A T I O N & U S E R ’ S G U I D E Safety Bath’s Innovative New Traditional Size Walk-In Bathtubs Safety Bath Inc. 504 5th Avenue NE P.O. Box 53...
- Page 2 IMPORTANT! Before Continuing... Check your new Safety Bath So-Lo thoroughly for concealed damage which may have occurred during shipping. If any damage is found, DO NOT INSTALL! DO NOT ATTEMPT TO REPAIR! Call one of our friendly support staff at 1-877-826-6666 for further instructions.
-
Page 3: Before Beginning Installation
Make absolutely certain that access panels and/or service openings are properly placed and that all possible areas where service may be required are accessible. If your Safety Bath So-Lo is equipped with the Warm Air Massage hydrotherapy system, the sys- ♦... - Page 4 Safety Instructions General Information Installing Your Bathtub Installation Overview Tools & Materials Required Framing Plumbing Rough-In Electrical Rough-In Setting Bathtub In Place Connections & Testing Finishing Enjoying Your Bathtub At A Glance The Safety Seat Optional Hydrotherapy Systems: Description Air, Rather Than Water Controlling Your Warm Air Massage Equipped Bathtub The Heated Shower Deck Care And Maintenance...
-
Page 5: For Your Safety
A ground fault circuit. (Outside Canada and U.S.A., refer to current standards of country in question). Use the unit only for its intended use as described in this manual. Do not use attach- ments not recommended by Safety Bath. Building materials and wirings should be routed away from the blower unit on hydrotherapy- equipped bathtubs. -
Page 6: General Information
Do not operate the hydrotherapy system if the bathtub is not properly filled to this level or if the bathtub is empty. Safety Bath is not responsible for defects and problems discovered or that could have been repaired or avoided by following this procedure. - Page 7 Safety Bath. ** Faucets come with limited lifetime warranty from the manufacturer. ** Safety Bath Inc. covers labor and one (1) hour travel- ing time during the first year only. Balance is own- ers/end-user’s responsibility. does not...
- Page 8 Safety Bath’s highest standards. Proper installation and testing by qualified trades Installation of a Safety Bath So-Lo is simple is essential to your and straight-forward. Follow this intuitive continued satisfaction step-by-step guide to ensure a smooth, with your investment.
-
Page 9: Plumbing Rough-In
Electrical Rough-In - page 14 If your Safety Bath So-Lo has been shipped with an optional hydrotherapy system, it has been factory wired for 110/120 VAC. For Canadian and American customers, a Class “A” 15-amp Ground Fault Circuit Interrupter (GFCI) is required. - Page 10 Solder & Flux ⇒ ⇒ Hacksaw 1x3 or 1x4 Dimensional Lumber - Approx. 11’ (4.3m) ⇒ ⇒ Emery Cloth 2x4 Dimensional Lumber (So-Lo with Shower Deck ⇒ ⇒ Pencil Only) - Approx. 5’ (1.5m) ⇒ Torch Screws Or Nails For Framing ⇒...
- Page 11 1. If your Safety Bath So-Lo is replacing an old bathtub, remove old bathtub first. Observe basic safety precautions, and wear a dust mask during this step. Thoroughly clean up the work area to remove all debris, dirt, nails, etc. Thoroughly inspect the old tap & faucet assembly if you in- tend to re-use it.
- Page 12 ** Refer To Local, State, & Federal Code ** Install 1x4 Pressure-Treated Lumber To Support Edges Of So-Lo Bathtub Safety Bath So-Lo Support Framing And Cement Board Nailers Nailers For Cement Board (Or Equivalent) ** Refer To Local, State, & Federal Code **...
- Page 13 2. Plumbing fixtures, overflow, drain, etc. are not included with the basic So-Lo or So-Lo With Heated Shower Deck bathtubs. Safety Bath offers an optional Faucet & Drain Kit, or locally pro- cured components may be used.
- Page 14 2. Be sure to check all connections, and verify GFCI operation before completing installation of bathtub. 3. If your So-Lo was ordered with the optional heated shower deck, it comes with a pre-installed deck surface warmer. The electrical for this system must be roughed in at this time. Safety Bath recommends a 15-Amp 30-minute timer switch be mounted in a convenient location near the bathroom’s light switch in accordance with local and federal code to supply 120VAC to the...
- Page 15 Safety Bath Warm Air Massage Hydrotherapy System Wiring Schematic (Canada & U.S.A.) Safety Bath With Optional Shower Deck Heated Deck Wiring Schematic (Canada & U.S.A.) Electrical Specifications: 12-Jet Blower Motor Seat Warmer Transformer Model # EP-150-US CG Industries HZ: 60...
- Page 16 Locate 15-Amp Timer Switch (Not Included) In A Convenient Location ** Refer To Local, State, & Federal Code ** Safety Bath With Optional Shower Deck - Showing Location Of 30-Minute Timer Switch 120VAC/24VAC Heated Shower Deck Transformer 2.0A Circuit Breaker...
- Page 17 1. Safety Bath recommends a few simple steps to ensure the installation of your So-Lo bathtub will be satisfactory: a) If your bathtub has been shipped with our optional hydrotherapy system, be sure there is sufficient access to blower motor and electrical connections. Check to be sure there will be sufficient airflow around blower motor.
- Page 18 5. Be extremely careful not to lift the Carefully Set So-Lo bathtub by any of its hydrotherapy Into Place components (tubing, jets, motor, etc.). Make sure the inside of the bathtub is protected by cardboard or cloth to avoid damaging the bath- tub’s surface.
- Page 19 1. Once the mortar has set, it’s time to make all plumb- ing and electrical connections. Remove the side ac- cess cover (if so equipped) to gain access to the elec- trical components on hydrotherapy system and heated shower deck equipped bathtubs. Removing Access Cover 2.
- Page 20 4. Install the tap and faucet components at this point, making sure to check with local, state, and federal code and regulations pertaining to positioning. Since soldering of the joints will likely be necessary, be extremely careful not to start a fire. not included 5.
- Page 21 1. Now that your Safety Bath So-Lo has been tested, it’s time to put the finishing touches on your installation. During this step, cover the surface of the bathtub again with cardboard of drop cloth. 2. If wallboard is to be installed, do so at this point. Before installing wallboard, make sure insula- tion, vapor barriers, etc.
- Page 22 Safety Bath So-Lo With Optional Heated Shower Deck Shown Your Safety Bath So-Lo (excluding Shower Deck model) has been shipped with a complimentary Safety Seat. If you prefer to use your Safety Bath So-Lo without the Safety Seat, your installation is complete. Otherwise, continue to the next page.
- Page 23 The Safety Bath So-Lo Safety Seat is a convertible seating surface and transfer bench, and can quickly be lifted and latched in an upright position, out of the way if desired. Your So-Lo bathtub has been shipped with the seat removed to prevent damage to the seat and bathtub. It is easily installed as per instructions on this page.
- Page 24 4. Install the seat by simply securing the hinge portion of the seat to the bathtub with the supplied fasteners removed in step 3. Securing Seat Assembly To Bathtub 5. Install the seat retaining bracket on the wall: a) Three (3) stainless steel screws, along with white plastic trim caps and retainers are provided for mounting the seat retaining bracket to the wall.
- Page 25 c) The installed Safety Seat and Bracket, with the seat in the down position for use.
- Page 26 (Optional) The Safety Bath Shower Deck Safety Seat is a convertible seating surface and transfer bench, and can quickly be lifted and latched in an upright position, out of the way if desired. Your Shower Deck bathtub has been shipped with the seat removed to prevent damage to the seat and bathtub. It is easily installed as per instructions on this and the following pages.
- Page 27 3. If your Safety Seat was ordered with your Ensure seat bumper lands on bathtub when Shower Deck bathtub, the screw holes will be seat is lowered. skip pre-drilled in the bathtub at the factory ( to #5 ). If your seat was ordered after your Shower Deck, the holes will need to be marked out and drilled with a 9/64”...
- Page 28 6. Install the seat retaining bracket on the wall: a) Three (3) stainless steel screws, along with white plastic trim caps and retainers are provided for mounting the seat retaining bracket to the wall. This bracket will hold the seat in the up posi- tion when not in use.
- Page 29 If your tub is equipped with our optional hydrotherapy Now that your new Safety Bath So-Lo is system, you’re in for a treat! installed and has been tested, it’s time to experience the ease of use, and enjoy the Read on...
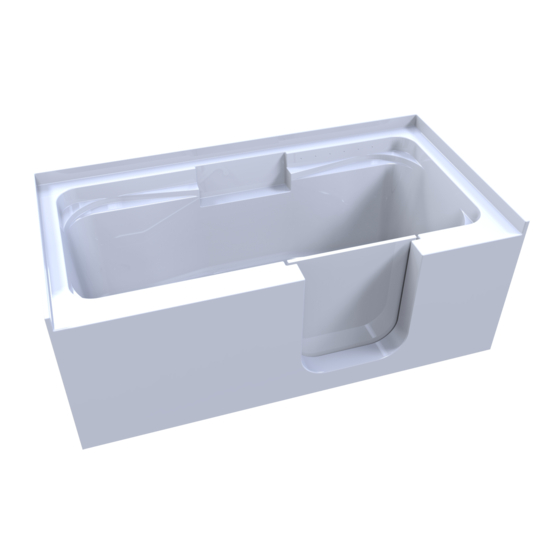
- Page 30 Congratulations on the purchase of a Safety Bath So-Lo accessible bathtub! Your bathtub at a glance: What you’ll find about a Safety Bath So-Lo is the ease of entry and exit, quality of construction and finish, and ease of use.
- Page 31 Description Safety Bath’s new Safety Seat is a standard feature on the So-Lo bathtub, and optional on the Shower Deck model. Safety Bath’s engineers worked tirelessly on the design of the sturdy and du- rable convertible seat, and the results are the best integrated bathtub seat in the industry. It is con- structed of sturdy, stain resistant high density polyethylene, carries a 350-lb.
- Page 32 Using The Safety Seat As A Transfer Bench The So-Lo Safety Seat is not only a convenient, comfortable seating surface, it is also a built-in transfer bench. Most bathtubs necessitate the use of an external chair or bench to transfer the bather into the bathtub, creating the possibility of the chair tipping over, slipping away while the bather is getting into the tub, etc.
- Page 33 But, unlike the Romans who could only afford the pleasures of a relaxing in an invigorating bath every now and then, the technology incorporated into your Safety Bath with Warm Air Massage Jet System allows you to enjoy the benefits of balneotherapy every day in your own bathroom.
- Page 34 BLOWER SPEED DECREASE Press and hold to decrease the jets’ air blower speed. The LED is ON while button is pushed. ♦ Release pressure at the desired speed. ♦ BLOWER PULSE Pressing this button once pulses the jets’ air blower on slow cycle. The LED turns ON. ♦...
-
Page 35: Operation
Description If your Safety Bath So-Lo was ordered with the optional Heated Shower Deck, not only do you get a comfortable seating surface when you bathe or shower, the seat is also heated! Your installer or electrician has installed a 30-minute timer switch in a convenient location (usually near the bath- room’s light switch) to turn the heated shower deck on and off. - Page 36 Never use industrial-type cleaners, acetone, thinner, or any other petroleum-based clean- ers on your Safety Bath. Most everyday dirt and grime can be wiped away with a damp cloth or a mild dish detergent. If a heavier product is necessary, ammonia will do the job quite nicely without damaging the acrylic finish.
-
Page 37: Troubleshooting
6. Using the blower for too long a period at too high water temperature will cause a tiring effect. 7. When you first begin to use your So-Lo, run the blower for five minutes maximum. Regulate the water temperature to a moderately warm level. These levels can be later increased for additional massaging ef- fects. - Page 38 OTHER PROBLEMS, REPAIRS, AND CONCERNS Should you encounter other problems with your Safety Bath, please contact our support group at: Safety Bath Hydrotherapy Systems Toll Free: 1-877-826-6666...
Need help?
Do you have a question about the SO-LO and is the answer not in the manual?
Questions and answers