Table of Contents
Advertisement
Advertisement
Table of Contents

Related Manuals for marren ISM-1800

Summary of Contents for marren ISM-1800
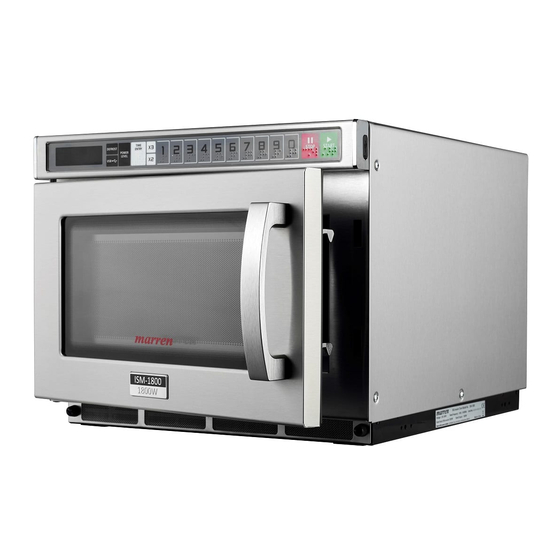
- Page 1 Microwave Oven Model: ISM-1800 Operation Manual Please read these instructions carefully before using your microwave oven, and retain for safe keeping. Following these instructions will help to provide you with many years of good service from your microwave oven.
-
Page 3: Table Of Contents
CONTENTS Important safety instructions 9. Preset Program Cook Mode Materials you can use in 10. On the Fly Cooking a microwave oven 11. Time Defrost Function Materials you need to avoid in 19-20 12. Programming a microwave oven 13. Double/Triple Setting up your microwave oven Quanitity Cooking Installation... - Page 4 If the oven is not maintained in a good state of cleanliness, it’s surfaces can become degraded and affect the lifespan of the oven potentially, leading to a dangerous situation. SPECIFICATIONS Model ISM-1800 Rated Voltage 230V~240V 50Hz Max Power input (Microwave) 3000W...
-
Page 5: Important Safety Instructions
IMPORTANT SAFETY INSTRUCTIONS WARNING To reduce the risk of fire, electric shock, injury to persons or exposure to excessive microwave oven energy when using your appliance, follow basic precautions, including the following: 1. This appliance is not intended for use by persons (including children) with reduced physical, sensory or mental capabilities, or lack of experience and knowledge, unless they have been given supervision or instruction concerning use of the appliance by a person responsible for their safety. - Page 6 11. Eggs in their shell and whole hard-boiled eggs should not be heated in microwave ovens since they may explode, even after microwave heating has ended. 12. The oven should be cleaned regularly and any food deposits should be removed. 13.
- Page 7 CONSULT A QUALIFIED ELECTRICIAN OR SERVICEMAN If the grounding instructions are not completely understood or if doubt exists as to whether the appliance is properly grounded. CLEANING Be sure to unplug the appliance from the power supply. 1. Clean the cavity of the oven after using with a slightly damp cloth. 2.
-
Page 8: Materials You Can Use In A Microwave Oven
UTENSIL TEST 1. Fill a microwave-safe container with 1 cup of cold water (250ml), along with the utensil in question. 2. Cook on maximum power for 1 minute. 3. Carefully feel the utensil. If the empty utensil is warm, do not use it for microwave cooking. - Page 9 MATERIALS TO BE AVOIDED IN MICROWAVE OVEN Utensils Remarks Aluminium Tray May cause arcing. Transfer food into microwave-safe dish. Food Carton with Metal May cause arcing. Transfer food into microwave-safe dish. Handle Metal or Metal Trimmed Metal shields the food from microwave energy. Metal trim may cause arcing. Utensils Metal Twist Ties May cause arcing and could cause a fire in the oven.
-
Page 10: Setting Up Your Microwave Oven
SETTING UP YOUR MICROWAVE OVEN NAMES OF OVEN PARTS AND ACCESSORIES Remove the oven and all materials from the carton and oven cavity. Your oven comes with the following accessories: Instruction Manual Control panel Observation window Safety interlock system Ceramic board Air Filter Plug Ventilation... -
Page 11: Installation
INSTALLATION 2. Stacking and installation of the microwave oven. 1. Select a level surface that provides enough open space for the intake The maximum height of stacking shall be and/or outlet vents. (Fig 1) two layers. Specific stacking installation is as follows. Fig 1 12 inch() 30cm... -
Page 12: Cleaning Instructions
CLEANING INSTRUCTIONS ALWAYS KEEP THE MICROWAVE OVEN CLEAN 1. Cleaning the glass viewing window, the inner door panel and oven front face. For best performance and to maintain a higher degree of safety, the inner door panel and oven front face should be free of food or grease build-up. Wipe these parts with a mild detergent, rinse and wipe dry. -
Page 13: Operation Control Panel
OPERATION CONTROL PANEL (WITH BRAILLE) AND FEATURES (1) Defrost Button (2) USB Buttons (3) Power Level Button (4) Time Entry Button (5) Double Quantity Button (6) Triple Quantity Button (7) Number Buttons (8) Stop/Reset Button (9) Start Button... -
Page 14: Appendix A User Options
OPERATION INSTRUCTION APPENDIX A USER OPTIONS Items in bold below are the default values. Option Setting Description OP:10 3 SECONDS BEEP OP:11 Continuous Beep EOC Tone OP:12 5 quick beeps, Repeating OP:20 Beeper Off OP:21 Beeper OP:22 MEDIUM Volume OP:23 High OP:30 Keybeep Off... -
Page 15: Appendix B Default Cook Times
OPERATION INSTRUCTION APPENDIX B DEFAULT COOK TIMES The oven will with operate with the following Preset Cook Times, unless otherwise noted in the product Specification. Button Display (Time) Power 0:10 100% 0:20 100% 0:30 100% 0:45 100% 1:00 100% 1:30 100% 2:00 100%... -
Page 16: Power Up
OPERATION INSTRUCTION 1. POWER UP When the oven is turned on for the first time, “------- “ will display. If the “ “ button is pressed, the oven will change to idle mode. Note: During idle mode, the oven will not respond when buttons are pressed. 2. -
Page 17: Pause Mode
OPERATION INSTRUCTION In all other cases, the oven will return to Door open Mode with User Option OP:61 set. Opening and closing the door will clear out any information about a Manual or Preset Program which was running. 5. PAUSE MODE 1) This mode allows the users to temporarily stop the cooking cycle to inspect or stir the food item. -
Page 18: Manual Cook Mode
OPERATION INSTRUCTION 7. MANUAL COOK MODE 1) This mode allows manual cooking of food items. While in Manual Cook Entry Mode, pressing the “ “ pad will begin Manual Cook Mode. 2) During this mode, the remaining cooking time displays. The fan and oven lamp will light. 3) When the cooking program finishes, the oven will enter End of Cook Cycle Mode. -
Page 19: Time Defrost Function
OPERATION INSTRUCTION 11. TIME DEFROST FUNCTION (1) In Ready Mode, press “DEFROST” button, the screen will display “00.00”. (2) Press number buttons to input defrosting time. The maximum time is 99 minutes and 99 seconds. (3) Press “ “ to start defrosting. The default power is a power level of 20%. (4)The remaining cooking time will be displayed. -
Page 20: Double/Triple Quanitity Cooking
OPERATION INSTRUCTION 8) Close the oven door, to return to Ready Mode. If the “ “ button is pressed during the setting process, the oven will turn to Door Open Mode. The program that did not save will be lost. If there is a saved program within the memory procedure, pressing the relevant number button will start the program. -
Page 21: Stage Cooking Programming
OPERATION INSTRUCTION 14. STAGE COOKING PROGRAMMING This allows the user to cook food items in manual cook mode and programming mode. 1) A maximum of three stages can be set at most during cooking mode or programming mode. After setting the power and time for the first stage, press “Time Entry”... -
Page 22: Filter Cleaning Function
OPERATION INSTRUCTION 15. FILTER CLEANING FUNCTION (1) If User Option OP:01 is set and the cleaning reminder is due, the oven will remind the user to clean the filter. Note: The oven must be turned on. (2) The screen will display “CLEAN FILTER” when due. Pressing the “ “ button or opening the door will put the oven into Ready Mode. -
Page 23: Factory Default Setting
OPERATION INSTRUCTION (5) During the setting process, press the “ “ button to enter Door Open Mode. Closing the door will enter Ready Mode. 6) If the “ “ button is not pressed at the last step, the program will not be saved but will remain at the previous setting. -
Page 24: How To Set And Save Menu Programs On The Usb Stick
HOW TO SET AND SAVE MENU PROGRAMS ON THE USB STICK 1. Insert the USB stick in to the computer and open the file called “Setup”. 2. Double-click “MenuEdit” to enter the editable interface. (Recommendation: Right-click and choose “Run as administrator”) 3. - Page 25 HOW TO SET AND SAVE MENU PROGRAMS ON THE USB STICK 4. Set the first menu A maximum of two stages of cooking can be set. Cooking time and power can also be set. 5. Click “New Line” to create the second menu - with a maximum amount of menus being 20.
-
Page 26: Air Filter Cleaning
FILTER CLEANING Caution! Make sure the roof liner is installed correctly before use of the microwave oven! The front air filter serves as the air inlet; the air filter should be cleaned regularly to keep the chamber clean. 1. Turn counterclockwise to unscrew and take down the filter and wash with warm soapy water. -
Page 27: Installation (Supplement)
INSTALLATION (SUPPLEMENT) 1. The switching operation of this microwave oven can cause fluctuations in the supply voltage. The operation of this unit with Voltage supplies of under 225Vac or above 245Vac may cause the oven to not operate correctly. This oven is intended for connection to a power supply that is suitably earthed/grounded and is supplied with a cord and plug to ensure this. -
Page 28: Troubleshooting
TROUBLESHOOTING Normal Radio and TV reception may be interfered when microwave oven is operating. It is Microwave oven interfering TV reception similar to the interference of small electrical appliances, like mixers, vacuum cleaners and electric fans. This is normal. In low power microwave cooking, oven light Dim oven light may become dim. -
Page 29: Warranty Information
CONDITIONS a) All repairs during the warranty period must be completed by an authorised engineer of Marren, either on-site or at an approved location. Any work carried out by a non-authorised engineer will invalidate the remaining term of the warranty. - Page 30 01933 665 313 sales@marren.co.uk www.marren.co.uk Marren Microwave Ltd., 40 Mallard Close, Earls Barton, Northampton, NN6 0JF...
Need help?
Do you have a question about the ISM-1800 and is the answer not in the manual?
Questions and answers