Advertisement
Quick Links
Advertisement

Summary of Contents for MEDIBIOS plus
- Page 1 USER MANUAL MEDIBIOS plus...
- Page 2 Mod. 048 EN - User manual MEDIBIOS plus - Rev. 1 – 27/05/2020 © 2020 Amil Care CORP. - All rights reserved...
- Page 3 Introduction The present user manual must be considered as an integral part of the machine, as it contains important information on proper utilization of MEDIBIOS plus device. Keep in a protected but easily accessible place. Every operator should carefully comply with warnings and instructions given in this manual.
- Page 4 The “mandatory” symbol is used to describe safety instructions and warnings to be complied with. Disposal: The correct disposal of your old product will help prevent potential negative consequences for our environment and human health. Do not dispose of your old products with your normal household waste. Please act according to your local rules.
- Page 5 Index 1. Safety instructions and warnings p. 6 2. General p. 8 3. Technical characteristics p. 8 4. Chart of consumption and emission duration p. 8 5. List of visible external elements p. 9 6. Labelling p. 9 7. General norms of usage p.
-
Page 6: Safety Instructions And Warnings
▪ Only use the device with the products authorized by the producer (the list of the authorized products is available on the website www.medibios.com or please contact the local authorized distributor). ▪ Carefully study the material safety data sheet of the product to be utilized before using the device. - Page 7 ▪ Periodically check the state of the power supply cable and never operate the device when the cable shows any anomaly or is in any way damaged in its structure. ▪ Don't pull the cables to detach them from the device panel, but take them in your fingers to extract them from the sockets.
-
Page 8: Technical Characteristics
The Manufacturer shall not be held responsible for possible damage to people, animals or things in case of improper use. General Name: MEDIBIOS Model: plus Purpose: Sanitation - Disinfection - Pest control Use: in closed rooms Medical Device Classification: class I... - Page 9 ▪ Particle size: from <1 to 5 µm ▪ Hourly consumption: 1.500 ml/h ± 10% ▪ Treatable volume: from 10 to 1000 m Chart of consumption and emission duration (1 ml/m For example: Cubic Meters Cycle Time in seconds Consumption in ml 1000 2400 1000...
-
Page 10: Unpacking The Device
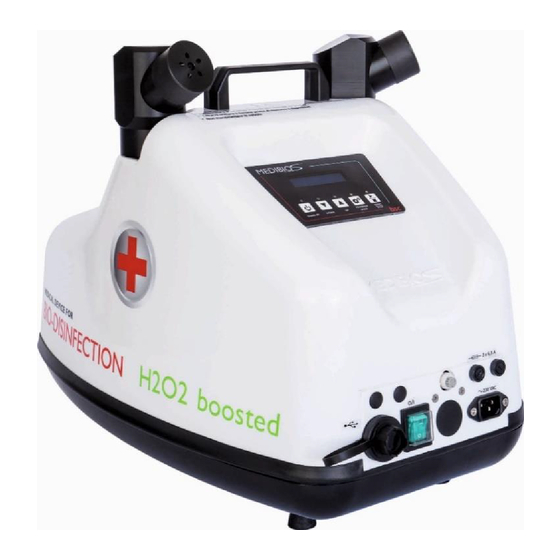
On the device, there are applied warning (the complete list of warnings are described in this manual in section 1) and/or descriptive phrases and images of some components. Labelling General norms of usage 7.1. Unpacking the device The device is delivered inside a delivery package, check that it is intact and therefore in good conditions. - Page 11 Moving of the apparatus must be effected without shaking and by appropriate means. The device has to be kept in a dry place protected from outdoors weather. 7.2. Modalities of use ▪ Before effecting a sanitation, disinfection, pest control or a washing cycle, ensure that the place is suitable.
- Page 12 Modality of bottle extraction The bottle has to be extracted in the following way: Firmly press the release mechanism (indicated by an arrow); While keeping pressed the release mechanism, lift the bottle; Let go of the release mechanism (the valves will automatically close). 7.3.
- Page 13 7.3.2. Stand-by functions By typing in the password (8 users are available) you access all the functions of the device, listed here: Program setting ( see 7.3.2.1) Cycle type ( see 7.3.2.2) Alarms see 7.3.2.3) Settings 7.3.2.4) Reports ( see 7.3.2.5) Bottle setting ( see 7.3.2.6) ▪...
- Page 14 ▪ At the bottom of the screen, there’s two icon that are “Back” button and “Home Page” button. 7.3.2.1 Program setting you enter in “program setting” and you see the next screen: By pressing the icon...
- Page 15 From program setting it is possible to choose to carry out a sanitation, disinfection or pest control cycle. Up to 300 different programs can be assigned for each cycle. By selecting one of the programs (sanitation, disinfection or pest control) the following screen appears.
- Page 16 By pressing on the rectangles relating to the values, you can change them: ▪ Program name: name assigned to each cycle ▪ Volume: from 10 to 1000m ▪ Concentration: 1-3-5 ml/m and 5+5 (5ml/m +5ml/m Automatically, is setting the right supply, with the parameters chosen When you choose 5+5 concentration, you must set the break ( from 1 to 5 hours) N.B.:...
- Page 17 By pressing the icon you see the next screen: If you select a cycle in which there are no programs, the message is output: Press ok and to set the program see 7.3.2.1. As regards the sanitation, disinfection and pest control cycles, it is possible to choose the type of activation: immediate or weekly.
- Page 18 Now: You enter in selected program: N.B.: In the event that a cycle, other than the last that has been performed, the display shows the following screen: Press YES to start automatic washing cycle (see washing cycle description) Press NO switches to the selected program. N.B.: In this window you choose the program, but you cannot modify it.
- Page 19 parameters are displayed (see 7.3.2.1). By pressing to confirm the selected program, the display shows: Pressing on the box correspond to the seconds it is possible to set the delayed start (from 10 to 59 sec). N.B.: If you enter invalid values, an error message is displayed. confirms the setting and the summary screen appears: Pressing...
- Page 20 N.B.: If the message "insufficient liquid to run the set program" appears, it means that the bottle is empty, not sufficient or not inserted (the functional block is not provided). To continue press OK. To reset the signal, access the alarms screen and press the RESET button.
- Page 21 Choose program you want press cycle start time setting screen will be displayed: Press on the figure corresponding to the hour / minutes and press the arrow icons to change the time. Press ON for active to confirm. and press Premere OFF for deactive and press to confirm.
- Page 22 START CYCLE: When the chosen cycle starts, the device loads the vessel and the display shows: At the end of pre-load, a buzzer starts (if it is actived - see 7.3.2.4) with the countdown. Then the real cycle starts: The cycle can be interrupted at any time by pressing STOP. At the end of the cycle, if there have been problems, the alarms screen appears (see 7.3.2.3).
- Page 23 The washing cycle allows you to empty the pre-loading vessel and clean the pipes inside the machine with distilled water. This operation is useful every time a pest control cycle is carried out and then a sanitation/disinfection cycle and vice versa. 7.3.2.3 Alarms...
- Page 24 pressing the icon you enter in the alarms section and the following screen is disp N.B.: If an error has occurred at the end of the cycle, the screen above is displayed. The items with the green dots identify that the values or conditions are good, while if there is a red dot it means that the values or conditions are not good.
- Page 25 pressing the icon you enter in the settings and the following screen is displayed: By pressing the icon you enter in the buzzer management and you can view the following screens: • If the buzzer is not activated, this screen appears: •...
- Page 26 pressing icon displayed: you enter in the language setting and the following screen is Once the language has been chosen, it is highlighted in yellow. By pressing the icon you enter the date and time setting and the following screen is displayed: By pressing on the white rectangles you can change the various settings:...
- Page 27 N.B. if you enter invalid values, an error message is displayed By pressing the icon you enter in the display setting and the following screen is displayed: To adjust the brightness, use the sliding bar. To make the settings definitive press .
- Page 28 At the end of the row there are the alarms. If appears “0” this means there are no alarms, while if appears “1” it means there are alarms. Filter: allows you to filter information by date and time. Report PDF: allows you to view the report and then export it in PDF format.
- Page 29 Then insert a device and wait for icon appears blue, press the icon message "Save OK - Programs saved successfully on USB" will appear. In the case of the message "Error file Failed to save programs on USB", remove the pen drive USB and turn the device off and on again using the main switch and return to the screen above and reinsert the USB device to save the reports.
- Page 30 N.B.: If you enter invalid values, an error message is displayed When the bottle is replaced, it is necessary to enter in this screen and press the CHARGE 1000ml button. N.B.: Before pressing CHARGE 1000ml button make sure that a new bottle is inserted 7.3.3.
- Page 31 Guarantee Duration of the guarantee: a) The device MEDIBIOS plus is guaranteed for a 1 year (one year) period, starting from the date of transport document. This document will have to be kept available for any possible claims. Object of the guarantee:...
- Page 32 client as title of purchase of the object of the claim, with express exclusion of any responsibilities for indirect damages such as loss of data in computer applications, loss of profit or loss of earnings from production, interruptions of service, etc., where not contrary to applicable legal regulations on product responsibility in each individual country.
- Page 33 www.amilcarecorp.com...
Need help?
Do you have a question about the plus and is the answer not in the manual?
Questions and answers