
Related Manuals for Pellini ScreenLine SL2776

Summary of Contents for Pellini ScreenLine SL2776
- Page 1 Manuale per l’installatore Installer’ s guide Installations-Anweisungen Notice installateur SL2776 DISPOSITIVO DI COMANDO TENDA MODULO BATTERIA Blind control device Battery module...
- Page 2 La carica può anche essere coadiuvata dal pannello fotovoltaico SL1084B160 (optional). La posa dei cablaggi nel serramento deve essere effettuata da personale qualificato. Pellini SpA non risponderà di danni causati da errata installazione. INSTALLAZIONE SU SERRAMENTO Vedi pag. 50...
- Page 3 INSTALLAZIONE SU VETRO CON GUARNIZI0NE SENZA GUARNIZIONE CON GUARNIZIONE CON GUARNIZIONE SENZA GUARNIZIONE SENZA GUARNIZIONE...
- Page 4 ² 0.35 mm 7 mm ² 1 mm ATTENZIONE - WARNING motore SINISTRO/LEFT motor motore DESTRO - RIGHT motor Collegare arancio-grigio e grigio-arancio arancio-arancio e grigio-grigio Collegare Connect orange-grey and grey-orange orange-orange and grey-grey Connect COLLEGAMENTO DEL MOTORE MEDIANTE MORSETTI A SL_Cartoncino supporto modulo batteria SL2775.indd 1 30/08/19 13:47 PERFORAZIONE D’ISOLANTE...
- Page 5 ² 0.35 mm Spellare un solo filo 7 mm ² 1 mm...
-
Page 6: Ricarica Batteria
RICARICA BATTERIA Il modulo viene consegnato con la batteria parzialmente carica: è pertanto necessario provvedere inizialmente ad almeno una ricarica completa. In caso di fornitura associata a pannello fotovoltaico (optional): nel normale ciclo di funzionamento, il pannello fotovoltaico aiuta a mantenere carico il modulo batteria. In casi particolari (ad esempio: pannello fotovoltaico posizionato sul lato nord dell’... - Page 7 Con l’alimentatore collegato, il LED segnala le seguenti condizioni: • LED lampeggianti: carica in corso Aree • LED accesi fissi: carica sensibili di azionamento terminata con LED Al termine della carica staccare il cavo e riposizionare il modulo sul suo supporto. In presenza di batteria nuova possono essere necessari 2-3 cicli completi di carica/scarica...
- Page 8 Memorizzazione di un canale 1. Staccare il modulo batteria dal supporto; 2. Visualizzare sul display del radiocomando il canale richiesto, premendo i pulsanti +/-; 3. Premere il pulsante di programmazione per 3 secondi, fino all’ a ccensione ed immediato spegnimento del LED giallo; 4.
- Page 9 5. Inviare entro 10 secondi il comando di cancellazione di tutti i canali premendo contemporaneamente i pulsanti di salita e discesa di un qualsiasi telecomando (impostato su qualsiasi canale), fino al lampeggio in colore viola dei LED del modulo batteria: tutti i canali precedentemente memorizzati dal modulo batteria sono stati eliminati.
-
Page 10: Manutenzione
8. Dopo 10 secondi il modulo parte con la nuova modalità programmata. MANUTENZIONE Il prodotto non richiede manutenzione. Eventuali riparazioni devono essere effettuate da un tecnico autorizzato da Pellini SpA. N.B.: La mancata osservanza delle raccomandazioni o la manomissione del modulo batteria comportano la decadenza della garanzia. -
Page 11: Sostituzione Della Batteria
La batteria deve essere smaltita in modo sicuro. INFORMAZIONI SULL’USO CONFORME Il modulo è fornito per l’ a zionamento di tende Pellini serie “W”. Solo per uso interno. Ogni altro tipo di impiego non è conforme alla destinazione. Il produttore non si assume alcuna responsabilità per i... -
Page 12: Informazioni Sulla Sicurezza
INFORMAZIONI SULLA SICUREZZA ATTENZIONE! È fondamentale seguire e conservare le seguenti istruzioni, per la sicurezza delle persone! L’ a pparecchio non deve essere utilizzato da bambini o da persone le cui capacità fisiche, sensoriali o mentali siano ridotte. L’ a pparecchio non deve altresì essere utilizzato da persone prive di esperienza o conoscenza delle modalità... - Page 14 SL1084B160 can also be used to help charge the battery module. Wiring and installation must be performed by skilled staff only. Pellini SpA shall not be liable for any damage resulting from improper installation. INSTALLATION ON THE WINDOW FRAME...
- Page 15 INSTALLATION ON GLASS WITH GASKET FLUSH EDGE GASKET CON GUARNIZIONE CON GUARNIZIONE SENZA GUARNIZIONE SENZA GUARNIZIONE...
- Page 16 ² 0.35 mm 7 mm ² 1 mm ATTENZIONE - WARNING motore SINISTRO/LEFT motor motore DESTRO - RIGHT motor Collegare arancio-grigio e grigio-arancio arancio-arancio e grigio-grigio Collegare Connect orange-grey and grey-orange orange-orange and grey-grey Connect SL_Cartoncino supporto modulo batteria SL2775.indd 1 30/08/19 13:47 MOTOR CONNECTION THROUGH INSULATED CRIMP WIRE CONNECTORS...
- Page 17 ² 0.35 mm Strip one wire only 7 mm ² 1 mm...
-
Page 18: Recharging The Battery
RECHARGING THE BATTERY The module is delivered with the battery partially charged: it is therefore necessary to put it through at least one complete charge cycle. When supplied with a solar panel (optional): during the normal operating cycle, the solar panel helps keep the battery module charged. - Page 19 When the charger is connected, the LED will indicate the following conditions: Activation • LED pulsating: charging push buttons underway with LED • LED steadily lit: charging completed After charging, detach the cable and fit the module back onto its base plate.
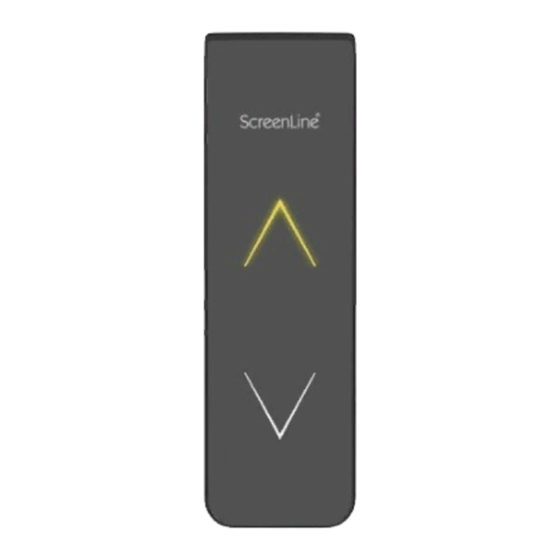
- Page 20 Memorizing a channel 1. Detach the battery module from its base plate; 2. Select the required channel on the remote control display by pressing the +/- buttons; 3. Using a sharp tool, such as the end of a paperclip, press the programming button on the battery module (see image opposite) for 3 seconds, until the yellow LED on the up arrow turns...
- Page 21 3. Within 20 seconds hook the battery module onto the base plate to be memorized; 4. The yellow LED on the up arrow will turn on and then start flashing quickly. Wait 10 seconds until it flashes more slowly; 5. Within 10 seconds send the cancellation command of all channels by pressing the up and down push buttons simultaneously on any remote control (set on any channel), until the purple LED on the battery module...
- Page 22 1. Detach the battery module from its base plate; 2. Press the programming button on the battery module for at least 10 seconds. This will restart the device, as confirmed by a steady yellow LED on the up arrow; 3. Release the button; 4.
-
Page 23: Maintenance
MAINTENANCE The product requires no maintenance. Any repairs must be made by a technician authorized by Pellini SpA. N.B.: any failure to follow the instructions or tampering with the battery module will invalidate the warranty. CLEANING Clean the product using a clean, dry, soft cloth that does not leave any residues. -
Page 24: Safety Information
INFORMATION ABOUT PROPER USE The battery module is supplied for the purpose of operating Pellini “W” blinds. For indoor use only. Any use for other than the intended purpose is to be considered improper use. The manufacturer accepts no liability for possible damage caused by improper use. - Page 25 Technical data Battery module SL2776 Battery: Lithium-ion Polymer 3.7Vdc, 9.99Wh. 2700mAh. Battery charger: Primary: 100-240Vac 50/60Hz 15VA Secondary: 5V 2A dc...
- Page 26 Das optionale Solarmodul SL1084B160 kann auch zum (bedingten) täglichen Nachladen des Batteriemoduls verwendet werden. Verkabelung und Installation am Fenster ist ausschließlich von qualifiziertem Personal durchzuführen. Pellini SpA haftet nicht für Schäden durch fehlerhafte Installation. INSTALLATION AUF FENSTERRAHMEN Siehe Seite 50...
- Page 27 INSTALLATION AUF GLAS MIT DICHTUNG OHNE DICHTUNG CON GUARNIZIONE CON GUARNIZIONE SENZA GUARNIZIONE SENZA GUARNIZIONE...
- Page 28 ² 0.35 mm 7 mm ² 1 mm WARNUNG - AVERTISSEMENT LINKS Motor/moteur GAUCHE RECHTS Motor - moteur DROIT Orange-Grau und Grau-Orange Orange-Orange und Grau-Grau anschließen anschließen Brancher orange-gris et gris-orange orange-orange et gris-gris Brancher SL_Cartoncino supporto modulo batteria SL2775.indd 2 30/08/19 13:47 ANSCHLUSS DES MOTORS ÜBER KLEMMEN MIT ISOLIERUNGSDURCHTRENNUNG...
- Page 29 ² 0.35 mm Nur ein Kabelende abisolieren! 7 mm ² 1 mm...
-
Page 30: Aufladen Des Akkus
AUFLADEN DES AKKUS Das Modul wird mit teilweise geladenem Akku ausgeliefert. Vor dem ersten Einsatz ist daher mindestens eine vollständige Aufladung erforderlich. Bei Lieferung mit Solarzelle (optional): Im Normalbetrieb dient die Solarzelle zur Unterstützung, um die Ladung des Batteriemoduls zu erhalten. In bestimmten Fällen (z.B. Positionierung der Solarzelle an der Gebäude-Nordseite oder in einem Schattenbereich, intensive Nutzung, extrem niedrige Temperaturen) kann ein zusätzliches Aufladen des Akkus... - Page 31 Bei angeschlossenem Netzteil zeigt die LED-Anzeige folgende Betriebszustände an: Sensor- • LED blinkt: Akku wird geladen flächen mit • LED leuchtet konstant: Ladevorgang abgeschlossen. Nach dem Ladevorgang das Kabel abziehen und das Modul wieder auf die Basisstation stecken. Bei neuem Akku können 2-3 vollständige Lade-/Entladezyklen Micro USB erforderlich sein, bevor der Akku...
- Page 32 des Batteriemoduls kann bis zu 26 Kanäle speichern und somit ebenso viele Adressen von einer oder mehreren Funkfernsteuerungen empfangen. Speichern eines Kanals 1. Das Batteriemodul aus der Basisstation nehmen; 2. Auf dem Display der Fernbedienung gewünschten Kanal durch Drücken der Tasten +/- einstellen; 3.
- Page 33 Fernbedienung gleichzeitig den Aufwärts- und Abwärts- Taster so lange gedrückt halten, bis die LED des Bedienungsmoduls anfängt schnell in grün zu blinken: der gewählte Kanal wurde gelöscht. Löschen aller Kanäle 1. Das Batteriemodul aus der Basisstation nehmen; 2. Die Programmiertaste am Batteriemodul für 3 Sekunden drücken, bis die LED auf dem Aufwärtspfeil nur kurz gelb aufleuchtet;...
- Page 34 1. Das Batteriemodul aus der Basisstation nehmen; 2. Die Programmiertaste am Batteriemodul für mindestens 10 Sekunden drücken. Auch in diesem Fall wird der Neustart des Batteriemoduls durch Aufleuchten der LED in gelb bestätigt. LOGIKUMKEHR Falls der Behang in umgekehrter Richtung fährt (d.h., wenn der Behang bei Drücken des “Abwärts-Sensorfeldes“...
-
Page 35: Wartung
Reinigungsmittel verwenden. Die Goldkontakte nicht mit Alkohol oder anderen Substanzen reinigen. AUSTAUSCH DES AKKUS Der Akku kann ausschließlich durch einen von Pellini SpA autorisierten Techniker ausgewechselt werden. ENTSORGUNG DES GERÄTS Gemäß den Bestimmungen aus der Richtlinie 2002/96/EG fällt das Batteriemodul unter den Geltungsbereich der WEEE... - Page 36 Der Akku muss sicher und ordnungsgemäß entsorgt werden. HINWEISE ZUM BESTIMMUNGSGEMÄSSEN GEBRAUCH Das Batteriemodul wird ausschließlich für die Betätigung der Pellini-Behänge Serie “W“ geliefert. Nur für die Anwendung in geschlossenen Räumen! Jede andere Anwendung, als der bestimmungsgemäße Gebrauch, wird als unzulässig erachtet.
- Page 37 Das Gerät ist kein Spielzeug und ist außerhalb der Reichweite von Kindern zu halten! Stellen Sie sicher, dass Kinder nicht mit den (Fern-)Bedienungsmodulen spielen! Das Gerät NICHT verwenden, wenn Reparaturen oder Einstellvorgänge erforderlich sind. Eventuelle Reparaturen NICHT selber durchführen: sie dürfen nur von befugtem Personal durchgeführt werden.
- Page 38 SL1084B160 (optionnel). Le câblage dans le cadre de la fenêtre doit être effectué exclusivement par un personnel qualifié. Pellini SpA décline toute responsabilité en cas de dommage dû à un montage incorrect. MONTAGE SUR CADRE DE FENÊTRE Voir page 50...
- Page 39 MONTAGE SUR VERRE AVEC JOINT D’ÉTANCHÉITÉ SANS JOINT D’ÉTANCHÉITÉ CON GUARNIZIONE CON GUARNIZIONE SENZA GUARNIZIONE SENZA GUARNIZIONE...
- Page 40 ² 0.35 mm 7 mm ² 1 mm WARNUNG - AVERTISSEMENT LINKS Motor/moteur GAUCHE RECHTS Motor - moteur DROIT Orange-Grau und Grau-Orange Orange-Orange und Grau-Grau anschließen anschließen Brancher orange-gris et gris-orange orange-orange et gris-gris Brancher SL_Cartoncino supporto modulo batteria SL2775.indd 2 30/08/19 13:47 CONNEXION MOTEUR AVEC DES CLIPS À...
- Page 41 ² 0.35 mm Dénuder un seul fil 7 mm ² 1 mm...
-
Page 42: Recharge De La Batterie
RECHARGE DE LA BATTERIE Le module est livré avec la batterie partiellement chargée. Avant la première utilisation, procéder à un rechargement complet de la batterie. En cas de fourniture avec module photovoltaïque (en option): en fonctionnement normal, le module photovoltaïque sert d’ a ppoint pour stabiliser la charge du module batterie. - Page 43 3. Enfichez la prise micro USB de l’ a limentation sur l’ e ntrée Zones sensibles correspondante du module. d’actionne- Lorsque l’ a limentation ment avec branchée, le témoin lumineux à DEL indique les états de fonctionnement suivants: • DEL clignotantes: chargement en cours •...
- Page 44 récepteur radio pour télécommander le store. Une carte de transmission radio à 99 canaux est utilisée pour la télécommande. Le récepteur radio situé dans le module batterie peut mémoriser jusqu’ à 26 canaux et recevoir autant d’ a dresses d’une ou de plusieurs télécommandes. Mémorisation d’un canal 1.
- Page 45 d’ e ffacement canal désiré appuyant simultanément sur les touches de montée et descente de la télécommande, jusqu’ à ce que les DEL vertes du module batterie clignotent rapidement: le canal sélectionné a été effacé. Effacement de tous les canaux 1.
- Page 46 Si la panne persiste, il est possible de forcer manuellement le redémarrage du module: 1. Détachez le module batterie de son embase; 2. Appuyez sur le bouton de programmation du module batterie pendant au moins 10 secondes. Dans ce cas également, le redémarrage du module batterie sera confirmé...
-
Page 47: Entretien
L’ a ppareil est exempt de maintenance. D’éventuelles réparations peuvent être exclusivement effectuées par un spécialiste agréé par la société Pellini SpA. N.B.: le non-respect de ces consignes ou l’utilisation non conforme du module batterie entraîne la perte de la garantie. -
Page 48: Consignes De Securité
INSTRUCTIONS CONCERNANT L’UTILISATION CONFORME Le module batterie est fourni pour l’ a ctionnement des stores Pellini, série «W». POUR USAGE INTÉRIEUR UNIQUEMENT. Toute autre utilisation est considérée comme non conforme. Le fabricant décline toute responsabilité pour tout endommagement imputable à... - Page 49 NE PAS laisser le module sans surveillance pendant la recharge de la batterie. NE PAS jeter les batteries usagées au feu: risque d’ e xplosion! NE PAS ouvrir, percer ni court-circuiter les batteries. Données techniques Batteriemodul SL2776 Module batterie SL2776 Batterie: polymère lithium-ion 3,7 Vcc, 9,99 Wh.
- Page 50 DIMA DI FORATURA DRILLING TEMPLATE BOHRSCHABLONE GABARIT DE PERÇAGE...
- Page 52 Via Fusari, 19 • 26845 Codogno • Lo • Italia T. +39 0377 466411 • F. +39 0377 436001 info@pellini.net - www.pellini.net This project has received funding from the European Union’ s Horizon 2020 research and innovation programme under grant agreement Nº 768766.
Need help?
Do you have a question about the ScreenLine SL2776 and is the answer not in the manual?
Questions and answers
1 dei moduli batteria SL2776 rev.02 delle mie veneziane non si carica più a soli 8 mesi dall'installazione, appena inserisco il cavo si accendo le due frecce verdi **** per pochi secondi, poi la freccia "su" di colore giallo e poi si spegne tutto. cosa può essere?