Table of Contents
Advertisement
Quick Links
Advertisement
Table of Contents

Subscribe to Our Youtube Channel
Related Manuals for Rain Bird PT5002

Summary of Contents for Rain Bird PT5002
- Page 1 PT5002 Flow Monitor User Manual Ver: 1.3.3...
- Page 2 Industrial Flow Computer, PT5002 Flow Monitor Page ii June 2020...
-
Page 3: Table Of Contents
Installing the PT5002 � � � � � � � � � � � � � � � � � � � � � � � � � � � � � � � � � � � � � �... - Page 4 Industrial Flow Computer, PT5002 Flow Monitor Configuring a Flow Meter � � � � � � � � � � � � � � � � � � � � � � � � � � � � � � � � � � � � � � 29 Configuring Outputs �...
-
Page 5: Scope Of This Manual
This symbol signifies that the PT5002 may be powered by a DC power supply� Acceptable DC input voltage range is: 10…40V DC�... -
Page 6: Safety Instructions
Safety Instructions WARNING • LIFE SUPPORT APPLICATIONS: THE PT5002 IS NOT DESIGNED FOR USE IN LIFE SUPPORT APPLIANCES, DEVICES, OR SYSTEMS WHERE MALFUNCTION OF THE PRODUCT CAN REASONABLY BE EXPECTED TO RESULT IN A PERSONAL INJURY. CUSTOMERS USING OR SELLING THESE PRODUCTS FOR USE IN SUCH... -
Page 7: Description
Unlatch Relays and Reset Totalizers Relay Control Outputs The PT5002 has two relay outputs, a mechanical Form C switch and a solid state form A switch� All control functions are always available by dedicated relay outputs� Unneeded outputs may be left disconnected or disabled within the firmware�... -
Page 8: Power Supply
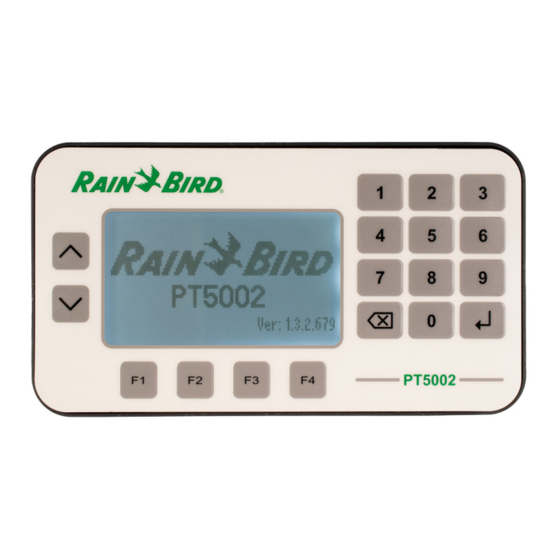
All information is stored in EEPROM memory and will not be lost in the event of power failure� Display Information The PT5002 has a large transflective LCD with a bright LED backlight that displays symbols and digits for measuring units, status information and keyword messages� “Units” on page 27�... -
Page 9: Mounting Options
Installing the PT5002 Mounting Options The PT5002 can be mounted on a wall, shelf or instrumentation panel� Wall-mount units are shipped in a NEMA 4X enclosure, ready to mount� Panel-Mount Installations OTE: Mounting clips can accommodate a maximum panel thickness of 1�5 in� (38�1 mm)�... - Page 10 (238.25 mm) (222.25 mm) 9.65 in. (242.83 mm) 9.38 in. (238.25 mm) Figure 3: PT5002 in an enclosure To install the PT5002 on a wall, secure the enclosure to the wall with four mounting screws (customer-supplied)� Page 10 June 2020...
-
Page 11: Wiring The Pt5002
CONNECTIONS HAVE BEEN COMPLETED. Figure 4: One sensor input, analog output THE PT5002 IS MICROPROCESSOR CONTROLLED. IT IS VERY IMPORTANT THAT THE POWER SUPPLY BE FREE OF ELECTRICAL NOISE. AVOID USING POWER LINES THAT FEED HEAVY LOAD ELECTRICAL DEVICES SUCH AS PUMPS AND MOTORS. -
Page 12: Terminal Connector Descriptions
Wiring the PT5002 Terminal Connector Descriptions Power Input The PT5002 power input is internally fused and protected from common line noise by a filtering network� TB1 (POWER) Function Connector Pin Reference Pin AC Power DC Power Line (L) Positive (L+) - Page 13 Table 3: Communications input Scaled Outputs The PT5002 has two scaled output channels for use in applications requiring remote data collection and/or monitoring� The outputs are firmware configurable, and can be tied to parameters such as rates or total volume�...
- Page 14 Connect the blue/ white wire of the sensor port to terminal 33 on TB7� Relay Output Connectors The PT5002 has two relay output terminals� One Form C and One Form A TB3 (RELAY 1) - Form C Reference Pin Connector Pin...
- Page 15 TB4)� OTE: Wire master valve common to power supply common� Flow Sensor Inputs The PT5002 is designed to accept pulses from open collector transistors or dry contact closure transmitters� Before making any connections: • Always use shielded wire to protect the signal line from external noise (ground shield to terminal #3)�...
- Page 16 Wiring the PT5002 Flow Sensor From the flow sensor, connect red wire to terminal 20 and the black wire to terminal 21 on TB5� Wind Speed Sensor (Anemometer) From the Anemometer, connect red wire to terminal 19, the white wire to...
-
Page 17: Operator Interface
To see the off-screen items, press UP/DOWN to scroll through the entire list� THE PT5002 MAY BE OPERATED ONLY BY PERSONNEL WHO ARE AUTHORIZED AND TRAINED BY THE FACILITY. OBSERVE ALL INSTRUCTIONS IN THIS MANUAL. OBEY ALL SAFETY PRECAUTIONS MENTIONED IN “SAFETY CONSIDERATIONS”... -
Page 18: Icon Functionality
Cycle through alpha characters Enter a decimal point Cycle through special characters Reveal raw and calculated info/sensor data for the PT5002 Clear the selected value or cancel edit (press twice, consecutively) Enter conversion factor for custom unit of measure Change selected value to positive ( + ) or negative ( – ) Set totalizer rollover point Appears on Home screen for various events�... -
Page 19: Numeric Editing
Move cursor Return to to the right previous menu Existing Value Move cursor to the left Save value PT5002 Value Return to Make entry Add a Clear entire new value or parent setup positive or cancel edit (press twice, consecutively) decimal... -
Page 20: Selection/Enumeration Editing
Operator Interface Selection/Enumeration Editing OTE: Depending on the menu, the selection during an enumeration style edit may appear different� Save/Select PT5002 Move up or down in Create a Enter Set totalizer menu custom conversion rollover point Return to label factor... -
Page 21: Navigating The Menus
Press UP/DOWN to toggle views on the Home screen� • Flow Rate • Flow Total PT5002 Figure 9: Single display • Flow Rate and Flow Total PT5002 Figure 10: Dual display Press F1 to enter the Main menu to access Setup and System Information, or press F2 to enter the INFO/SENSOR DATA menu�... -
Page 22: Menu Structure
Operator Interface Menu Structure The available menu items depend on the PT5002 configuration� Each menu item is explained in detail in the following pages� MAIN MENU Home Screen System System Setup Display Resets Information Language Reset Flow Total Contrast Reset Faults... -
Page 23: Info/Sensor Data
Info/Sensor Data INFO/SENSOR DATA The PT5002 features a quick method to view measured data transmitting to and from the device� You can use the data for informational purposes or for troubleshooting� The type of data displayed can include raw input frequency, relay status or calculated data, such as flow rate�... -
Page 24: System Information
System Information SYSTEM INFORMATION The System Information menu contains build information specific to the configuration of the unit� To view your system information, navigate to System Information from the Main menu� Item Description VENDOR Manufacturer of the product MODEL Product family/series FUNCTION For factory/diagnostic purposes only P�N�... -
Page 25: Basic Setup
Basic Setup BASIC SETUP Display Use this menu to change the display settings for Language, Contrast or Brightness� 1� Navigate to Display from the main menu� 2� Press UP/DOWN to scroll through the available display parameters, then press ENTER� 3� Scroll through available options, then press ENTER to select and save your changes�... -
Page 26: Passcode Setup
2� Press UP/DOWN to scroll to UNLATCH R1 or UNLATCH R2, then press ENTER� Passcode Setup Enabling a Passcode PT5002 units are shipped without passcode protection enabled� Passcodes can be optionally configured for Setup and Reset functions� To enable a passcode: 1� Navigate to SETUP > PASSCODE SETUP�... -
Page 27: Units
Basic Setup Disabling a Passcode 1� Navigate to SETUP > PASSCODE SETUP� 2� Press UP/DOWN to scroll to the passcode you want to delete, then press F4 (clear)� 3� On the confirmation screen, press ENTER to confirm removal of the passcode� Units Use the UNITS menu to configure units of measure, display precision (resolution) and radix (comma or decimal point)�... - Page 28 Basic Setup Changing Custom Units for Rate or Total Measurement 1� Follow the procedure outlined in “Unit of Measure” on page 27 to enter the Unit of Measure menu for a parameter� 2� Press UP/DOWN to choose CUST, then press ENTER� OTE: The display populates with additional icons that need to be modified for custom units�...
-
Page 29: Advanced Setup
"Flow Sensor Inputs" on page 15 for more details on flow type selection for Rain Bird products� Use this menu to select the flow meter that the device is connected to� 1� Navigate to SETUP > ADVANCED SETUP > SENSOR INPUTS�... -
Page 30: Configuring Outputs
Advanced Setup Configuring Outputs Scaled Outputs: Output Mode Use this menu to change the mode of one or both scaled outputs� The mode defines the behavior of the output� 1� Navigate to SETUP > ADVANCED SETUP > SCALED OUTPUTS 2� Press UP/DOWN to scroll to an output mode, then press ENTER� 3�... - Page 31 Advanced Setup Relay Outputs: Relay Mode Use this menu to change the mode of one or both relay outputs� The mode defines the behavior of the output� 1� Navigate to SETUP > ADVANCED SETUP > RELAY OUTPUTS. 2� Press UP/DOWN to scroll to an output mode, then press ENTER� 3�...
- Page 32 Advanced Setup Output Mode Option Description OUTPUT SOURCE Parameter assignment (such as Flow Rate or Temperature) Instructs the device to energize the relay if this value reached/ LOW SETPOINT exceeded� This value is linked to the OUTPUT SOURCE and its unit of measure (for example, Flow Rate in GPM) Creates a window/zone above the LOW SETPOINT value where HYSTERESIS LO...
-
Page 33: Configuring Digital I/O
Advanced Setup Configuring Digital I/O The PT5002 has remote reset capabilities for relays and totalizers through any one of six channels� All six channels are input-only and can be configured for any combination of the following� Option Description DISABLED The I/O channel will have no function... -
Page 34: Configuring Communications
Advanced Setup Configuring Communications The Communications menu configures the device to communicate to other systems via BACnet� The available communication settings vary based on Network Type� Figure 19: BACnet communications menu 1� Navigate to SETUP > ADVANCED SETUP > COMMUNICATIONS� 2�... -
Page 35: Troubleshooting
The problem may also be in the flow meter, valve, pump or other piece of equipment� Be sure that all other equipment is functioning properly� The PT5002 Flow Monitor is extensively tested at the factory before shipment� However, the unit may get damaged during transit or installation�... -
Page 36: Return Policy
Please call 877�727�8772 to obtain an RGA number before you return any items to Rain Bird� A mailing address and additional instructions will be emailed to you after calling for your RGA number�... -
Page 37: Specifications
Specifications SPECIFICATIONS Input range: 10…40V DC and 9…28V AC RMS (50…60 Hz) Maximum power consumption: 8 Watts (power supply must provide 8 watts at minimum) Power Supply Isolated from power ground Over-voltage, transient and reverse polarity protected Input Range: 0�3 Hz…10 kHz One (1) independent channel Configurable as square wave 0…30V pulse with 2�5V threshold Configurable as sine wave, zero-centered with 45 mV threshold... - Page 38 Specifications Isolated coil drivers Over-voltage, transient and reverse polarity protected Load Resistive Rated Carry 5 A (N�C� or N�O�) Current Maximum 250V AC, 30V DC Switching Voltage Form C Relay Minimum 10 mA at 5V DC Permissible Load Relay Outputs Coil Rating 5…24V DC Life Expectancy...
- Page 39 Specifications Pollution Degree Altitude Up to 2000 m (6561 ft) Restriction Over-Voltage Category II (CAT II) Rating Environmental Ambient Ratings Temperature 32…130° F (0…55° C) Range Storage Temperature –40…160° F (–40…70° C) Range Humidity 0…85%, non-condensing Panel Mount 1�25 lb (0�57 kg) Weights Wall Mount (Approx.)
-
Page 40: Standards And Certifications
Industrial Flow Computer, PT5002 Flow Monitor STANDARDS AND CERTIFICATIONS Agency Approval/Standards • CE Marked for Low Voltage Directive and RoHS EMI/EMC Compliance Conducted and Radiated Emissions per Class A, Group 1 CISPR11:2009 / EN55011 2/4 kV - Contact Discharge, IEC 61000-4-2:2008...
Need help?
Do you have a question about the PT5002 and is the answer not in the manual?
Questions and answers