Table of Contents
Advertisement
Advertisement
Table of Contents
Troubleshooting

Subscribe to Our Youtube Channel
Summary of Contents for IXIA XGS2-HS
- Page 1 XGS2 Chassis Platform Getting Started Guide...
- Page 2 This publication may not be copied, in whole or in part, without Ixia's consent. Ixia, the Ixia logo, and all Ixia brand names and product names in this document are either trademarks or registered trademarks of Ixia in the United States and/or other countries. All other trademarks belong to their respective owners.
- Page 3 (d) Any other rights or limitations regarding the use, duplication, or disclosure of this computer software and/or software technical data are to be expressly stated in, or incorporated in, the applicable contract. (e) This notice shall be marked on any reproduction of this computer software, in whole or in part. (End of notice) IxOS 8.20 EA, December 2016...
-
Page 4: Contacting Ixia
Web site: www.ixiacom.com 26601 W. Agoura Rd. General: info@ixiacom.com Calabasas, CA 91302 Investor Relations: ir@ixiacom.com +1 877 FOR IXIA (877 367 4942) training@ixiacom.com Training: +1 818 871 1800 (International) support@ixiacom.com Support: (FAX) +1 818 871 1805 +1 818 595 2599 sales@ixiacom.com... - Page 5 Outer Ring Road, Varthur Hobli Kadubeesanahalli Village Bangalore East Taluk Bangalore-560 037, Karnataka, India +91 80 42862600 China Ixia Technologies (Shanghai) Company Ltd support-china@ixiacom.com Support: Unit 3, 11th Floor, Raffles City, Beijing 400 898 0598 (Greater China Region) Beijing, 100007 P.R.C.
-
Page 6: Table Of Contents
Unpack and Connect the Unit Rack Mounting and Ventilation Warning Installing the XGS2 on a Flat Surface Record Product Information XGS2-HS Configuration Connecting the XGS2-HS Processor module Initial Configuration of XGS2-HS System Administration of XGS2-HS XGS2-SD Configuration Connecting the XGS2-SD Processor module... - Page 7 Initial Configuration XGS2-SD Ixia Test Applications Support Ixia Applications support for XGS2-HS Ixia Applications support for XGS2-SD Common Administrative Tasks Start a Windows Remote Desktop Connection Start an SSH Session Start a Serial Session Reboot the System Shut Down the System...
-
Page 8: About This Guide
Provides information that is needed to avoid potential harm to equipment or the environment. Provides information needed to prevent certain harm to a person, piece of equipment, or the environment. XGS2 on ixiacom.com Ixia XGS2 Datasheet , plus related information, is available from the Ixia website: www.ixiacom.com/products/XGS2 Chassis Platform About This Guide | 8... - Page 9 Additional information Ixia Platform Reference Guide Refer to the for additional information about the XGS2 chassis platform. 9 | About This Guide...
-
Page 10: Xgs2 Chassis Platform Overview
XGS2 Chassis Platform Overview This section provides an overview of the XGS2 chassis platform, the physical units and the indicators and controls on them. In this section: XGS2 Processor Modules Front Panel Indicators and Controls Product Specifications... -
Page 11: Xgs2 Processor Modules
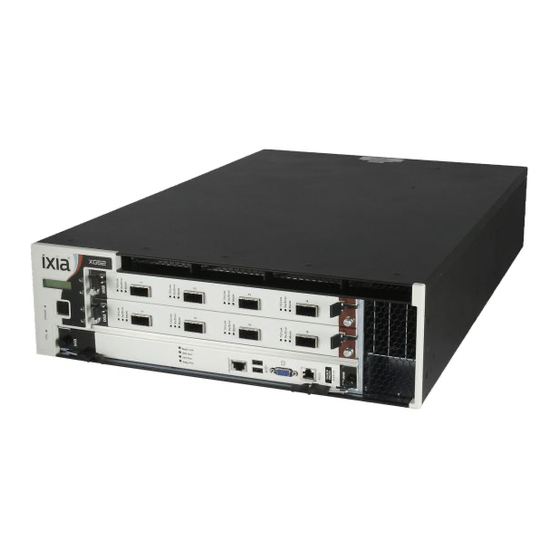
XGS2 is the next-generation benchtop chassis platform that brings higher density, modular service capability, and efficient air flow for rack mount applications. This chassis platform supports application and security testing with the Ixia IxLoad™ , IxNetwork™ and BreakingPoint™ software products. - Page 12 The XGS2-HS processor module is shown below. XGS2 Chassis Platform Overview | 12...
- Page 13 The chassis is shown below: Chassis Front View 13 | XGS2 Chassis Platform Overview...
- Page 14 Chassis Rear View XGS2 Chassis Platform Overview | 14...
-
Page 15: Front Panel
Front Panel The XGS2-HS front panel: The XGS2-SD front panel: 15 | XGS2 Chassis Platform Overview... -
Page 16: Indicators And Controls
Indicators and Controls Power LED Indicates the current power state: Green: the system is ON and all power supplies are operational. Off: the system is powered off or one or more power supplies are not operational. Power button Power button: Power cycles the unit: Short press (0.5 to 2 seconds): Graceful system shutdown. - Page 17 Chassis 3U Rack Mountable Regulatory Compliance UL File #: E255262 Safety North America UL 60950-1, 2nd Edition CSA C22.2 No. 60950-1, 2nd Edition Europe EN60950-1, 2nd Edition International CB Scheme: IEC 60950-1:2nd Edition EMI/EMC North America FCC part 15, Class A (USA) 17 | XGS2 Chassis Platform Overview...
- Page 18 ICES-003 Issue 4, Class A (Canada) Europe EN 55022:2010 +C1 (Emissions, Harmonics, Flicker) EN 55024:2010 (Immunity) International IEC/EN 61000-3-2:2009 Harmonic emissions IEC/EN 61000-3-3:2008 Voltage Fluctuations & Flicker Immunity IEC/EN 61000-4-2:2008 Electrostatic Discharge Immunity IEC/EN 61000-4-3:2006 Radiated Immunity IEC/EN 61000-4-4:2004 +A1:2010 Transient/Burst Immunity IEC/EN 61000-4-5:2005 Surge Immunity IEC/EN 61000-4-6:2008 Conducted Radio Frequency Immunity IEC/EN 61000-4-11:2004 Voltage Dips, Interruptions and Variations Immunity...
- Page 19 Thermal Operating Temp.: 0° to 40° C Operating humidity: 10 to 85% (RH), non-condensing Input Power INPUT 1/ALIMENTATION 1: 100-240VAC, 50/60Hz, 8A INPUT 2/ALIMENTATION 2: 100-240VAC, 50/60Hz, 8A INPUT 3/ALIMENTATION 3: 100-240VAC, 50/60Hz, 8A Inputs 1 and 2 are required for normal operation. Input 3 is optional. 19 | XGS2 Chassis Platform Overview...
-
Page 20: Xgs2 Chassis Physical Setup
XGS2 Chassis Physical Setup This section describes the tasks needed to physically set up the XGS2-HS and XGS2-SD units for operation. In this section: Unpack and Connect the Unit Rack Mounting and Ventilation Warning Installing the XGS2 on a Flat Surface... -
Page 21: Unpack And Connect The Unit
XGS2 Getting Start Guide Any optional items that you ordered (such as transceivers and cables) Ixia Technical Support Contacts on page 86 If any items are missing or damaged, contact Ixia Support. Refer to for contact information for each Ixia region. - Page 22 Power LED indicator: Green indicates proper operation. LAN port LED indicator: Green indicates proper operation. Install XGS2 Chassis The installation procedure for both XGS2-HS and XGS2-SD chassis are the same. The following sections describe the procedure. XGS2 Chassis Physical Setup | 22...
- Page 23 Insert the controller module in the lower slot in front of the chassis. Ensure that the module is fully seated. Ensure that the thumbscrews are screwed in properly. 23 | XGS2 Chassis Physical Setup...
- Page 24 Take the Sync module and insert it in its slot on the back of the chassis. XGS2 Chassis Physical Setup | 24...
- Page 25 When the Sync module is fully inserted, tighten its two screws. 25 | XGS2 Chassis Physical Setup...
- Page 26 Insert a power supply in one of the power supply slots. XGS2 Chassis Physical Setup | 26...
- Page 27 Push the power supply until you hear a click and it is fully seated in its slot. 27 | XGS2 Chassis Physical Setup...
- Page 28 Repeat the same for the second supply. If you have purchased the optional redundant power supply, you may have to repeat this step after removing the empty slot cover. XGS2 Chassis Physical Setup | 28...
- Page 29 The fully assembled chassis’s rear view looks like this. 29 | XGS2 Chassis Physical Setup...
- Page 30 If you need rack mounting, attach the two rack mounts. Tighten the rack mounts using the screws provided. Depending on your rack equipment placement require- ment, you can attach the rack mounts to the front of the chassis, or at an offset from the chassis front. Rack Mounts attached to the front of the chassis XGS2 Chassis Physical Setup | 30...
-
Page 31: Rack Mounting And Ventilation Warning
Rack Mounts attached at an offset from the chassis front Use the provided power cords to connect the chassis to the electrical power source. Rack Mounting and Ventilation Warning The XGS2 chassis are shipped with brackets and screws for rack mounting and rubber feet for stationing on a flat surface. 31 | XGS2 Chassis Physical Setup... -
Page 32: Installing The Xgs2 On A Flat Surface
Installing the XGS2 chassis in an Equipment Rack The equipment can be installed in most standard 19-inch racks and Telco two-post racks. To install the unit in a rack, complete the fol- lowing steps: Use the supplied screws to attach a mounting bracket to each side of the unit. Position the unit in the rack and align the holes in the mounting bracket with the holes in the rack. - Page 33 uneven mechanical loading. D) Circuit Overloading - Consideration should be given to the connection of the equipment to the supply circuit and the effect that overloading of the circuits might have on overcurrent protection and supply wiring. Appropriate consideration of equipment name- plate ratings should be used when addressing this concern.
-
Page 34: Record Product Information
The Host Name, Part Number, and Windows Product Key are printed on the label on the back of the unit. The IP addresses are either assigned by the network's DHCP server or statically assigned by a system administrator. Flix OS and BreakingPoint IP addresses are needed for XGS2-HS chassis only. Host Name:... -
Page 36: Xgs2-Hs Configuration
XGS2-HS Configuration This section describes the tasks needed to configure the XGS2-HS chassis. In this section: Connecting the XGS2-HS Processor module Initial Configuration of XGS2-HS System Administration of XGS2-HS... -
Page 37: Connecting The Xgs2-Hs Processor Module
Connecting the XGS2-HS Processor module This section describes the process of connecting the XGS2-HS Processor module. To connect the module you need to do the following: Connect the RJ45 management port (4) as the designated management port to your lab management switch. -
Page 38: Initial Configuration Of Xgs2-Hs
There are two management IP addresses required (from the same management subnet) for the operation of the High Performance Processor Mod- ule: IP used by the system controller for general management tasks and used for Ixia Web-based user interface (also used to launch Break- ingPoint web user interface). - Page 39 On the monitor connected to the VGA port, the basic login screen is prompted. To have access to the System Admin Screen (system con- figuration menu for configuring various system-level parameters) use the following system credentials: username: admin password: admin 39 | XGS2-HS Configuration...
- Page 40 System Admin Screen Once the system credentials are correctly inserted, the is displayed. XGS2-HS Configuration | 40...
- Page 41 Configure the general Ixia Web UI IP address: 41 | XGS2-HS Configuration...
- Page 42 : make sure to have an active DHCP server running on the management subnet (this is also the default setting). Static : manually configure the Ixia Web UI IP address and netmask. Configure the IxOS Windows IP address: 3 Quit...
- Page 43 , use the following hotkey combination: CTRL+ALT+F2. Then use the same credentials as mentioned at step 2: username: admin admin password: To apply the new settings, from the System Admin Screen choose option 4 Reboot system (graceful) 43 | XGS2-HS Configuration...
-
Page 44: System Administration Of Xgs2-Hs
Windows IxOS IP RDP using the address System Admin Screen Remote access to the is available as well using SSH on the above configured Ixia Web UI IP address, port 8022, admin/admin and using the same credentials. 5 Observe sensors... - Page 45 You need to gracefully shutdown the system before powering off the chassis. Prior to this, a manual shutdown of the Windows IxOS machine is also recommended. 45 | XGS2-HS Configuration...
-
Page 46: Xgs2-Sd Configuration
XGS2-SD Configuration This section describes the tasks needed to configure the XGS2-SD chassis. In this section: Connecting the XGS2-SD Processor module Initial Configuration XGS2-SD... -
Page 47: Connecting The Xgs2-Sd Processor Module
Connecting the XGS2-SD Processor module This section describes the process of connecting the XGS2-SD Processor module. To connect the module you need to do the following: Insert and remove the Processor Module. Connect the RJ45 management port (4) as the designated management port to your lab management switch. Connect the VGA (2) and USB (3) ports to the KVM infrastructure (or to a local monitor, mouse, and keyboard). -
Page 48: Initial Configuration Xgs2-Sd
Connect the monitor, USB mouse and keyboard, and then start the chassis. When the chassis boots up, log on to the chassis. ixia The user name is and the password is the CPU module serial number found on the sticker located at the back of the chassis. - Page 49 View your active networks Access type: Internet Status Under , click the local area connection under . The window appears. 49 | XGS2-SD Configuration...
- Page 50 Properties Internet Protocol Version 4 (TCP/IPv4) Click . Select XGS2-SD Configuration | 50...
- Page 51 Properties Use the following IP address Click and then click the option. Enter the IP address, subnet mask and default gateway. 51 | XGS2-SD Configuration...
-
Page 52: Ixia Test Applications Support
Ixia Test Applications Support This section provides the details of the Ixia Test Applications supported by XGS2 chassis platform. In this section: Ixia Applications support for XGS2-HS Ixia Applications support for XGS2-SD... -
Page 53: Ixia Applications Support For Xgs2-Hs
This section provides the details of the Ixia Test Applications supported by XGS2-HS chassis. IxLoad When running the IxLoad client application to add your new XGS2-HS chassis in the Chassis Chain pane, the IxOS Windows machine IP address should be used:... - Page 54 Select in the navigation pane. Add Chassis Click the icon (in the Port Tools ribbon). Enter the XGS2 host name or IP address. Assign ports from the XGS2 system to the current IxNetwork test scenario. Ixia Test Applications Support | 54...
- Page 55 55 | Ixia Test Applications Support...
- Page 56 BreakingPoint To access the BreakingPoint web-based UI, connect to the Ixia Web UI IP address using your browser and launch a new BreakingPoint session: It is recommended that you periodically check the Ixia compatibility matrix ( http://www.ixiacom.com/support/product_compatibility_ matrix/ ) to determine the correct Ixia software application versions that are validated for interoperability.
-
Page 57: Ixia Applications Support For Xgs2-Sd
Ixia Applications support for XGS2-SD This section provides the details of the Ixia Test Applications supported by XGS2-SD chassis. IxLoad When running the IxLoad client application to add your new XGS2-SD chassis in the Chassis Chain pane, the IxOS Windows machine IP address should be used: 57 | Ixia Test Applications Support... - Page 58 Select Ports in the navigation pane. Click the Add Chassis icon (in the Port Tools ribbon). Enter the XGS2 host name or IP address. Assign ports from the XGS2 system to the current IxNetwork test scenario. Ixia Test Applications Support | 58...
- Page 59 59 | Ixia Test Applications Support...
- Page 60 It is recommended that you periodically check the Ixia compatibility matrix ( https://wiki.ixi- acom.com/pages/viewpage.action?title=Compatibility+Matrix&spaceKey=NetworkInfrastructureTestHome ) to determine the cor- rect Ixia software application versions that are validated for interoperability. Ixia Test Applications Support | 60...
-
Page 62: Common Administrative Tasks
Common Administrative Tasks This topic describes, for reference, some of the common tasks that system administrators will perform on the XGS2 system. In this section: Start a Windows Remote Desktop Connection Start an SSH Session Start a Serial Session Reboot the System Shut Down the System... -
Page 63: Start A Windows Remote Desktop Connection
In the Windows Security window, provide the following credentials: User name: ixia Password: the last part of the host name. For example, if the host name is xxxx-X1234567, the password will be X1234567. -
Page 64: Start An Ssh Session
Start an SSH Session You can access the XGS2 Administrative Console using either a serial connection or an SSH session. This applies to the XGS2-HS chassis model only. To start an SSH session: Open an SSH session from your terminal emulation application, specifying: The FlixOS IP address as the Host Name. - Page 65 User ID: admin Password: admin The Administrative Console presents the main menu. For example: Once logged in, you can perform any of the available tasks. 65 | Common Administrative Tasks...
-
Page 66: Start A Serial Session
Start a Serial Session You can access the XGS2 Administrative Console using either a serial connection or an SSH session. This applies to the XGS2-HS chassis model only. To start a serial session: Open the serial connection from your terminal emulation application. - Page 67 User ID: admin Password: admin The Administrative Console presents the main menu. For example: Once logged in, you can perform any of the available tasks. 67 | Common Administrative Tasks...
-
Page 68: Reboot The System
Reboot the System The Administrative Console provides options for restarting the XGS2 chassis, Using the console is the recommended approach for this activity. Open a serial connection or an SSH connection from your terminal emulation application. The Administrative Console prompts you to log in. Enter the following credentials: User ID: admin Password: admin... - Page 69 User ID: admin Password: admin The Administrative Console presents the main menu. Select option (Halt system (graceful)) option: Enter Press to initiate the graceful shutdown. XGS2 executes an orderly shut down of all processes, then powers-down the system. The "forced" shutdown option should be used only in cases where an abnormal and immediate termination of operations is the only viable option.
-
Page 70: Troubleshooting
This section provides guidance for interpreting the operational status of your XGS2 unit, and troubleshooting issues that may arise. Ixia Technical Support Contacts on page 86 If you need assistance, contact Ixia Technical Support using the contact information provided in In this section:... -
Page 71: Led Indicators
The XGS2 chassis provides LED indicators that provide a visual presentation of the operational status of the device and its individual ports. LED/LCD Display The XGS2-HS and XGS2-SD chassis have front panel LEDs for each load module slot. The following table describes the purpose and meaning of each indicator:... -
Page 72: Ip Addressing Issues
Color Description On the chassis front face CPU card Slot Yellow The backplane is initializing Green The backplane has initialized Processor module - front Stdby Pwr LED Green 5V Stand-by power is available panel CPU Pwr LED Green CPU Card power is available HDD Act LED Bkpln Link LED Green... - Page 73 the WebUI address (applicable for the HS model only) the IxOS address (applicable for both the HS and SD models of the chassis) If your network implements a DHCP service, the XGS2 IP addresses will automatically be assigned by that service, unless you choose to assign static IP addresses instead.
-
Page 74: Troubleshooting Licensing Issues
L2 switches: Check for intermediate L2 switches that are configured to allow only a single L2 MAC per interface. If a switch so configured is present in your network, FlixOS will retrieve an IP address. This is applicable for the XGS2-HS chassis only. -
Page 75: Appendix: Safety Instructions
SAFETY: General Safety CAUTION: The power supplies in your system may produce high voltages and energy hazards, which can cause bodily harm. Only Ixia service technicians are authorized to remove the cover and access any of the components inside the system. - Page 76 It is your responsibility to ensure that the final combination of equipment and rack complies with all applicable safety standards and local electric code requirements. Ixia disclaims all liability and warranties in connection with such combinations. Rack kits are intended to be installed in a rack by trained service technicians.
- Page 77 80 percent of the ampere ratings limit for the extension cable or power strip. If any of the following conditions occur, unplug the equipment from the electrical outlet and replace the part or contact Ixia:...
- Page 78 Your system uses a lithium coin-cell battery. These batteries are long-life batteries, and it is very possible that you will never need to replace them. However, should you need to do so, please contact Ixia to arrange for the replacement of the battery.
- Page 79 To help avoid the potential hazard of electric shock, do not connect or disconnect any cables or perform maintenance or reconfiguration of your equipment during an electrical storm. SAFETY: Equipment with Laser Devices CAUTION: Do not look directly into a fiber-optic transceiver or into the end of a fiber-optic cable.
-
Page 80: Safety Instructions (French)
AVERTISSEMENT : les sources d’alimentation de votre système peuvent produire une tension élevée et des dangers électriques qui peuvent causer des blessures corporelles. Seuls les techniciens de service d’Ixia sont autorisés à retirer le couvercle et à accéder aux composants à... - Page 81 Il vous incombe d’assurer que la combinaison finale d’équipements et de bâtis soit conforme à toutes les normes de sécurité applicables et aux exigences du code local en matière d’électricité. Ixia décline toute responsabilité et toutes les garanties relatives à de telles combinaisons. Les ensembles de bâtis sont prévus pour être installés par un technicien de service formé.
- Page 82 équipements branchés ’à la rallonge ou à la barrette d’alimentation n’excède pas 80 pour cent de l’ampérage nominal maximal ’de la ral- longe ou de la barrette d’alimentation. Si l’une des situations suivantes se produit, débrancher l’équipement de la prise de courant et remplacer la pièce ou contacter Ixia : Le câble d’alimentation, ’la rallonge ou la fiche est endommagé.
- Page 83 Votre système utilise une pile bouton au lithium. Ces piles sont à longue durée et il est très possible que vous n’ayez jamais à les remplacer. Toutefois, si jamais vous deviez le faire, veuillez contacter Ixia pour prendre les dispositions nécessaires au remplacement de la pile.
- Page 84 AVERTISSEMENT : ouvrir ou retirer le couvercle de cet équipement peut vous exposer à un risque de choc électrique. Les composants à l’intérieur de ces compartiments doivent être entretenus exclusivement par un technicien de service Ixia. • Laisser l’équipement refroidir avant de retirer les modules additionnels. Les modules additionnels peuvent devenir très chauds lors du fonctionnement normal.
- Page 85 Les décharges électrostatiques peuvent endommager les composants électroniques. Dans certaines conditions, les décharges électrostatiques peuvent s’accumuler sur votre corps ou sur un objet, puis se décharger dans un autre objet comme vos modules additionnels. Pour prévenir les dommages dus aux décharges électrostatiques, vous devez décharger l’électricité statique de votre corps avant de manipuler un module addi- tionnel.
-
Page 86: Ixia Technical Support Contacts
Ixia Technical Support Contacts This topic lists the telephone and email contact information for Ixia Technical Support, for each region. Region Contacting Technical Support Corporate Headquarters support@ixiacom.com email: Telephone: +1 818 595 2599 Asia Pacific support-asiapac@ixiacom.com email: Telephone: +91 80 4939 6410... - Page 87 India support-india@ixiacom.com email: Telephone: +91 80 4939 6410 Japan support-japan@ixiacom.com email: Telephone: +81 3 5326 1980 Ixia Platform Reference Guide Refer to the for complete contact information, including addresses and links to additional online resources. 87 | Ixia Technical Support Contacts...
- Page 88 66 initial configuration of XGS2-HS 38 shutting down 68 initial configuration XGS2-SD 48 SSH session, starting 64 IP addresses system administration 44 overview 38 IP addressing issues 72 technical support, contacts 86 ixia applications support for XGS2-HS 53...
- Page 89 74 virtual machines 38 XGS2-HS 44 XGS2 processor modules 11 | 89...
- Page 90 Ixia Worldwide Headquarters 26601 West Agoura Road Calabasas, California 91302 www.ixiacom.com IxOS 8.20 EA, December 2016...
Need help?
Do you have a question about the XGS2-HS and is the answer not in the manual?
Questions and answers