Table of Contents
Advertisement
Quick Links
Advertisement
Table of Contents

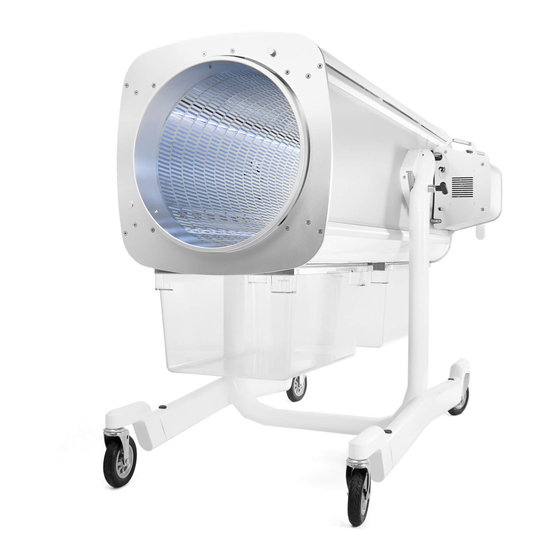
Summary of Contents for Keirton Twister BatchOne
- Page 1 Twister BatchOne Dry Trimmer User Manual PN: 21-10097A_REV01...
-
Page 2: Table Of Contents
TABLE OF CONTENTS TABLE OF CONTENTS Important Safety Information Important Safety Information ................ 3 General................................3 General Connection ..............................4 Connection Operation ..............................4 Operation Maintenance ..............................5 Maintenance Machine Overview Machine Overview ....................6 Control Box Overview Control Box Overview..................8 Initial Setup Initial Setup...................... - Page 3 TABLE OF CONTENTS Warranty Information..................22 Replacement Parts .................... 24 Specifications......................25 Contact Us ......................26 www.twistertrimmer.com PN: 21-10097A_REV01...
-
Page 4: Important Safety Information
BatchOne. Keirton Inc® is continually improving all of its products. As a result, engineering changes are sometimes made. If operation or appearances differ from this manual, please contact Keirton Technical Support for assistance (for contact details, see page 26). -
Page 5: Connection
The BatchOne is intended for use on legal aromatic herbs and hops. Please check all municipal, provincial/state, and federal laws and regulations before using the BatchOne. Keirton Inc. does not promote or condone the use of the BatchOne in any way that may be deemed illegal. -
Page 6: Maintenance
IMPORTANT SAFETY INFORMATION Maintenance Safety Information • Conduct regular maintenance of the BatchOne. • Ensure the BatchOne is powered off and the machine is unplugged before conducting any Never conduct maintenance, repairs, or cleaning maintenance, repairs, or cleaning. while the BatchOne is plugged in. •... -
Page 7: Maintenance Machine Overview
MACHINE OVERVIEW SADDLE TENSION BAR SADDLE TOP PANEL TUMBLER ROLLER BRUSH MAIN BODY PIVOT BLOCK BODY RELEASE TUMBLER PLUNGER TRIM BIN SUPPORT FRAME TUMBLER CAP LOCKING CASTER CONTROL BOX Fig. 2 www.twistertrimmer.com PN: 21-10097A_REV01... - Page 8 MACHINE OVERVIEW TOP PANEL SCREW BRUSH PLUNGER TENSIONING KNOB LOCK TENSIONING KNOB UPPER CB RAIL LOWER CB RAIL Fig. 3 RETAINING AXIAL STOP ROLLERS INNER BRUSH PLUNGER BLOCK SADDLE Fig. 4 www.twistertrimmer.com PN: 21-10097A_REV01...
-
Page 9: Machine Overview Control Box Overview
CONTROL BOX OVERVIEW TIMER DIAL FAULT LIGHT START BUTTON READY LIGHT STOP BUTTON RUNNING LIGHT EMERGENCY STOP BUTTON RELEASE BUTTON CONTROL BOX LEVER Fig. 5 Fig 5 Legend Feature Function Control Box Lever Lock to connect control box to main body. Emergency Stop Button Press to stop in an emergency. - Page 10 CONTROL BOX OVERVIEW DRIVE WHEEL AC POWER INLET LED DC JACK COOLING FAN Fig. 6 www.twistertrimmer.com PN: 21-10097A_REV01...
-
Page 11: Control Box Overview Initial Setup
INITIAL SETUP WARNING Step 1: Open Package THE BATCHONE MUST BE PLACED Place crate containing the BatchOne on level ON LEVEL GROUND. LOCKING ground. CASTERS ARE NOT DESIGNED TO Remove all screws from crate lid. SUPPORT THE BATCHONE ON ANY Lift crate lid off. -
Page 12: Initial Setup
INITIAL SETUP Step 3: Connect Control Box If control box lever is in locked position, press RELEASE button, and rotate lever upwards. Secure control box hooks on upper control box rail (see Fig. 7 below). Ensure control box slots are flush against lower control box rail (see Fig. 7 below). Press RELEASE button and rotate lever downwards into locked position. -
Page 13: Operation
OPERATION Step 1: Power On Connect power plug to AC power inlet on control box. Connect opposite end of power plug to socket (see Current and Input Voltage in Specifications on page 25). Press power switch above AC power inlet on control box (see Fig. 10 below). Fig. -
Page 14: Step 3: Set Trimming Adjustments And Start
OPERATION UNLOADING POS. RUNNING POS. LOADING POS. UNLOADING POS. LOADING POS. Fig. 12 Step 2 (Continued) RECOMMENDED Reattach tumbler cap. PRODUCT LOAD Support main body in a stable position. Pull plunger, and return to horizontal The recommended amount of product to position. -
Page 15: Step 4: Unload Machine
OPERATION RECOMMENDED TRIMMING TIME Every strain is different in density, every batch's relative humidity is unique, and individual loads may vary in quantity, creating different ideal trimming times. From our testing, however, we recommend trimming between 8-10% RH, with Fig. 13 15-20lbs of product, for 10-15 minutes. - Page 16 OPERATION Step 4 (Continued) Twist timer to minimal time, and press START button to aid movement of trimmed product. Press STOP button once product stops exiting the tumbler. Turn off the BatchOne and disconnect from power. Remove any remaining product with a long brush. Return the BatchOne to horizontal position.
-
Page 17: Maintenance
MAINTENANCE DANGER The BatchOne has been designed and manufactured for optimal performance. However, to maintain high performance levels, regular inspection and cleaning of the machine is necessary. DO NOT CONDUCT ANY INSPECTION, DISASSEMBLY, OR CLEANING WHILE Inspection THE BATCHONE IS CONNECTED TO POWER*. -
Page 18: Remove Tumbler
MAINTENANCE Fig. 14 Fig. 15 Flip Up or Remove Brush (Continued) Slide brush in opposite direction to release other end. To reattach and reengage the brush, follow these steps in reverse. Remove Tumbler Fig. 16 The tumbler needs to be removed for inspection, cleaning, and replacing the saddle. To remove tumbler from main body of the BatchOne: WARNING Ensure BatchOne is in horizontal position (SEE... -
Page 19: Remove Tumbler
MAINTENANCE WARNING IF THIS PROCEDURE IS COMPLETED WITH THE BATCHONE IN A TILT SETTING, THE TUMBLER MAY FALL OUT CAUSING DAMAGE TO THE COMPONENT AND BODILY HARM. Fig. 17 Remove Tumbler (Continued) Remove top panel by lifting. Remove control box. To remove control box: Press RELEASE button on control box. -
Page 20: Clean Clean
MAINTENANCE Fig. 19 Fig. 20 Clean The BatchOne should be cleaned on a daily basis and in between trimming of different strains. To clean the BatchOne: Remove control box. To remove control box: Press RELEASE button on control box. Rotate control box upwards. Lift control box hooks off the upper rail. - Page 21 MAINTENANCE Fig. 21a Fig. 21b Clean (Continued) To remove baffles (continued): Pull out the free end. Slide back in opposite direction so that other end of the baffle is no longer under the baffle guide. Pull out other end. Pressure wash all components with water. Let dry.
-
Page 22: Troubleshooting
TROUBLESHOOTING Tumbler is Not Moving Despite Drive Wheel Moving This may occur for two reasons: • There is not enough traction between drive wheel and tumbler. • The saddle tension is too tight. If there is not enough traction: • Clean both the tumbler and the drive wheel. -
Page 23: Warranty Information
Keirton Inc. Any service work performed and deemed valid due to a defective part will be free of charge. Keirton Inc. reserves the right to use any manufacturer approved replacement part for warranty repair. - Page 24 WARRANTY INFORMATION Keirton Inc. assumes no risk and shall be subject to no liability for damages or loss resulting from the specific use or application made of the product. In no event will Keirton Inc. be liable for any special, incidental, or consequential damages (including loss of use, loss of profit, and claims of third parties) however caused, whether by negligence of the manufacturer or otherwise.
-
Page 25: Replacement Parts
REPLACEMENT PARTS N.A. Fig. 22 Ref. Part Number Description 11-10293A Brush 14-10067 Trim Bin 14-10108 Trim Bin Lid Power Cord (North America) 15-01-000286 15-01-000424 Power Cord (Europe) 17-10071A Saddle 17-10072A Tumbler Cap 17-10084 Tumbler Roller 19-10010 Axial Stop Roller 24-10040A Tumbler www.twistertrimmer.com PN: 21-10097A_REV01... -
Page 26: Specifications
SPECIFICATIONS North American Specifications Circuit Breaker Required 15A, 120V Connector Plug NEMA 5-15P (see Fig. 23 below) Current (Amps) 2.7A Height 48in/121.9cm Input Voltage 120V, 60Hz Length 63in/160cm Product Number 02-10007A Tumbler Diameter 19.5in/49.5cm Tumbler Motor 1/4HP/200W Tumbler Speed 21RPM Width with Control Box 34in/86.4cm Width without Control Box... -
Page 27: Contact Us
CONTACT US Keirton Technical Support is available at 1-888-254-3204 or support@keirton.com between 7 a.m. and 7 p.m. Pacific Standard Time seven days a week. www.twistertrimmer.com PN: 21-10097A_REV01...
Need help?
Do you have a question about the Twister BatchOne and is the answer not in the manual?
Questions and answers