Table of Contents
Advertisement
Advertisement
Table of Contents

Related Manuals for Dahua Technology Digital signage LDV43-SAI200


Summary of Contents for Dahua Technology Digital signage LDV43-SAI200
- Page 1 Digital Signage User’s Manual V1.0.0...
-
Page 2: Cybersecurity Recommendations
Cybersecurity Recommendations Mandatory actions to be taken towards cybersecurity 1. Change Passwords and Use Strong Passwords: The number one reason systems get “hacked” is due to having weak or default passwords. It is recommended to change default passwords immediately and choose a strong password whenever possible. -
Page 3: Foreword
Foreword General This user’s manual (hereinafter referred to as "the Manual") introduces the usage and configurations of the LCD Digital Signage (hereinafter referred to as "the Signage"). Model LDV43-SAI200, LDV49-SAI200, LDV55-SAI200 and LDV65-SAI200 Safety Instructions The following categorized signal words with defined meaning might appear in the Manual. Signal Words Meaning Indicates a high potential hazard which, if not avoided, will result in... - Page 4 The Manual is for reference only. If there is inconsistency between the Manual and the actual product, the actual product shall prevail. We are not liable for any loss caused by the operations that do not comply with the Manual.
-
Page 5: Regulatory Information
Regulatory Information The regulatory information herein might vary according to the model you purchased. Some information is only applicable for the country or region where the product is sold. FCC Information Changes or modifications not expressly approved by the party responsible for compliance could void the user's authority to operate the equipment. -
Page 6: Important Safeguards And Warnings
Important Safeguards and Warnings This chapter describes the contents covering proper handling of the device, hazard prevention, and prevention of property damage. Read these contents carefully before using the device, comply with them when using, and keep it well for future reference. Operating Requirements ... -
Page 7: Table Of Contents
Table of Contents Cybersecurity Recommendations ......................I Foreword ..............................II Regulatory Information ........................... IV Important Safeguards and Warnings ..................... V 1 Product Introduction ..........................1 Overview ............................1 Features ............................1 2 Appearance ............................2 Dimensions ........................... 2 Components ..........................4 Ports .............................. -
Page 8: Product Introduction
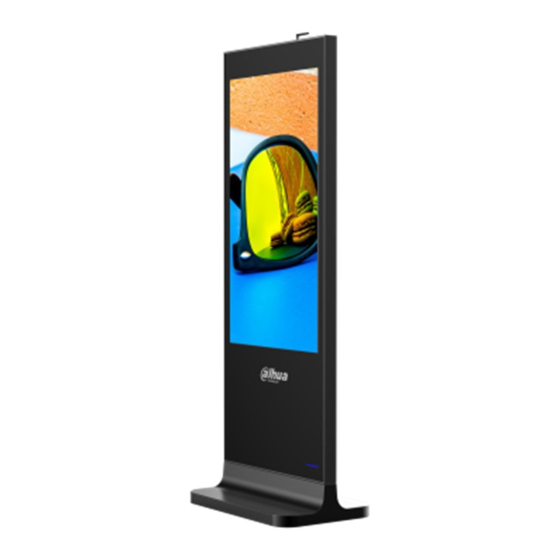
Product Introduction Overview This product is a new intelligent-cloud digital signage with which you can release various information such as advertisements, notices and announcements. After connecting the Signage to the platform (the CIRS software, for example), you can use the platform to send programs to Features Connected to the platform, the Signage can receive and display programs sent by it. -
Page 9: Appearance
Appearance Dimensions Figure 2-1 43 inches (mm [inch]) Figure 2-2 49 inches (mm [inch]) Appearance 2... - Page 10 Figure 2-3 55 inches (mm [inch]) Figure 2-4 65 inches (mm [inch]) Appearance 3...
-
Page 11: Components
Components Figure 2-5 Components (43, 49, 55 and 65 inches) Table 2-1 Components description Name Description Receives Wi-Fi signals and connect the Signage to the network in Wi-Fi antenna a wireless way. TFT LCD display Shows information. Signal indicator of Receives signals from remote control. - Page 12 Figure 2-6 Ports Table 2-2 Ports description Icon Name Description USB2.0 port Connects to USB drive or mouse. Ethernet port Connects to the Ethernet cable. You can read information in the SD card such as pictures, SD card slot videos, audios, files. SD card cannot be used for storing the Signage data for now.
-
Page 13: Installation
Installation Unpacking the Box Refer to the following checklist and check the package. If you find device damage or component loss, contact the after-sales service. Check Check Item Check Content Sequence Appearance No obvious damage. Overall Packing Not distorted or broken. packing Component No missing. -
Page 14: Laying The Power Line
Step 2 (Optional) If the ground is not flat, you can install foot-pads in the accessory bag to the pedestal. Adjust those foot-pads to make the Signage stable. See Figure 3-2. Figure 3-2 Installing foot-pads In Figure 3-2, ① is the foot-pad. 3.2.2 Laying the Power Line Figure 3-3 Laying the power line... - Page 15 — — Grounding screw Step 1 Use the given key to unlock and take off the rear panel. Step 2 Thread the power line through the outlet hole and connect the line to the power input port. Step 3 Buckle the line-protection ring to the power line and place the ring closely near the outlet hole.
-
Page 16: Basic Operations
Basic Operations The Signage’s operation system is developed based on the Android OS. You can connect the Signage to the online platform of information release & management. Then you can use the platform to release a multi-media program to the Signage, turn on/off the Signage and reboot the Signage. -
Page 17: Logging In Signage
Figure 4-2 Main menu Logging in Signage You need to type your password to unlock the Signage screen, and the screen will be locked under each of the following conditions: You have just finished initializing the Signage. Plug the Signage’s power line into a socket. ... -
Page 18: Operating Quick Tool Bar
Operating Quick Tool Bar Move your pointer to the bottom of any an interface to display the quick tool bar. See Figure 4-4 and Table 4-1 for details. Figure 4-4 Quick tool bar Table 4-1 Description of quick tool bar Icon Description Click this icon to adjust the backlight value. -
Page 19: Displaying Programs From Platform
4.6.1 Displaying Programs from Platform 4.6.1.1 Procedure Figure 4-6 Procedure Table 4-2 Procedure description Description Description Logging in Connecting Signage to network Connecting Signage to platform Receiving programs from platform 4.6.1.2 Connecting Signage to Network 4.6.1.2.1 Connecting Signage to Network Connect your Signage to network by Ethernet, WLAN, 4G or Virtual Private Network (VPN). - Page 20 Network Description Type Connect your Signage to network by Ethernet and there are two kinds of methods for you to give an IP to your Signage. DHCP: When there is a DHCP server in the network, after selecting the DHCP ...
-
Page 21: Displaying Programs From Usb Drive
4.6.1.3 Connecting Signage to platform Connect the Signage to the platform. Then you can use the platform to send programs. To use the platform to send programs, stop playing programs from the USB drive first. Preparation Your Signage and the platform have been connected to each other. To connect Signage to ... - Page 22 Procedure Step 1 In the main menu, select Local Release > General > Quick Play. The Quick Play interface is displayed. See Figure 4-10. Figure 4-10 The quick play interface Step 2 Select a template. The system will display images & videos information according to their layout in the template.
- Page 23 Figure 4-11 The customized play interface Step 2 Click a template you want to define. The template’s interface ready for configuration is displayed. Step 3 Define the template. to configure this region’s display sequence and content. Click a A program waiting box of images & videos is displayed. See Figure 4-12. Basic Operations 16...
- Page 24 Figure 4-12 The program waiting box Click on the lower left corner. The "File Manager" interface is displayed. Then you can select an image or a video and upload it to the program waiting box. Then, you can select duration of displaying an image from 5s, 10s, 20s, 30s and 60s.
- Page 25 4.6.2.2 Releasing Programs by Special Use Templates There are six special use templates, including "Face Attendance", "Catering & Life", "Special Offer & Promotion", "Brand Publicity", "Supermarket & Hotel", and "Info & News", each of which conforms to a specific scenario. Select according to your needs. For configuration of “Face Attendance”...
- Page 26 Figure 4-13 Configuring face attendance template Step 3 Click The Add Device interface is displayed. See Figure 4-14. Figure 4-14 The add device interface Step 4 Configure the parameters. See Table 4-4. Table 4-4 Parameter description Parameter Description Basic Operations 19...
- Page 27 Parameter Description According to the connection method you want between the camera and your Signage, you can select from IPC, DSS, PSS and IVSS. If you want to connect the camera directly to your device, you can select Protocol IPC.
- Page 28 Step 1 In the main menu, select Local Release > Custom. The Custom interface is displayed. Step 2 Click a template you want to define. The template’s interface ready for configuration is displayed. Step 3 Configure the template. to configure this region’s display sequence and content. Click a A program waiting box of images &...
- Page 29 Step 4 Operate the template you have almost finished. On the upper right corner of the current interface: Click Preview to preview your template. Click Save to save your template. You can view and use the template in Local Release >...
-
Page 30: Managing Apps
Managing Apps In main menu, click App Manager and then you can install/uninstall an app, view and operate the files, and log in the browser to surf on the Internet after the browser is connected to the Internet. See Figure 4-17. Figure 4-17 Apps 4.7.1 Installing an App... -
Page 31: Operating File Manager
You can use and view the app you have installed in "App Center." 4.7.2 Operating File Manager View and operate files. Step 1 In main menu, select App Manager > App Center. The App Center interface is displayed. Step 2 Click File Manager. -
Page 32: Configuring System Settings
Configuring System Settings Configuring Visual & Audio Parameters Adjust the screen’s display effect and the Signage volume. Step 1 In main menu, select Settings > Audiovisual Adjustment. The Audiovisual Adjustment interface is displayed. See Figure 5-1. Figure 5-1 The audiovisual adjustment interface Step 2 Configure visual &... -
Page 33: Selecting Input Source
Item Description You can set a Signage idle time (the time when you do not operate the Auto Lock Signage) beyond which your Signage screen will be locked. Select Never and Screen the screen will not be locked automatically. Adjust speaker volume. And "0" represents mute. Volume Click OK to finish configuration. -
Page 34: System Maintenance
System Maintenance Maintenance Requirements It is recommended to: Modify the user password every three months. Reboot this device regularly. Upgrade firmware regularly. Modifying Password For system security, regularly change the password and adopt the strong password. Keep the password properly after your modification. -
Page 35: Configuring Auto Reboot Time
Figure 6-2 The rebooting now interface Step 3 Click Confirm and system reboots. Configuring Auto Reboot Time Configure an auto reboot time for your device. And your device will reboot at a fixed time every day. Step 1 In main menu, select Settings > Maintenance and Upgrade. The Maintenance and Upgrade interface is displayed. -
Page 36: Restoring Your Signage To Factory Settings
Figure 6-4 The system upgrade interface Step 3 Select the upgrade package to start upgrade. Your Signage reboots after being upgraded. Restoring Your Signage to Factory Settings Restore your Signage to factory settings to handle problems such as storage insufficiency and system error. -
Page 37: Appendix 1 Remote Control
Appendix 1 Remote Control For Signage of specified models, you can use remote controls to operate them. There are two kinds of remote controls. Refer to one of them according to the remote control you have received. See Appendix figure 1-1, Appendix figure 1-2 and Appendix table 1-1. Appendix figure 1-1 Remote control appearance (1) Remote Control 30... - Page 38 Appendix figure 1-2 Remote control appearance (2) Appendix table 1-1 Buttons description Operation Item Buttons Needed Turning on/off Press device Turn on/off Hold for three seconds. device screen Volume up: Press Fn, and then press 1. Or, press and press Adjusting right arrow button.
Need help?
Do you have a question about the Digital signage LDV43-SAI200 and is the answer not in the manual?
Questions and answers