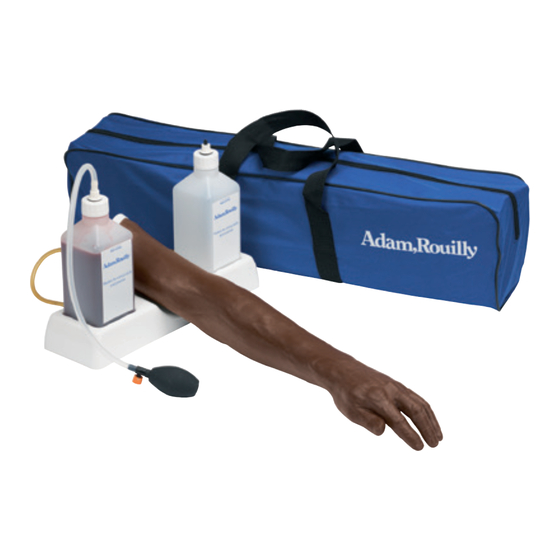
Summary of Contents for Adam,Rouilly AR251
- Page 1 AR251/AR251-B INJECTION, VENEPUNCTURE, CANNULATION & INFUSION ARM Instruction Manual...
- Page 2 Thank you for purchasing this AR251 Venepuncture and Infusion Arm. Cast from life, it shows a well developed male left arm in fine detail. The arm features a flexible wrist for added realism, durable silicone skin and is simple to set up, operate and maintain.
-
Page 3: Table Of Contents
Safety and Precautions The veins in this arm contain natural latex which may cause an allergic reaction to some individuals. If a reaction occurs, discontinue use immediately and seek medical advice. Do not leave the blood system pressurised when not in use. Do not mark the skin with ink from ball point pens, marking pens or newsprint as these cannot be removed. -
Page 4: Parts
Parts... -
Page 5: Supplied With
Infusion Arm (made up of Skin, Vein, Core) S251/8 BLANKING PLUGS (x 2) S251/11 TUBE AND BULB CONNECTOR White bottle cap (x 2) S251/4C BOTTLE (x 2) Blue bottle valve (x 2) S341/7 ORANGE PRESSURE RELEASE CAP S341/6 BULB S251/6 BLUE VEIN CONNECTOR (x 2) S201/2A ARM REST... -
Page 6: Before Use
Before Use 10 g (x1 teaspoon) -
Page 7: Making The Blood Concentrate
Making the Blood Concentrate Ensure the work area is clean and dry. Keep paper towels nearby in case of any spillage. Unscrew the cap of the bottle with the tube and bulb attached. Prepare artificial blood by putting 10 grams (Approx. 1 teaspoon) of artificial blood powder concentrate in the bottle and fill with water to the “Max Level”... -
Page 8: During Use
During Use... -
Page 9: Using Vascular Access Devices And Keeping The System Pressurised
Using Vascular Access Devices and Keeping the System Pressurised A range of vascular access devices may be used to take blood from the arm such as syringes, vacutainers and cannulae. Periodically pump the bulb to maintain pressure in the system during use. It is recommended that 21 gauge or smaller cannulae and needles be used on the arm to avoid accelerated wear of the skin and veins. -
Page 10: After Use
After Use... -
Page 11: Empty The Vein System Of Blood
Empty the Vein System of Blood After use, pump the bulb until blood has collected in one bottle and the vein system is empty. Locate the pressure release valve fully into the first bottle valve and turn clockwise until it locks into place. Once the system has depressurised, close the orange cap. - Page 12 After Use Storage and Transportation...
-
Page 13: Flushing The Vein System And Bottles
Flushing the Vein System and Bottles Before storage, or at the end of a training session, the vein system must be flushed through with clean water to prevent mould growth. Do not use soap, detergents or any other chemical cleaners to clean the vein system or bottles. -
Page 14: Replacing The Skin And Veins
Replacing the Skin and Veins... -
Page 15: Remove The Old Skin And Vein System
Replacement Skin and Vein Sets Replacement skin and vein sets are available from Adam,Rouilly or your local distributor: AR253 SKIN AND VEIN SET, WHITE for AR251 AR253-B SKIN AND VEIN SET, BLACK for AR251-B The veins in this arm contain natural latex which may cause an allergic reaction to some individuals. - Page 16 Replacing the Skin and Veins (Continued)
-
Page 17: Insert The New Vein System
2. Insert the New Vein System To insert the new vein, first loop it through tunnel in the back of the hand. Pull the vein through so that there are equal halves on each side of the tunnel. With the back of the core facing you, loop the first half vein around the right channel in the back of the hand and down the arm to tunnel Insert the vein through tunnel Loop the other half of the vein around the left channel in the back of the hand. - Page 18 Replacing the Skin and Veins (Continued)
-
Page 19: Installing The New Arm Skin
2. Insert the New Vein System (Continued) Insert the rest of the vein system into its corresponding channels in the arm core, keeping the two ends of remaining vein out of the way during installation of the new arm skin. 3. - Page 20 2 Year Guarantee All products manufactured by Adam,Rouilly are covered by our full 2 Year Guarantee. This guarantee applies to models which have been used correctly and covers durability and functionality. As part of our policy of continual product development, the specification of products may alter without prior notice.


Need help?
Do you have a question about the AR251 and is the answer not in the manual?
Questions and answers