Advertisement
Table of Contents
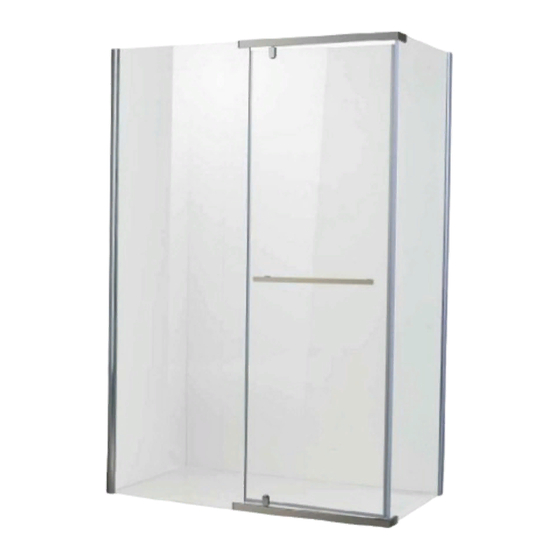
"SALTO" SHOWER
Operators' Manual
DOUCHE "SALTO"
Guide de l'utilisateur
Customer Service / Service à la clientèle : 1-866-206-0888
Our Customer service staff is available to help you. For help with product assembly, to report damaged or missing
parts, or for any other information about this product, please call our toll-free number.
SAVE THIS MANUAL
Keep this manual and the original sales invoice in a safe, dry place for future reference.
Notre personnel du service à la clientèle est disponible pour vous aider. Pour obtenir de l'aide pour le montage de
votre produit, pour signaler des pièces endommagées ou manquantes, ou pour toute autre information à propos de
ce produit, veuillez composer notre numéro sans frais.
CONSERVEZ CE GUIDE
Conservez ce guide avec la facture d'origine dans un endroit sûr et sec pour référence future.
Shower door 70845013-14-15-16
Model / Modèle :
Shower base 70845010-11-17-12
C
Advertisement
Table of Contents

Subscribe to Our Youtube Channel
Summary of Contents for Uberhaus SALTO 70845013
- Page 1 Shower door 70845013-14-15-16 Model / Modèle : Shower base 70845010-11-17-12 "SALTO" SHOWER Operators’ Manual DOUCHE "SALTO" Guide de l'utilisateur Customer Service / Service à la clientèle : 1-866-206-0888 Our Customer service staff is available to help you. For help with product assembly, to report damaged or missing parts, or for any other information about this product, please call our toll-free number.
-
Page 2: Table Of Contents
TABLE OF CONTENTS General instructions.............1 Before you begin..............1 Shower parts................2 Hardware part list..............3 Plumbing components & shower base installation....4 Installing wall channels ............5-6 Installing fixed glass panels..........7-8-9-10 Installing moving shower panels.........11-12 Caulking................13 Warranty................14 General instructions 1. Please take a few minutes to review this manual before you start installation. 2. -
Page 3: Shower Parts
Shower parts Shower Bottom -Drip Seal- Right Bottom -Drip Seal- Left Base Sku:70845010-11-17-12 (Sold separately)... -
Page 4: Hardware Part List
Hardware part list DESCRIPTION Qty. Wall Channel Sationary Panel - Left Bottom Drip Seal Bottom Drip Seal - Left Bottom Drip Seal - Right Shower Base 70845010-11-17-12 (Sold separately) Door Pull Bar Magnetic Door Seal Strips Door Handle Glass Clamp Qty. -
Page 5: Plumbing Components & Shower Base Installation
Plumbing components & shower base installation 1. Base installation Ensure that all raw plumbing has been prepared before installing the shower. It is very important to sure that the base is level and properly supported. WARNING! Your bathroom's floor and walls must be leveled and square for an optimal installation. Cut the box in the same size as the shower base and place cutout over base for protection. -
Page 6: Installing Wall Channels
2. Installing wall channels 2A. Wall channels installation preparation Note: Use a level to make sure the position of wall channels. Draw line to mark channel location with a pencil. Make sure to leave 1/2” space on the edge of shower base when installing. - Page 7 2B. Installing wall channels Remove wall channels and drill holes at each mounting hole location. Repeat on the other side. Ref: M After drilling, insert wall anchors. Replace wall channels and secure to walls with ST4X30 truss head screws(Ref:A). Repeat on the other side.
-
Page 8: Installing Fixed Glass Panels
3. Installing fixed glass panel When installing glass panels, make sure that you have a firm grip on the glass. Insert the back of glass panel into the wall channels as shown. Repeat on the other side. When the glass panels, make sure that bent channels are on the outside of the shower. - Page 9 3B. Installing hinges and door pull bar First decide whether you want the door to open on the right (hinges on the left side) or open on the left (hinges on the right side). Please note: For information purposes, the shower illustrated throughout this manual has hinges on the left side.
- Page 10 Push screw though hole in cup-end of snap cap washer, then tighten screw. Caps may require a light tapping. NOTE:Install snap caps only once the shower installation is completed.
- Page 11 3C. Reinforcing installation of stationery panels Make sure that the shower enclosure is sitting flat and even on the base. Drilling holes through each of the six holes in the wall panels and into the wall channels. Fix the position connect with wall panels and wall channels...
-
Page 12: Installing Moving Shower Panels
4. Installing moving shower panels 4A. Installing door hinges Please note: Use the allen key to install hinges on the glass door. 4B. Installing moving shower panels Please note:Keep a firm grip on the glass door during the installation, until door is recured on its hinges... - Page 13 4C. Installing door strips...
-
Page 14: Caulking
Caulking WARNING! Silicone sealer must be only applied on the outside of the shower to prevent leaks. Allow silicone to dry 48 hours. -
Page 15: Warranty
Warranty Warranty Shower Clear tempered glass door: 70845013-14-15-16 3 years Shower base: 70845010-11-17-12 3 years Following the conditions and the terms described below, RONA guarantees that the product is in conformity with its specifications and at the moment of the sale, the product is free from vice and/or manufacturing defects.
Need help?
Do you have a question about the SALTO 70845013 and is the answer not in the manual?
Questions and answers