
Subscribe to Our Youtube Channel
Summary of Contents for AddSecure Asset Series
- Page 1 AddSecure Asset Installation Guide Version 2.3 2017-01-26 / PEP & FB Asset Light & Asset Pro...
-
Page 2: Table Of Contents
Content: Mounting the unit ....................................1 Wiring for Asset Light .................................... 2 Wiring for Asset PRO with one-wire temperature sensor ....................3 Cable for one-wire sensor ..........................................4 Temperature sensor – PRO version only ....................................4 Wireless Sensors ....................................... 5 4.1.1 Wireless temperature sensor ...................................... -
Page 3: Mounting The Unit
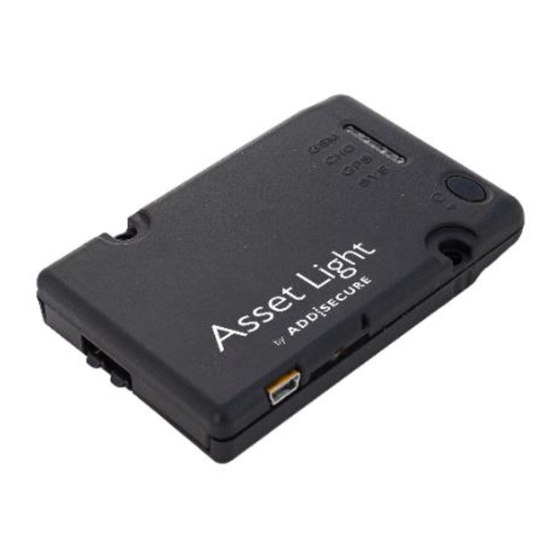
1 Mounting the unit The Asset Light and Asset Light Pro units can be mounted on various places on the vehicle, but to ensure best possible GPS and GSM signals, it must not be placed under metal. Plastic, fibreglass and fabric will not affect the signals. -
Page 4: Wiring For Asset Light
2 Wiring for Asset Light Asset Light is supplied with the following wires: Wire chart Colour Function Note Purple Not used Dallas 1-wire – for temperature sensor Blue Not used Digital Output Grey Not used Digital Input Brown Terminal 15 ignition Ignition (has to be connected –... -
Page 5: Wiring For Asset Pro With One-Wire Temperature Sensor
3 Wiring for Asset PRO with one-wire temperature sensor Asset Pro with temperature sensor(s) is supplied with the following wires: Wire chart Colour Function Note Purple Temperature Dallas 1-wire – for temperature sensor Orange TX (RS 232) Used for ThermoKing / Carrier Green RX (RS 232) Used for ThermoKing / Carrier... -
Page 6: Cable For One-Wire Sensor
• On a central place in the compartment AddSecure recommends that you agree on a mounting place with the customer. Mounting/fixing the temperature sensor Take care not to damage the temperature sensor when mounting/fixing it and make sure it is placed well protected. -
Page 7: Wireless Sensors
Up to 8 external temperature sensors can be connected to an Asset Pro. If more temperature sensors are connected they must be parallel mounted. White core to white core, and brown core to brown core. Wires may be extended. All soldering must be isolated. 4 Wireless Sensors When mounting wireless sensors the Asset unit is not allowed to be placed in the trucks cabin. -
Page 8: Wireless Temperature Sensor
4.1.1 Wireless temperature sensor A wireless temperature sensor consists of only one part, the Sensor. Depending on materials between and around the sensor and Asset unit, the range will vary. e.g. the Asset unit cannot be mounted in the trucks cabin and communicate with the sensor. -
Page 9: Unit On/Off And Led
5 Unit on/off and LED ON/OFF button USB-input for charger When the unit is off it must not be 230 V charger and connected to a power source. 12/24 V cigarette charger available as option. • Press button for 5 seconds till yellow lamp Yellow Blue starts to flash differently. -
Page 10: Carrier Transicold
7 Carrier Transicold Datalogger, Datacold 500, 600 and EuroScan X2 7.1.1 Mounting The Asset Pro can be mounted on the rear of the datalogger It mush flush with the edges Make sure that there is room for the printer cable 7.1.2 Connection... -
Page 11: Ignition Connection
7.1.3 Ignition Connection The ignition input (Brown – pin 12) can be connected to the trailer 24 volt (Light). It will then show if the trailer is connected to a truck with ignition on (Light turned on). Trailer and datalogger has separated ground. -
Page 12: Thermoking
8 ThermoKing Datalogger DAS / SR2 / CargoWatch 8.1.1 Serial RS 232 connection to CargoWatch. Solder the TX and RX connections on the connector on the controller board or use a connector. The 1 kohm resistor R1 secures that the CargoWatch Port is not blocked when connection in parallel with the connector. -
Page 13: I-Box
i-Box... -
Page 14: Hultstein
9 Hultstein HUK Datalogger To connect to a HUK, you will need a male DB9 connector. Power is connected as usual. PINOUT Asset Green Orange Black Jumper between 7 & 8 10 System configuration See the document: Asset configuration AddSecure.
Need help?
Do you have a question about the Asset Series and is the answer not in the manual?
Questions and answers