Table of Contents
Advertisement
Quick Links
T/AML2C/080
Before Setup
Remove the Backplate from the Doorbell, unclip the battery
cover and remove the battery.
There is a clear plastic film over the top of each battery.
Remove the films and replace the batteries.
Connect the supplied USB Lead to the device and charge for 8
hours.
(This will require a 5V USB Mains Plug—not supplied)
Important: The product may power up when the batteries are first
inserted; however, the device will not function correctly during the
installation procedure unless it has been fully charged.
Download the iCSee App (NOT iCSee Pro) to your phone by
searching in the App Store or by scanning the QR Code below.
Turn off Mobile data (3G/4G) and connect to the available Wifi.
Important: When setting up the iCSee app you
should allow any permissions it requests as
declining them may prevent the app from
functioning correctly; the screenshot displayed
on the left shows what permissions are
required.
28th November 2019
Advertisement
Table of Contents

Summary of Contents for Securefast AML2C
- Page 1 T/AML2C/080 Before Setup Remove the Backplate from the Doorbell, unclip the battery cover and remove the battery. There is a clear plastic film over the top of each battery. Remove the films and replace the batteries. Connect the supplied USB Lead to the device and charge for 8 hours.
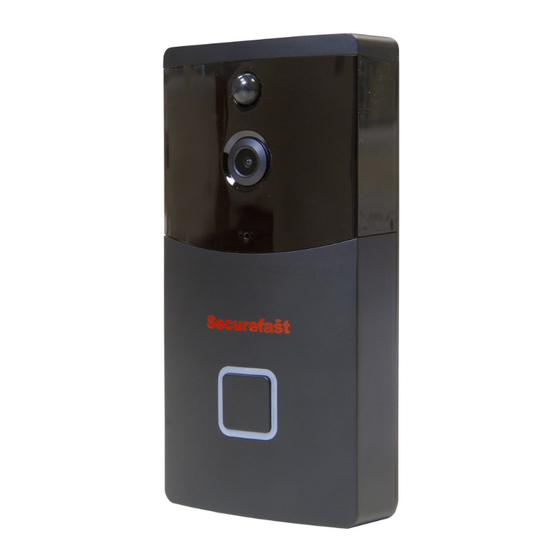
- Page 2 T/AML2C/080 Doorbell Light Indicators PIR Sensor Blue light solid - Startup Camera Blue light flashing - App remote monitor and setup Red light flashing - Low battery Microphone Indicator Bell Button RESET USB Charging Button Port Micro SD Memory Card Slot 1) Registering for an Account N.B: Local Login will allow you to have Temporary Access to the App as a Visitor- you can set up...
- Page 3 T/AML2C/080 2) Add a device After charging the device for 8 hours press the Bell Button to wake-up the Doorbell. The voice Prompt “Wait to be configured” should be heard before proceeding to adding the device as below. N.B: If the above voice prompt is not heard wake-up the Doorbell, using the Bell Button, then press and hold the RESET button.
- Page 4 T/AML2C/080 When the device has successfully connected it will prompt you by saying “ Connected to router successfully” you will then be asked to set a password for the device. When the password is set you will be asked to give the device a name, this is what it will appear as in the app.
- Page 5 T/AML2C/080 3) Features of the app Data connection speed Signal strength and date/time Battery/SD card status Mute/unmute button, allows you to hear sound from the doorbell Video quality FHD/SD, allows you to change between high and standard definition video Screen resolution...
- Page 6 T/AML2C/080 4) Installing the Device Important: The Doorbell should be positioned to prevent excessive exposure to direct sunlight as this could negatively affect the performance of the PIR motion detection sensor. Decide on device positioning considering the above; the unit is supplied with wood screws, wall plugs and 3M double sided backing to suit a variety of installations;...
- Page 7 T/AML2C/080 6) Further Information and Frequently Asked Questions The Doorbell will emit a sound when the Bell Button is pressed to inform the person ringing the Doorbell that the Device has registered the button being pressed. To turn this feature off, you will need to turn on “Device Hints”...
- Page 8 T/AML2C/080 7) Setting up a Chime To set the chime up plug it into a mains socket Volume button Use the select buttons to cycle through the Chime library and stop when you have found a Chime you like. Select button...
Need help?
Do you have a question about the AML2C and is the answer not in the manual?
Questions and answers