
Related Manuals for Mindfield MindLights


Summary of Contents for Mindfield MindLights
- Page 1 www.mindfi eld.de MA NUAL INSTRUCTIONS FOR INSTALLATION AND USE · SOFTWARE · AUDIO-VISUAL STIMULATION...
- Page 2 This provides ® you with the maximal benefits so you can achieve results in the shortest amount of time. This manual elaborates in detail on all functions of the MindLights ® and the annexed software for your PC which controls the device.
- Page 3 The stimulation patterns for tinnitus treatment used in the Areas of Application for the MindLights ® MindLights(r) Software are provided by professor Dr. Dipl.-Psych. S. Tönnies. Further information on studies and publications is available on our website The MindLights ®...
-
Page 4: Table Of Contents
1.4 Disposal ....................9 5.2.3 Deleting Frequency Markers .............. 33 2. Installation / Setting-up Operation ..............10 5.2.4 Copying a Color Selection ..............33 2.1 Software- and Driver unit Installation of the Mindlights ® ..... 11 5.2.5 Preview Function ................33 2.2 Configurating the soundcard of the Mindlights... -
Page 5: Safety Instructions
® which have been in direct contact to users, support of Mindfield Biosystems Ltd. The contact data can be found at the end of this you have to make sure that the material is not contaminated. When in doubt please manual. -
Page 6: Installation / Setting-Up Operation
MindLights ® driver unit you will have to restart your PC! You should not start the MindLights If you install the software, which is recom- Software before this restart. You need at least Java 6 to install or start ™... -
Page 7: Software Updates Mindlights
MindLights are now ready to operate ® website www.mindfield.de . Our website also provides further information regarding and you can make yourself familiar with this subject.« further content of this manual. -
Page 8: Handling The Mindlights
3. Handling the MindLights ® 4. Automatic Generation of a New Session Starting the Program By clicking on the following button you will be guided to the subject selection. If you have chosen to create a desktop icon during the installation process, you can now start the software with a click on this icon! You can find the start option in the Windows(tm) Start Menu as well. -
Page 9: Step 2: Choosing The Background Music
10 minutes. After you habe chosen and verified your piece of music proceed to the next part of the menu. Step 4: Setting up the MindLights ® During this part you can choose between the options standard settings and parameter adjustments. -
Page 10: Step 5: Adjusting Parameters
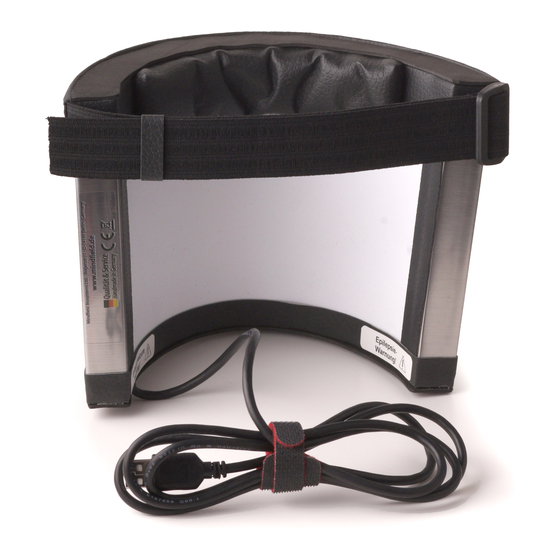
. Principally, colors Put on the MindLights LED-mask which is included in delivery and watch the different ® like green and yellow have a comforting effect and colors like blue, white, and red (sig- light stimulations. -
Page 11: Step 8: Choosing The Frequency Variation
In the section labeled Frequency Variation you can influence the intervals of audio- visual stimuli during the session. You have the choice between three frequency variation levels: low, medium and high level of frequency variation. The MindLights ® LED mask includes integrated LED diodes. These diodes are aligned in a horizontal line. -
Page 12: Step 10: Acoustic Variation
Step 11: Noise Step 10: Acoustic Variation White Noise Binaural / Monaural Sounds represent sounds that are created by the brain, due to White noise consists of all the frequencies of the audible range which stretches from slightly different frequencies applied to each ear. When trying to process these sounds, 16 Hz to 20 kHz. -
Page 13: Step 12: Respiratory Support
37 of this manual. After you have entered the number of seconds, click on the start-button below. Step 13: Checking the Settings You now have enough time to put on your MindLights LED-mask and the headphones. ® Before the session starts you The session starts at the time you have set the countdown. -
Page 14: Manual Generation Of A Session
5. Manual Generation of a Session 5.1.1 Session This chapter will provide you with an in depth overview of the MindLights . The fol- ® Generate lowing information will allow you to manipulate the predefi ned sessions or create your Generates a subject-related session. -
Page 15: Playback / Information
® library or your own library. Information By clicking on this button After you have selected your track it will appear in the MindLights ® you will open a context The surface of the MindLights now has a slightly grey hue and the title of ®... -
Page 16: Master Control / Other Program Buttons
The manual is provided in PDF format. Extend Quit By clicking this button, you can extend the duration of the session. A session Click on this button and the MindLights ® software quits. The program will has a maximum duration of 2 hours. -
Page 17: Placing / Editing Of Frequency Markers
Activate the preview function by clicking in the »preview« box. (page 32 image at the meters, such as time and frequency, dynamically top left). adjust according to your commands. Put on the MindLights ® LED-mask and the headphones and look at your audio-visual The time- and frequency parameters can either be adjustments. -
Page 18: Editing Transitions
5.3 Editing Transitions 5.3.2 Function / Waveforms There will always be a transition between two frequency markers. Basically, the The integrated LED-lights can perform the visual stimulation through three different software will try to smoothly interpolate the differences in frequency and color. These waveforms. -
Page 19: Acoustic Transition
5.3.6 Background Noise and Breathing Patterns 5.3.5 Acoustic Transition This tab allows you to create your own acoustic transitions. An explanation on the various forms of noise can be found on page 23. By clicking on »function« you can chose monaural, binaural, isochronic or pulsed sound stimulation patterns. -
Page 20: Adjusting And Cloning Of Frequency Markers
5.5 Fast Forwarding during a Session 5.4 Adjusting and Cloning of Frequency Markers At the point when you have created your own session, you have the opportunity to rewind or fast forward within it. You can click, hold and drag the fast forward bar within the composition towards the start or the end of the session. -
Page 21: Information On Wave Frequency Areas
6. Information on Wave Frequency Areas Alpha Frequency range (8 to 12Hz): Use frequency markers between 8 to 12 Hz for the following: The left side of the canvas will show a frequency scale (image on page 38). It ranges from 0 Hz - 30 Hz. -
Page 22: Loading An Existing Session
If you want to load a demo session or your individual saved session, you can do this by clicking on »generate« or the »load« button in the start window of the MindLights ® When you have stored your own sessions, they will be saved to the folder labeled »ses- sions«... -
Page 23: Brief Description Button-Functions
Save the session Pausing the session (keyboard shortcut V) Delete History Halting the session This function allows you to go back in the menu Quit the MindLights ® program This function confi rms your selection Attach / read personal session information... - Page 24 • PDF fi les will be displayed in an external reader if installed Place: Berlin • The MindLights software can be launched from a network volume Date: 24th of September, 2011 • There is a desktop shortcut to start a novel demo session directly.
- Page 25 Ihre Notizen...
Need help?
Do you have a question about the MindLights and is the answer not in the manual?
Questions and answers