Table of Contents
Advertisement
Quick Links
Advertisement
Table of Contents

Summary of Contents for ICRA DJI RoboMaster AI Challenge AI Robot 2019
-
Page 2: Using This Manual
RoboMaster AI Challenge AI Robot Information Kit" for reference. Check all of the included parts listed in the ICRA 2019 DJI RoboMaster AI Challenge AI Robot In the Box document. Prepare for first use by reviewing this User Manual. For more documents for developer, please refer to the "ICRA 2019 DJI RoboMaster AI Challenge AI Robot Information Kit". -
Page 3: Disclaimer And Warning
Disclaimer and Warning Thank you for purchasing the ICRA 2019 DJI RoboMaster™ AI Challenge AI Robot. Please read this disclaimer carefully before using this product. By using this product, you hereby signify that you have read and agreed to this disclaimer. Install and use this product in strict accordance with the User Manual. - Page 4 If you have any problems you cannot resolve, please contact RoboMaster.
-
Page 5: Table Of Contents
Contents Using This Manual ............................1 Disclaimer and Warning ..........................2 Product Usage Precautions ..........................2 Introduction ............................... 1 Introduction and Usage of Hardware Module ..................1 Introduction to Overall Hardware Feature ................... 1 Chassis ..............................3 Sensor Installation ..........................4 Two-Axis Gimbal.......................... - Page 6 Charging the Intelligent Flight Battery ..................12 Charging Protection LED Display ....................13 Remote Controller Kit ..........................13 Overview ............................13 Remote Controller ........................... 14 5.2.1 Powering On/Off the Remote Controller ................14 5.2.2 Charging the Remote Controller ..................15 Receiver .............................
-
Page 7: Introduction
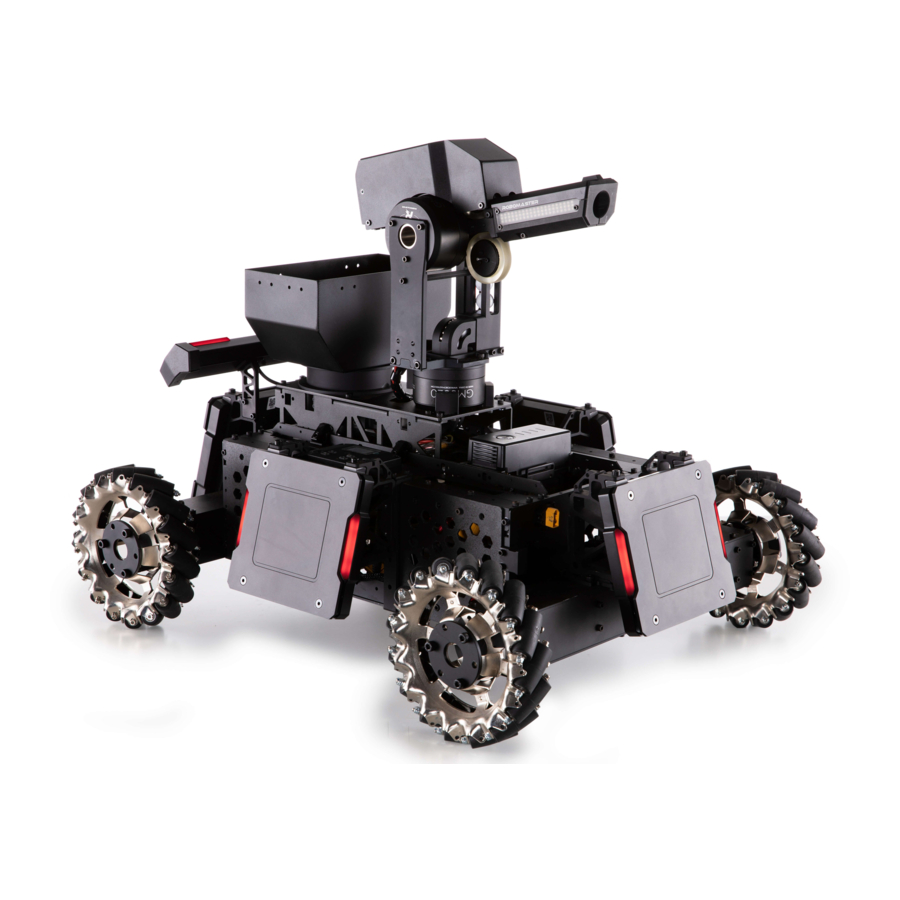
Introduction ICRA 2019 DJI RoboMaster AI Challenge AI Robot (hereinafter referred to as "Robot") consists of chassis, two-axis gimbal, Launching Mechanism, Referee System and intelligent battery. Mecanum wheels are used in the chassis for omnidirectional motion. The two-axis gimbal can complete two- DOF rotation, enhancing the flexibility and resistance of the robot. - Page 8 Referee System Speed Launching Mechanism Two-Axis Gimbal Monitor Module Referee System - Light Supply System Propulsion Module Indicator Module Referee System Main Referee System - Armor Battery Controller Module...
-
Page 9: Chassis
10. Referee System RFID 11. Referee System - Power 12. Referee System Module Management Module Power Module 13. Development Board Type-A 14. Referee System - RFID The following modules are not included in the sales list: LiDAR Camera Tag for UWB Locating System Manifold 2 Manifold 2 - USB HUB Manifold 2-Power HUB... -
Page 10: Sensor Installation
Sensor Installation Mounting hole for the sensor holder is reserved on the Yaw axis of the gimbal. You can design the mounting bracket based on the dimensions of mounting hole shown below. Mounting hole for the sensor holder is reserved on both the side (above the armor plate) and front of the chassis. -
Page 11: Two-Axis Gimbal
A. Mounting hole for side sensor B. Mounting hole for front sensor mounting bracket mounting bracket Two-Axis Gimbal A two-axis gimbal is installed between the chassis and the Launching Mechanism. The pitching direction is the Pitch axis and the yaw direction is the Yaw axis. Pitch axis motion range: -23° to +23° (mechanical limit angle);... -
Page 12: Projectile Supplying System
3. Gimbal Chassis Connection 1. Yaw-axis Motor 2. Yaw-axis Limit Fixture 4. Gimbal Chassis 5. Pitch-axis Limit 6. Pitch-axis Motor Connection Fixture Note: Separate the gimbal from the chassis by removing the four outer parts of the gimbal connection fixture. There are three connection cables between the gimbal and the chassis. -
Page 13: Launching Mechanism
Mechanism, increasing the flexibility of the Launching Mechanism and the amount of projectile load. The projectile load is over 200 projectiles, which fully meets the needs of the competition. After the initial loading, you must wait for the Loading Mechanism to fill the Projectile Pipeline so that projectiles can be fired from the barrel. -
Page 14: Referee System
Battlefield Components and the client side during the competition, visually presents these data to referees and automatically determine the competition outcome. For specifications of Referee System, please refer to the ICRA 2019 DJI RoboMaster AI Challenge Referee System Specification Manual. For client installation, server setup and more details about... -
Page 15: Hardware Circuit System
To download the documents relevant to the Referee System, visit: https://www.robomaster.com/en-US/resource/download The Speed Monitor Module is subject to the relevant information stated in ICRA 2019 • DJI RoboMaster AI Challenge Referee System Specification Manual. The server installation package will be released on the RoboMaster official website in •... -
Page 16: Software System
The RoboMaster Main Controller Development Board is an open-source main controller board designed for RoboMaster robots. It meets the control need of the entire robot and provides an open interface for customizing robot system and developing other functions. For more technical information of RoboMaster Development Board, please refer to the RoboMaster Main Controller Development Board User Guide in the Information Kit or download it from RoboMaster website https://robomaster.com. -
Page 17: Intelligent Flight Battery
Intelligent Flight Battery The Intelligent Flight battery (model: TB48D or TB47D) is used by DJI MATRICE 100. It has a capacity of 5700 mAh (for TB48D) or 4500 mAh (for TB47D), voltage of 22.2V and built-in smart charge- discharge function. It can only be charged with an appropriate RoboMaster approved charger. Read the DJI MATRICE 100 Intelligent Flight Battery Safety Guidelines before use. -
Page 18: Charging The Intelligent Flight Battery
Battery Level Indicator LED1 LED2 LED3 LED4 Battery Level 87.5%~100% 75%~87.5% 62.5%~75% 50%~62.5% 37.5%~50% 25%~37.5% 12.5%~25% 0%~12.5% = 0% Charging the Intelligent Flight Battery The Intelligent Flight Battery must be fully charged before first-time use. 1. Connect the battery charger to a suitable power supply (100-240V, 50/60 Hz). 2. -
Page 19: Charging Protection Led Display
It can only be charged with an appropriate RoboMaster official approved charger • (model: A14-100P1A). Air cool the Intelligent Flight Battery after each use. Allow its temperature to drop to • room temperature before charging. • The charging temperature range is 0 to 40°C. The battery management system will stop the battery from charging when the battery cell temperature is out of range. -
Page 20: Remote Controller
Remote Controller Robot uses the DJI Flight Remote Controller DT7. The DT7 remote controller is a wireless communication device that uses the 2.4 GHz frequency band. It is only compatible with the DR16 receiver. It has a built-in LiPo battery, can continually run for about 12 hours and its communication distance is up to 1,000 meters in an open area (you can control Robot to complete various actions on the ground with a distance of up to 100 meters). -
Page 21: Charging The Remote Controller
1. Toggle the Switch S1 to the uppermost position and ensure both sticks are at the mid-point position. 2. Toggle the Power Switch to the right to power on the remote controller. 3. The Power LED Indicator will turn solid green and the buzzer emit a "beep" sound to indicate that the remote controller has been powered on. -
Page 22: Linking The Remote Controller And Receiver
Linking the Remote Controller and Receiver The receiver is mounted near the Development Board Type A of Robot's chassis (as shown below). The remote controller is linked to the DR16 receiver by default . Follow these steps to link the remote controller with the receiver: 1. -
Page 23: Powering On And Operating The Robot
6. Powering On and Operating the Robot Installing and Removing the Battery The battery rack is in the middle of Robot chassis and in front of the gimbal. Vertically install the battery into the battery rack when use the robot. The following figure shows the installing position: Powering On/Off the Robot After installing the battery to the battery rack, power on the Intelligent Flight Battery and turn on the Power Switch of Robot (as shown above). -
Page 24: Operating The Remote Controller
Automatic: The onboard PC receives data and operates Robot through the interaction with USB HUB and Development Board Type A. Select either mode accordingly and toggle the Switch S1 on the remote controller. Operating the Remote Controller Power on the remote controller to operate Robot. When the remote controller is powered off, Robot is locked. - Page 25 Remote Controller Robot Function Push the stick up to tilt the gimbal up (+), and down to tilt the gimbal down (-). The rotation range of gimbal is -20° to +20°. Use S1 to decide whether the chassis rotates along with the Yaw-axis of the gimbal or the Yaw-axis of the gimbal rotates along with the chassis.
-
Page 26: Appendix
Appendix Specifications Structure Overall Dimensions 600 * 450 * 460 mm Weight (with battery) 16.6 kg Performance Maximum Forward Velocity 3 m/s Maximum Translational Velocity 2 m/s Gimbal Pitch-axis Rotation Range -20° to 20° Gimbal Yaw-axis Rotation Range -90° to 90° Projectile Frequency of Launch 10 projectiles/second Projectile Speed of Launch (barrel) - Page 27 Model TB47D Type LiPo 6S Voltage 22.8 V Capacity 5700 mAh for TB48D, 4500 mAh for TB47D Remote Controller Model Operating Frequency 2.4 GHz Communication Distance 1,000 m Power Supply Built-in lithium battery Charging Port Micro USB Battery Capacity 2600 mAh Charger Model A14-100P1A...
-
Page 28: Parts List (Incomplete)
Parts List (Incomplete) Module Name Component Name Quantity RoboMaster M3508 P19 Brushless DC Gear Motor RoboMaster Mecanum Wheel (left) Robot Chassis RoboMaster Mecanum Wheel (right) RoboMaster Main Controller Development Board RoboMaster M2006 P36 Brushless DC Gear Motor RoboMaster C610 Brushless Motor ESC Two-axis Gimbal and RoboMaster GM6020 Brushless Motor (with ESC) Launching Mechanism... - Page 29 Module Name Component Name Quantity Charger (with charging cable)
Need help?
Do you have a question about the DJI RoboMaster AI Challenge AI Robot 2019 and is the answer not in the manual?
Questions and answers