Table of Contents
Advertisement
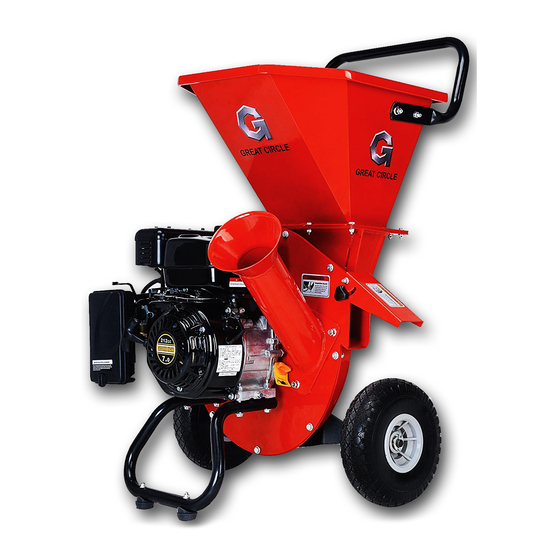
Chipper Shredder
Instruction Manual
WARNING:
Read carefully and understand all INSTRUCTIONS before operating. Failure to follow the safety rules
and other basic safety precautions may result in serious personal injury.
Save these instructions in a safe place and on hand so that they can be read when required. Keep
these instructions to assist in future servicing.
REV 08/22/18
Advertisement
Table of Contents

Summary of Contents for Great Circle LCE01
- Page 1 Chipper Shredder Instruction Manual WARNING: Read carefully and understand all INSTRUCTIONS before operating. Failure to follow the safety rules and other basic safety precautions may result in serious personal injury. Save these instructions in a safe place and on hand so that they can be read when required. Keep these instructions to assist in future servicing.
- Page 2 WARNING SYMBOL WARNING: This is the warning symbol to get your high attention for the instruction notice, which should be followed to avoid the potential serious personal injury. Anyone to use this equipment should read all the instructions of this manual. Keep this instruction manual for future reference.
-
Page 3: Table Of Contents
Shredder Hopper Rotor Housing Engine Discharge Vacuum Chute Chipper Inlet Cone Wheel Stand SPECIFICATIONS Item No. LCE01 Engine Specifications Chipping Capacity Max. 3” Engine Brand Rato Shredder Capacity Engine Type 1/2” Chipping Knives Power Shredder Hammer 4 Y-HAMMERS Displacement 212CC... -
Page 4: Safety
GENERAL OPERATING SAFETY 1. Read, understand, and follow all instructions in the manual and on the unit before starting 2. Locate the Chipper/Shredder on a flat, level, sturdy surface capable of supporting the weight of the Chipper / Shredder and any additional tools and equipment. 3. - Page 5 8. Never attempt to reposition or move the chipper shredder unit while it is running. Doing so could cause the machine to tip over, and reaching to steady the unit could result in accidental insertion of your hands into the chipper cone or shredder hopper areas.
- Page 6 Gasoline Fires and Handling Fuel Safely Use extra care in handling gasoline and other fuels. They are flammable and vapors are explosive. 1. When storing extra fuel be sure that it is in an appropriate container and away from any fire hazards. 2.
-
Page 7: Assembly
ASSEMBLY Install Stand (See Figure 1) Install the Wheels (See Figure 2) 1. Position the stand (A) underneath the engine base 1. Put the wheel onto the axle(B), Make sure the wheel 2. Using the four M8x60 bolts (C) and four nuts (D) to disc flat side face to machine. -
Page 8: Operation
Install the Hopper (See Figure 5) Install the Hopper Guard (See Figure 6) 1. Set plate (G) with bolts through the aligned holes 1. Position the hopper guard assembly (C) by aligning 2. Assembly the U shape plate (C) and put on plate (B) the assembly holes with the holes in the hopper 3. -
Page 9: Transportating And Storage
Adding Oil Refer to engine manual for information on adding oil. DANGER 1. The exhaust from this product contains carbon monoxide gas. Carbon monoxide is a colorless, orderless and tasteless gas that can cause dizziness, nausea, unconsciousness or even brain damage and death if inhaled for prolonged periods. -
Page 10: Maintenance
3. Always use the hopper handle and built-in wheels to move the chipper shredder. Never lift the unit using the fuel tank for support. If the unit must be lifted , always use at least two people, and always grip the unit securely using the front leg and hopper handle. - Page 11 Check Safety Labels 1. Service Interval: Every spring and fall. 2. Check that the safety labels are in place and undamaged. 3. Sample illustrations and part numbers of the decals can be found on page 6. Replace any damaged or missing decals.
-
Page 12: Trouble Shooting
IMPORTANT: Engine is shipped from factory without oil. You must add engine oil before starting engine. CAUTION 1. For the safety of the user, and to maximize the life of the engine, it is crucial to take time to check the condition of the engine. -
Page 13: Repair
REPAIR Shredding Hammer Rotation and Replacement The cutting edges of the shredding hammers may eventually wear out requiring rotation of the hammer or replace- ment if all cutting edges have been dulled. To rotate the shredding hammers: 1. Turn the engine off and wait for all moving parts to stop. 2. -
Page 14: Parts Breakdown
PARTS BREAKDOWN Part No. Description Q’ty Part No. Description Q’ty Engine Discharge guard Chipper cone Flange nut M6 Cone cap Flange bolt M6x20 Support stand Damper attachment Stand pad Damper Flange nut M8 Flange bolt M8x20 Flange bolt M8x60 Retainer hopper guard Flange Hopper Guard Wheel... - Page 15 Parts Breakdown – Engine and Rotor Group Part No. Description Q’ty Engine Flange Engine plate Spring washer 8 Hex bolt Key parallel pin Bearing spacer Rotor assembly kit Spring washer 10 Socket head cap screw Parts Breakdown – Rotor Group Part No.
-
Page 16: Warranty
PARTS BREAKDOWN - CHIPPER HOUSING GROUP Part No. Description Q’ty Engine plate Rotor assembly kit Rotor house Chipper back cover Flange bolt M8x20 Flange nut M8 Vacuum inlet cover Hex bolt M8x15 Spring washer Washer Wheel rack WARRANTY Limited 3 Years Warranty 1. -
Page 17: Optional Accessory
Vacuum Kit Optional Accessory for LCE01 Wood Chipper Shredder Item# LC901 Specification: 4"x10' extension hose with vacuum nozzle Type of waste permitted: Light, loose, dry waste such as leaves, grass clippings, or sawdust. NOTES: The vacuum is engineered for small, loose waste and for cleaning around decorative landscaping and... - Page 18 TROUBLE SHOOTING: SOLUTIONS PROBLEM POSSIBLE CAUSE 1. Hopper gate not closed. 1. Slide gate to closed position. 2. Cone cover not installed. 2. Install the cone cover. Vacuum not working 3. Hose not attached properly. 3. Clear blockage or replace. 4.
Need help?
Do you have a question about the LCE01 and is the answer not in the manual?
Questions and answers
How do you get the air cleaner off its located above the carberator
Need the 2 gas lines for Great Circle LCE01 wood chipper
What is the part number for the cutter and I need a Shaft for the motor
On the Gas tank there on the left corner is a breather cap or part of the fuel line.I need a replacement for this. Part is not listed.
on the top of the fuel tank is a breather cap with a fuel line or 1/4" hose . would there be a replacement part, it's not listed on the manual. a squirrel chewed this up.