Table of Contents
Advertisement
Advertisement
Table of Contents

Summary of Contents for ENERGIUM HENm
- Page 1 User Manual...
- Page 2 EN-Ver1_1_2 CONFIDENTAL ⓒ 2018 ENERGIUM Co., Ltd. All rights reserved. This is a confidential document and may not be photocopied, photographed, scanned, copied, modified, published, or in any way reproduced, disseminated, distributed, or shared without clear written permission from ENERGIUM.
-
Page 3: Table Of Contents
5-2-5. TUBE JAMMED IN LSM 1.General Safety Precautions 5-2-6. PAPER JAMMED IN RECEIPT PRINTER 5-2-7. A SYSTEM ERROR HAS OCCURRED 2.About HENm 5-2-8. BARCODE SCAN IS NOT SUCCESSFUL 2-1.HENm Definition 5-2-9. TRANSFER IS NOT INITIALIZED 2-2.Name and function of each component 5-2-10. -
Page 4: Description Of Marked Symbol Under Each
Sign used to display information required by the user when using the equipment. → Used to display process to execute specific feature. (Ex : ‘Setup → Select equipment.‘ means to select setup and then to select an equipment.) HENm User Manual... -
Page 5: General Safety Precautions
・ Insert the power plug tightly. ・ When unplugging the power cord, pull the plug head instead of cable line. ・ Do not make mechanical or electrical changes to the equipment. Energium shall not be held responsible for equipment that has been changed. - Page 6 ・ HENm contains a grounded (3-wire) power cord. To reduce the risk of electric shock, always plug the cord into a grounded power outlet. ・ The front power switch of the HENm device turns the equipment on or puts it in the standby mode. HENm User Manual...
-
Page 7: About Henm
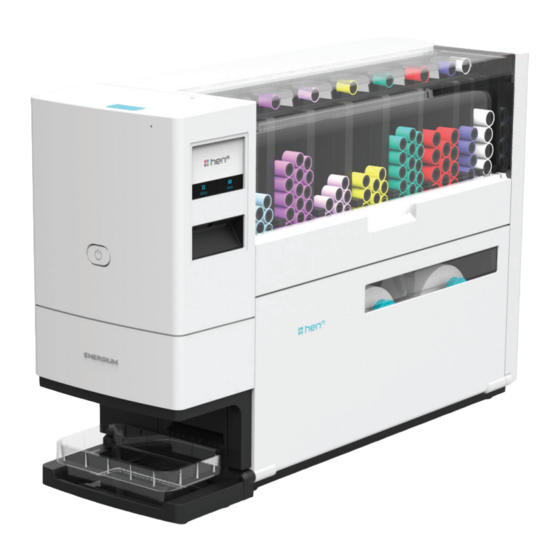
2. About HENm 2.About HENm 2-1.HENm Definition HENm automatically provides medical technicians with the essential items required to perform a phlebotomy (tubes with specimen labels attached, Extra Label) based on the phlebotomy information recorded in the Hospital Information System (HIS) -
Page 8: 2-2.Name And Function Of Each Component
2. About HENm 2-2.Name and function of each component title function 1. Inlet Stores tubes required for phlebotomy. Transfers supplied tubes from inlet to LSM 2. Transfer (Transfer moves i nside of Inlet Sensor Door). 3. LP Print necessary labels to be applied to tubes. - Page 9 2. About HENm 1. Inlet Stores tubes required for phlebotomy. ① ② ③ ④ ⑤ ⑥ ⑦ ⑧ Tube specifications and number of inlets can be adjusted by replacing the Inlet. ⑨ ① Inlet 1 ⑥ Inlet 6 ⑩ ②...
- Page 10 2. About HENm 4. LSM (Label Sticking Module) ① Apply labels to tubes and dispense them into a tray via outlet. ① Label attachment position 5. Tray Tubes and extra labels with patient information are dispensed into a tray within the outlet.
- Page 11 2. About HENm 7. RP (Receipt Printer) Print additional information to be provided to the patient. Ex) Receipts are printed with instruction to direct patients to subsequent location. ② ① Printed output information can be modified. ① Additional printed output ②...
- Page 12 2. About HENm ▪Control LCD Button features Button Title Function HOME Move to HOME Screen RESET Equipment Initialization PAUSE Temporary Pause Re-initialization of the equipment after resolving an FIXED error and or alarm DETAIL Check detailed error information START Un-pause the equipment with pause status...
-
Page 13: Component
User Manual Quick Installation Product Guide Warranty Power Cable USB Cable (2ea) Software Tray (4ea) (A,B Type) Installation USB Label roll (2ea) Receipt roll Outlet Tray pad (4ea) User may choose to attach the tray pad. HENm User Manual... -
Page 14: User Instruction
1. Connect Power Cable(①)→Interface(②), Debug USB Cable(③) then Turn on the power by pressing Power Switch(④)→Stand-by Switch(⑤). ⑤ ③ ② ④ ① 2. Check if there are sufficient tubes in each inlet. 3. Check if the LP label quantity is sufficient. HENm User Manual... - Page 15 4. User Instruction 4. Check if there is a tray in the outlet, and remove any labels and or tubes in the tray. 5. Run ‘Collection Program’. HENm User Manual...
- Page 16 4. User Instruction 6. Run ‘CNS Program’. 7. Run ‘MOD Program’ and Follow log-in procedure below on log-in screen. HENm User Manual...
- Page 17 8. Click ‘Call’ button to call the patient after receiving the patient via MOD program. 9. Click ‘Call’ button to call the patient after receiving the patient via MOD program. ① ② ① Patient Information ② Specimen Information HENm User Manual...
- Page 18 4. User Instruction 10. Press ‘Print’ button. 11. Check if the printed labels are properly printed and or attached. 12. Click HENm MOD Program ‘Complete’ button. HENm User Manual...
-
Page 19: 4-2.Software Program Features
4-2.Software Program Features 1. Collection Program Collects phlebotomy and patient information via hospital’s HIS, then reconfigure to communicate with HENm system and delivers it to CNS program. 2. CNS Program Saves patient phlebotomy data on HENm Storage by receiving from Collection Program. -
Page 20: 4-3.Consumable Replacement
[NO MORE LABEL IN STICKING LABEL PRINTER] message is displayed on LCD screen when sticking label is no longer available. ② ① 2. Pull the label holder and tilt downwards, then remove the used label roll. 3. Press the SLP Header switch(①), then turn the label guide(②) upwards. ① ② HENm User Manual... - Page 21 When mounting the label, attach the green ( ) label section with the sticker removed. 5. Close the SLP Header, then turn the label guide as shown in below image. 6. Turn the label holder as shown in below image. HENm User Manual...
- Page 22 4. User Instruction 7. Tighten the label roll by pressing REWIND button two to three times on the LCD screen. 8. Close the LSM(①)→LP Door(②). ① ② HENm User Manual...
-
Page 23: Extra Label
[NO MORE LABEL IN STICKING LABEL PRINTER] message is displayed on LCD screen when Extra label is no longer available. ② ① 2. Pull the label holder and tilt downwards, then remove the used label roll. 3. Press the ELP Header switch(①), then turn the label guide(②) upwards.. ① ② HENm User Manual... - Page 24 4. User Instruction 4. Insert the label as shown in below image. 5. Close the ELP Header, then turn the label guide as shown in below image. 6. Turn the label holder as shown in below image. HENm User Manual...
-
Page 25: Receipt Label
7. Close the LSM(①)→LP Door(②). ① ② 4-3-3. Receipt Label 1. Press the green button(①) and open the RP Door(②). [NO MORE PAPER IN RECEIPT PRINTER] message is displayed on LCD screen when Receipt Label is no longer available. ② ① HENm User Manual... - Page 26 4. User Instruction 2. Remove any label and or foreign substance in the vicinity of RP. 3. Close the RP Door. HENm User Manual...
-
Page 27: 4-4.Barcode Scanner Setting
4-4.Barcode Scanner Setting 4-4-1. How to disable Barcode Scanner 1. Scan the following barcodes in sequence on the Barcode Scanner, the Barcode Scanner will be disabled and the scanning function will not work. ① Enter Mode ② Trigger Mode HENm User Manual... -
Page 28: How To Activation Barcode Scanner
1. When the LCD screen is disabled, press the LCD screen to temporarily activate the scanner. 2. Barcode scanner is activated by scanning the following barcodes in order. ① Enter Mode ② Sense Mode ③ Exit Mode HENm User Manual... -
Page 29: Trouble Shooting
1. Stop the alarm by pressing MUTE(①) button on the LCD screen, then Close the RP Door(②). ① ② 5-1-2. TUBE INLET DOOR IS OPEN 1. Stop the alarm by pressing MUTE(①) button on the LCD screen, Close the Tube Inlet Door(②). ① HENm User Manual... -
Page 30: Label Printer Door Is Open
1. Stop the alarm by pressing MUTE(①) button on the LCD screen, Close the LP Door(②). ① ② 5-1-4. TRAY IS NOT AVAILABLE 1. Stop the alarm by pressing MUTE(①) button on the LCD screen, Return the empty tray(②) to the tray outlet. ① ② HENm User Manual... -
Page 31: More Label In Sticking Label Printer
1. Stop the alarm by pressing MUTE(①) button on the LCD screen, then open LSM(②) →LP Door(③). ① ② ③ 2. Remove the used up label roll and replace with a new one. *Refer to 4-3 3. Close the LSM(①)→LP Door(②). ① ② HENm User Manual... -
Page 32: More Label In Extra Label Printer
1.Stop the alarm by pressing MUTE((①) button on the LCD screen, then open LSM(②) →LP Door(③). ① ② ③ 2. Remove the used up label roll and replace with a new one. *Refer to 4-4 3. Close the LSM(①)→LP Door(②). ① ② HENm User Manual... -
Page 33: More Paper In Receipt Printer
1. Stop the alarm by pressing MUTE(①) button on the LCD screen, then open RP Door(②). RP Door open is press the green button. ① ② 2. Remove spent Receipt, insert a new Receipt and pull out the roll. 3. Close the RP Door. HENm User Manual... -
Page 34: Header Is Open On Sticking Label Printer
5-1-8. HEADER IS OPEN ON STICKING LABEL PRINTER 1. Stop the alarm by pressing MUTE(①) button on the LCD screen, then open LP Door(②). ① ② 2. Close the SLP Header in direction of the arrow shown below. 3. Close the LP Door. HENm User Manual... -
Page 35: Header Is Open On Extra Label Printer
5-1-9. HEADER IS OPEN ON EXTRA LABEL PRINTER 1. Stop the alarm by pressing MUTE(①) button on the LCD screen, then open LP Door(②). ① ② 2. Close the ELP Header in direction of the arrow shown below. 3. Close the LP Door. HENm User Manual... -
Page 36: Tube Labeling Is Complete
5. Trouble Shooting 5-1-10. TUBE LABELING IS COMPLETE 1. Turn alarm off by pressing the MUTE button. ① 2. Tube production is complete. Please remove the Tray. 3. Return the empty tray to the tray outlet. HENm User Manual... -
Page 37: 5-2.Lcd Error Display
Inlet Door(②)→LP Door(③)→Inlet Sensor Door(④) to open. ① ② ④ ③ 2. Remove the jammed tube by moving the Transfer by pressing BACK(①), FORWARD(②) buttons. ① ② 3. Close the Inlet Sensor Door→LP Door→Inlet Door and Press the FIXED button. HENm User Manual... -
Page 38: Tube Transfer Has Failed
1. Turn alarm off by pressing the MUTE(①) button on the LCD screen, then Press the FIXED button. ① ② 5-2-3. TUBE LABELING HAS FAILED 1. Stop the alarm by pressing MUTE(①) button on the LCD screen, then open LSM(②). ① ② HENm User Manual... - Page 39 5. Trouble Shooting 2. Remove unlabeled tube and label. 3. Close the LSM. 4. Press the FIXED button. HENm User Manual...
-
Page 40: Label Jammed In Extra Label Printer
1. Turn alarm off by pressing the MUTE(①) button on the LCD screen, then Open LP Door(②). ① ② 2. Remove any label and or foreign substance in the vicinity of ELP Header Door. 3. Print sample label by pressing FEED button 2~3 times. HENm User Manual... - Page 41 5. Trouble Shooting 4. Close the LP Door. 5. Press the FIXED button. HENm User Manual...
-
Page 42: Tube Jammed In Lsm
1. Turn alarm off by pressing the MUTE(①) button on the LCD screen, then Open LSM(②). ① ② 2. Remove unlabeled tube and label in the LSM. 3. Print sample label by press the FEED(①) and REWIND(②) button. ① ② HENm User Manual... - Page 43 5. Trouble Shooting 4. Close the LSM. 5. Press the FIXED button. HENm User Manual...
-
Page 44: Paper Jammed In Receipt Printer
1. Turn alarm off by pressing the MUTE(①) button on the LCD screen, then Open RP Door(②). RP Door open is press the green button ① ② 2. Remove any label and or foreign substance in the vicinity of RP. 3. Close the RP Door. HENm User Manual... - Page 45 5. Trouble Shooting 4. Print sample label by press the FEED button. 5. Press the FIXED button. HENm User Manual...
-
Page 46: A System Error Has Occurred
1. Stop the alarm by pressing (①) button on the LCD screen, and Press the RESET(②) button, then restart program. ① ② 5-2-8. BARCODE SCAN IS NOT SUCCESSFUL 1. Stop the alarm by pressing (①) button on the LCD screen, then open the LSM(②). ① ② HENm User Manual... - Page 47 5. Trouble Shooting 2. Remove labeling tube. 3. Close the LSM. 4. Press the FIXED button. HENm User Manual...
-
Page 48: Transfer Is Not Initialized
1. Stop the alarm by pressing MUTE(①) button on the LCD screen, then follow INITIALIZE(②) → FIXED(③) to open. ① ② ③ 5-2-10. LSM IS NOT INITIALIZED 1. Stop the alarm by pressing MUTE(①) button on the LCD screen, then follow INITIALIZE(②) → FIXED(③) to open. ① ② ③ HENm User Manual... -
Page 49: 5-3.In Case Called Patient Is Not Available To Come To
5. Trouble Shooting 5-3.In case called patient is not available to come to the table. 1. Click hold button. 2. Double click a patient to be recalled on the holding list. HENm User Manual... - Page 50 5. Trouble Shooting 3. Check called patient info(①) and specimen info(②), then click Print(③) button. ① ② ③ HENm User Manual...
-
Page 51: 5-4.In Case Basic Setting Window Is Displayed When Executing Software
<Network Not Connected> 2. Check PC LAN cable connection status. If not connected, reconnect the LAN cable and restart the program. 5-4-2. Check program setting 1. Run Collection, CNS, MOD, Statistic Program. Collection Statistics Program Program Program Program HENm User Manual... -
Page 52: In Case Receipts Are Not Printed
5. Trouble Shooting 2. Check if Database Connection Information under basic setting matches with HENm DB Setting. If it does not, modify the setting. 5-5. In case receipts are not printed 1. Check to see if Epson print port is properly connected. - Page 53 5. Trouble Shooting 3. Select receipt printer setting as EPSON TM-T88IV. 4. Press Save button and restart the program. HENm User Manual...
-
Page 54: 5-6.In Case [Comport Not Found] Message Is Displayed
2. Select Eq. port No.under equipment information, then click Save(②) button. COM port number generated by every PC may differ, in case Comport is not displayed under Eq. port No. move onto 3. below to take necessary measure. ① ② HENm User Manual... - Page 55 5. Trouble Shooting 3. In case, COM Port information is not available under Device Manager, detach the USB Port from PC and reconnect. COM port number generated by every PC may differant. HENm User Manual...
-
Page 56: 5-7.In Case [Equipment Communication Error]
5. Trouble Shooting 5-7.In case [equipment Communication Error] message is displayed on MOD program. Contact ENERGIUM C/S team if issues cannot be resolved. 1. Close the MDO Program. 2. restarting the equipment. 3. Run MOD Program. Program HENm User Manual... -
Page 57: 5-8.In Case Other Program Errors Occur
5. Trouble Shooting 5-8.In case other program errors occur In case any error occurs that are not covered by the HENm Software manual, collect and deliver the Log file as shown in below steps for error analysis. 1. Click Logs folder where the software has been installed. -
Page 58: Maintenance
6. Maintenance 6.Maintenance Inspect while the equipment is turned off. Month : Serial No. (HENm) : Check Result Catagry Suggested Action (week) Comment RP Header (①) 6-1. RP (Receipt Printer) RP Roller (②) 6-2. EXT Barcode Scanner EXT Barcode Scanner (①) LSM Door Sensor (①) -
Page 59: 6-1.Rp (Receipt Printer)
5. Close the RP Door. ② ① ① RP Header ② RP Roller 6-2.EXT Barcode Scanner 1. Turned off the equipment. 2. Clean dust and or foreign substance on the EXT Barcode Scanner(①) using dried cloth or a cotton-swab. ① HENm User Manual... -
Page 60: 6-3.Lsm
4. Clean dust and or foreign substance on the LSM Roller(⑤~⑥) using wet tower. ① ② ③ ④ <LSM Sensor> ① LSM Door Sensor ② Label Position Sensor ③ Tube In LSM Sensor ④ Tube Out Sensor ⑤ ⑤ ⑥ <LSM Roller> ⑤ Label Sticking Roller ⑥ Label Holder Roller HENm User Manual... -
Page 61: 6-4.Outlet
2. Clean dust and or foreign substance on theTray Detecting Sensor(①) using dried cloth or a cotton-swab. ① 6-5.Inlet 1. Turned off the equipment. 2. Clean dust and or foreign substance on the Inlet Door Sensor(①) using dried cloth or a cotton-swab. ① HENm User Manual... -
Page 62: 6-6.Lp (Label Printer)
5. LP Roller(⑥~⑦), SLP Sticking profile (⑧) SLP Sticking Roller(⑨), ELP Cutter cover (⑩) using wet tower. ① ② ④ ③ ① LP Door Sensor ② SLP Header ③ SLP Gap Sensor ⑤ ④ SLP Roller ⑦ ⑤ ELP Header ⑥ ⑥ ELP Gap Sensor ⑦ ELP Roller HENm User Manual... - Page 63 6. Maintenance ⑧ ⑨ ⑩ ⑧ SLP Sticking Roller ⑨ SLP Sticking profile ⑩ ELP Cutter cover HENm User Manual...
-
Page 64: Specifications
Tube Supply Method Direct tube supply Diameter : 12~16mm / Length : 75~125mm Compatible Tube Types BD, GREINER, AMPULAB, INSEPACK, IMPROVE, SARSTEDT, etc. *Please consult with ENERGIUM regarding tube compatibility prior to use. Sticking Label Printer Printing 203dpi Extra Label Printer... - Page 65 ⓒ 2018 ENERGIUM Co., Ltd. All rights reserved.
Need help?
Do you have a question about the HENm and is the answer not in the manual?
Questions and answers