
Summary of Contents for Diamond Traffic Products Omega X3
- Page 1 Omega X3 V 1.44 Updated 09/03/2019 Diamond Traffic Products P.O. Box 1455, 76433 Alder St, Oakridge, OR 97463 P: 866.782.3903 F: 541.782.2053 sales@diamondtraffic.com http://www.diamondtraffic.com...
-
Page 2: Table Of Contents
Version 1.05 01/23/2018 Omega X3: USER GUIDE Table of Contents 1. Introduction ................................ 4 1.a Keypad & Display ............................4 1.b Road Tubes ..............................6 1.b.1 Connecting Road Tubes ......................... 7 1.c Basic Setup ..............................9 1.d GPS Reception ............................... 9 1.e Date and Time Verification ........................... - Page 3 Version 1.05 01/23/2018 Omega X3: USER GUIDE 8.6 Iris Configuration Via Centurion ......................... 19 9. Data Processing ..............................20 9.1 Initial import screen ............................ 20 9.2 Advanced Processing ..........................21 9.3 Process Data ..............................22 10. Bluetooth ................................ 24 10.1 Microsoft Bluetooth Stack ........................24 10.2 3...
-
Page 4: Introduction
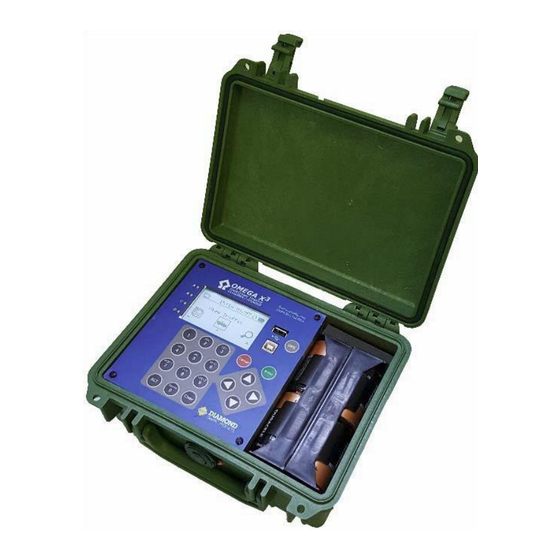
.0000305us (micro seconds). At this resolution, the Omega X3 can store over 150 million unique timestamp entries. A new feature that sets the Omega X3 apart from other data collection devices is its ability to store MAC addresses of active Bluetooth devices. This affords the possibility of determining Destination/Origin calculations. - Page 5 Keypad: these 12 buttons, located directly below the display, provide primary input. With the keypad, you can program and operate the Omega X3. When the ALT key is held down while you are pressing another key, an alternate set of keys is available to the user. The table below shows a sample of the alternate keys.
-
Page 6: Road Tubes
• The Omega X3 will work with road tubes between 30’ and 60’ long. Be sure that the tubes are of the same overall physical length (as measured when not stretched). When stretching the tubes, try to stretch them the same amount when securing them to the roadway (i.e. -
Page 7: Connecting Road Tubes
1.b.1 Connecting Road Tubes As the Omega X3 records a timestamp for each axle strike, it is highly important that the tubes be of similar overall length. This will provide an equal distance for the sound/pressure wave to travel inside of the tube. - Page 8 Version 1.05 01/23/2018 Omega X3: USER GUIDE For Volume type data: There are three possible tube layouts: Normal This sensor configuration will be used when the counter can be located in a center median of a roadway. Road tube can be stretched across each lane of travel on either side of the median.
-
Page 9: Basic Setup
1.d GPS Reception The Omega X3 has an internal GPS sensor that will be activated as a part of the setup process, and then again, every 6 hours after data collection has begun. After receiving a good GPS signal and position, the Omega X3 will power down the GPS module to reduce power draw. -
Page 10: Road Tube Layout
The next screen will allow you to specify a road tube layout. Use a tube layout that best matches your installation type. The correct selection will inform the Omega X3 how to process vehicle data when displayed using the On-the-fly classification. This will also help when importing data into the Centurion PC application. -
Page 11: Viewing Traffic
Each mode offers distinct types of data that can be displayed. To start this process, you will need to activate the Omega X3 display by pressing any key. The correct menu option is ‘View Traffic’, press ENTER to start viewing traffic. As each vehicle crosses the collection site, the Omega X3 will display various information. To change the type of data being displayed, use the Left or Right arrow keys. -
Page 12: Show Status
Version 1.05 01/23/2018 Omega X3: USER GUIDE 3. Show Status The Show Status menu option allows the field tech to receive a quick overview of the Omega X3 unit. The displayed data will contain such information as: System Status Amount of free memory and expected battery life. Note that since the Omega X3 uses lithium batteries, that the value will be close to the same value for the life of the batteries. -
Page 13: Files
4. Files The Omega X3 can store up to 65k files in its internal memory. This should afford the field tech the option of deploying the Omega X3 to several separate locations and then retrieving the data file(s) for processing at a later time, or to retain those studies till end of season. -
Page 14: Data Study
Version 1.05 01/23/2018 Omega X3: USER GUIDE 5. Data Study It may be necessary to check the status of the current study. Should the display be blank, press the Enter key to activate the display and then right or left arrow to ‘Show Status’ and press Enter. Using the Right or left arrow locate Data Study and press enter. -
Page 15: Data Retrieval
In order to use a thumb drive with the Omega X3 it must conform to a known standard. The thumb drive must have these specifications: •... -
Page 16: Driver Installation
8. Iris Cellular Modem When the Omega X3 is equipped with an Iris Cellular Modem, data files can be uploaded to the Diamond Data Server (DDS). This allows for quick retrieval of data files by Centurion in the office. The Iris Cellular Modem... -
Page 17: Settings
8.1 Settings To configure the Iris settings, wake up the Omega X3 and use the Left or Right arrow and select Iris Modem and press ENTER. Press ENTER on the menu item ‘Settings’. The Omega X3 will present the user 2 options to... -
Page 18: Enter Listen Mode
Selecting this option will cause the Omega X3 to upload data files to the Diamond Data Server (DDS). If there are no files to send to the DDS, the Omega X3 will display an error message ‘ERROR: There are no files in memory!’... -
Page 19: Iris Configuration Via Centurion
Omega X3: USER GUIDE 8.6 Iris Configuration Via Centurion Centurion can also be used to configure the Iris modem. You will need to connect the Omega X3 to a computer running the Centurion software (1.43 build 5 or newer). Diamond Traffic Products, Inc. -
Page 20: Data Processing
Omega X3: USER GUIDE 9. Data Processing In order to convert the Omega X3’s timestamp records (data file), the data must be processed through Centurion’s Timestamp Data Processor (TSProcess). Using TSProcess is quick and easy, it will allow you to verify or edit any of your site information and will allow you to select starting/ending Time &... -
Page 21: Advanced Processing
NOTE: This action will only impact the way you process or view the report. It will have no effect on the original raw binary data file from the Omega X3. The upper right allows the user to override the selected type of data (volume vs classification) and to select the number of lanes/tube that were deployed. -
Page 22: Process Data
Version 1.05 01/23/2018 Omega X3: USER GUIDE 9.3 Process Data Pressing the Process Data button will begin the conversion of Timestamp data into either Per-Vehicle or Volume only data. A Summary screen will be generated and be presented prior to importing the resulting data into the internal database. - Page 23 Version 1.05 01/23/2018 Omega X3: USER GUIDE Recorded Timestamps This section displays the total number of timestamps for each road tube input that was saved/recorded within the data file. Discarded Timestamps This section displays the total number of timestamps that were discarded/not used in data processing.
-
Page 24: Bluetooth
To add a device to the computer is a fairly simple process, simply right click on the Bluetooth adapter and select ‘Add Device’. Make sure that the Omega X3 display is active and then proceed with the on-screen steps needed to complete the process. -
Page 25: Bluetooth Address Recording
Signal strength (in dBm) When a device comes within range of the Omega X3, that device is recorded along with any other devices in the area. Clusters of devices could be thought of as an event. Seeing those clusters at another collection site would be a good indication of commute time between those points. -
Page 26: Bicycle Data Collection
2. Bicycles Only – This is where road tubes (usually physically shorter compared to those used for vehicles) are placed across a single or dual lane bike path and you want the Omega X3 to record each time a bicycle crosses the tubes. - Page 27 (i.e. a fast-moving bicycle hitting a road tube at 15 feet looks pretty much identical to a car) but is not too weak so that the Omega X3 misses it. Many users come up with an ideal road tube length.
- Page 28 As previously mentioned, road tube length selection is important for getting quality data to the Omega X3. It is recommended that customers perform some initial testing with various lengths and types of road tubes placed in different situations to determine their ideal requirements before primary data collection begins.
- Page 29 Version 1.05 01/23/2018 Omega X3: USER GUIDE A mix of vehicles and bicycles and you only want the Vehicles Only Go Shorter if missing bicycles. data from the Vehicles Go longer if bicycles are being A mix of vehicles and bicycles and you only want the Bicycle Only misidentified as vehicles.
-
Page 30: Appendix A. Specifications
Version 1.05 01/23/2018 Omega X3: USER GUIDE Appendix A. Specifications ▪ Sensor Inputs: Four watertight piezo air switches (Road Tube) 1-4096 millisecond programmable timeout value On board sensor diagnostics 5-120MPH normal operating range Metal nozzles accept 1/4" Standard road tube and Mini Tube 3/16”... -
Page 31: Appendix B. Data Port Pin Outs
The type ‘A’ port can be used for connecting such devices as a Thumb drive. Note not all devices plugged into this port may operate. The type ‘B’ port can be used for connecting the Omega X3 to a standard computer running the Windows operating system. Drivers will need to be installed prior to initial connection and are supplied during Centurion software installation. -
Page 32: Appendix C. Menu Structure
Data Study Diagnostics Volume Sensor Vehicle Files List Erase Iris Modem (only available if the Omega X3 contains an Iris modem) Settings Enter Listen Mode Send Files to DDS Test Text Message Files (DDS) Re-initialize Modem Diamond Traffic Products, Inc.
Need help?
Do you have a question about the Omega X3 and is the answer not in the manual?
Questions and answers
How to replace the batteries