Table of Contents
Advertisement
Advertisement
Table of Contents

Summary of Contents for E-Cells Super Monarch AWD 1500 Crown
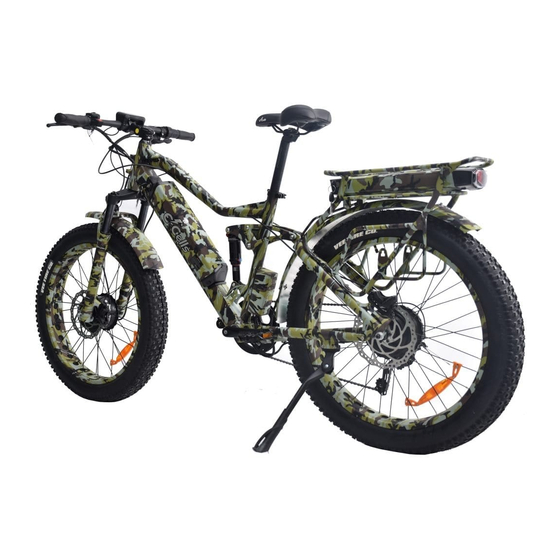
- Page 1 INSTALLATION USERS MANUAL E-Cells Super Monarch AWD 26" 1500 Crown Edition This manual describes how to complete the final assembly safely and includes operating and maintenance advice. This manual was designed for the CROWN models. But most tips apply to all our models.
-
Page 2: Table Of Contents
CONTENTS THANK YOU SECURITY ITEMS VERIFICATION FINAL ASSEMBLY UNPACKING MAIN PARTS SEAT HANDLEBAR FRONT WHEEL PEDALS BATTERY INSTALLATION LCD SCREEN OPERATIONS IMPORTANTS POINTS BATTERY CHARGING MAINTENANCE ASSISTANCE USEFUL TIPS... -
Page 3: Thank You
Thank you for purchasing your new E-Cells Super Monarch AWD 1500 Crown E- Bike pictured above our Golden Night edition. We are committed to 100% customer satisfaction and should you need assistance please don't hesitate to call us. All warranty concerns should be sent to: ecellswarranty@gmail.com. -
Page 4: Items Verification
• Do not turn the pedals while the battery is charging and installed on the bike. The cord may wrap around the pedals or pedals and damage the plug with the risk of electric shock or fire. • Do not use outlets, connectors, or other wiring devices with a different power source than recommended. -
Page 5: Final Assembly
4- Front wheel installation; 5- Fender and Front Light 6- Pedals Necessary tools : Pair of scissors Allen key (4mm,5mm). Allen Wrench (10mm,15mm,19mm) Tool Kit 1 set We recommend using the E-Cells Electric Bike Tool Kit. It will facilitate your installation and maintenance. -
Page 6: Unpacking
Make sure you do not lose the components in the packaging (there may be a lot of protective packaging). To note The keys will be securely attached to the frame or handlebars of your bike. Make sure you do not lose them as they are coded, and a replacement set can not be provided by E-cells. -
Page 7: Main Parts
Main parts After removing your bike from its shipping box, you should end up with these parts: 1. The electric bike 2. The front wheel... - Page 8 3. The handlebar 4. 5 Charger with Y cord 5. Pedals 6. Seat Note: The pedals can be in the same box as the charger. The saddle mounted on a pole can be in the box or attached to the bike.
-
Page 9: Seat
Seat post and saddle This is the easy part! Simply insert the seat post at the desired height (approximately so that the saddle reaches you at the height of the hips) Go ahead and remove the battery with key to facilitate turning bike over for easy wheel insertion onto fork dropouts. The post is inserted into the frame hole and set to the desired height. -
Page 10: Handlebar
HANDLEBAR The handlebar will already be connected by cables and wires, all that is necessary for the final assembly is to put the handlebar in good position. Initial position Final position Reverse the handlebar correctly. When putting the handlebar in the correct position, make sure no cables are bent or too tight. -
Page 11: Front Wheel
FRONT WHEEL AND FRONT FENDER Its best to turn the bike over resting on the handle bars and rear rack to insert the front wheel into the front forks. You may find the front brake caliper was shipped loose to facilitate attaching after wheel has been inserted into the fork.. - Page 12 Make sure the disk brake is well aligned to fit in the calipers and lock the lever to secure the wheel to the front fork. Step 1 Step 2 Tight the right screws by Allen wrench Tight the left screws by allen wrench FRONT FENDER ASSEMBLY Note:The recommended tire pressure for the Vee tires is a minimum of 8 PSI.
-
Page 13: Pedals
PEDALS All bikes (including electric bikes) have left and right pedals. Make sure to identify each one of them. This image shows how to identify each pedal. The '' R '' (right) written on the pedal indicates that this is the right pedal to install on the right side of the bike (if you are sitting on the bike). -
Page 14: Battery Installation
BATTERY INSTALLATION The battery of your bike is the most expensive and most important part. It can be removed by following these steps. Use the supplied key to unlock the battery. It is necessary to turn on the battery by pushing the red button when using the battery. - Page 15 To install the battery on the frame, insert it in the same way it was removed. It is necessary to use the key to install the battery. The base of the battery should be inserted first and pushed into the bike frame. It is very important to make sure the battery is locked before using the bike.
-
Page 16: Lcd Screen Operations
Check the condition of your bike regularly. Make sure that nothing has become loose. Make a visual inspection of the entire bicycle before each ride. Make sure the tires are properly inflated (about 8-30 PSI for the Super Monarch AWD 1500 Crown models). Also check your brakes. - Page 17 Battery indicator : The battery indicator light is only an estimate of the battery charge. The battery charge level appears on the LCD screen. The best way to know that the bike is 100% charged is by charging it until the charger light indicates that it is fully charged (see next page). Inversely, the only way to know that the battery is dead is to use the bike until the LCD screen turns off and does not turn back on.
-
Page 18: Battery Charging
CHARGING THE BATTERY The battery can be charged on the bike or off the bike by following these steps: 1. Plug the charger into the wall outlet just like a laptop or phone charger. 2. Check that the charger LED is green. 3. -
Page 19: Maintenance
MAINTENANCE A little extra maintenance is needed unlike a regular bike. One of the main things you may encounter is that your spokes need to be tightened more often than a non-electric wheel. Our wheels use 12Guage spokes that are very powerful, but more sensitive to vibration. In addition to paying attention to the tension of your spokes, it is important to periodically check all your screws and bolts, especially your rear suspension pivot points.Checking and tightening if necessary will allow you to have a bike safe and secure. -
Page 20: Assistance
LCD screen climb, overweight, etc. If the problem persists without the presence of these factors, contact E-Cells team. The screen just does not turn Check the connectors of the cables connected to the screen... - Page 21 Front light no longer lights If inadvertently or by accident the front light has been disconnected, be sure to reconnect the wires in the correct plugs: the negative wire in the negative plug and the positive wire in the positive plug. A bad connection Lumière avant can cause a short circuit of the controller...
-
Page 22: Useful Tips
USEFUL TIPS This User Manual is only explain the vehicle's use and functions. The images shown may differ from the actual model presented. We reserve the right to change the model without prior notice due to technical improvements. This vehicle has a top speed limiter. For security reasons, its removal is strictly prohibited.
Need help?
Do you have a question about the Super Monarch AWD 1500 Crown and is the answer not in the manual?
Questions and answers