Advertisement
Quick Links
Advertisement

Summary of Contents for Bushranger MULTI-TOOL 36V9701
- Page 1 OPERATOR’S MANUAL MULTI-TOOL 36V9701...
- Page 2 IMPORTANT NOTES Thank you for purchasing your Bushranger 36V Multi-Tool. ® This instruction manual will aid in the assembly, safe operation and maintenance of your Multi-Tool. Please read the following warnings to ensure safety and the long life of your product.
-
Page 3: Table Of Contents
TABLE OF CONTENTS Safety & Handling Safety Instructions ........4 Hazards ..........6 Personal Safety Equipment ....6 Features & Definitions Feature Definitions ........7 Assembly Procedures Handle ..........8 Guards ..........8 Split Shaft Assembly ......9 Connection Of Attachment ....9 Polesaw Adjustment ......9 Trimmer Line Fitting ......10 Fitting Trimmer Head......12 Operating Instructions Before Starting ........13... -
Page 4: Safety Instructions
SAFETY & HANDLING Safety Instructions Do not operate the 36V Multi-Tool before reading all Instructions & reading all Safety & Handling sections. Operator Safety • Wear the necessary safety equipment, as listed on page (6), in the Personal Safety Equipment Section. •... - Page 5 • Stop the 36V Multi-tool and disconnect the battery from the machine to inspect the unit if it begins to vibrate abnormally or if it strikes a foreign object. • Use only genuine trimmer line. Never use wire, rope, string, etc. • Use only genuine Bushranger replacement parts. ®...
-
Page 6: Hazards
SAFETY & HANDLING Transporting and Storage • Store the 36V Multi-tool out of reach of children and unauthorised persons. • Stop the 36V Multi-tool and allow it to cool before storing or transporting. Do not store or transport the 36V Multi-tool with batteries fitted, remove and secure separately •... -
Page 7: Feature Definitions
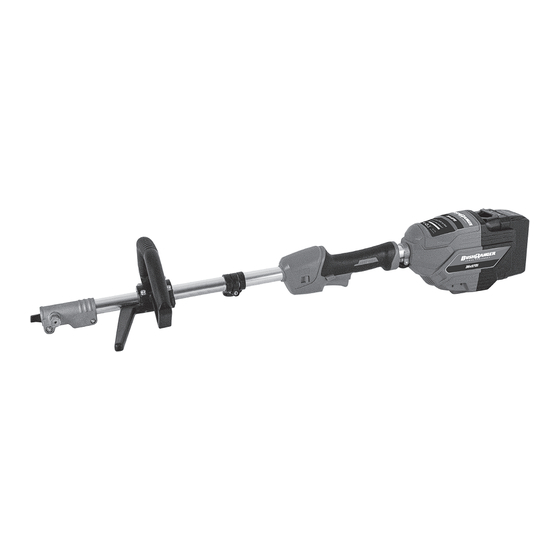
FEATURES & DEFINITIONS Bent Shaft Trimmer 1. Bumphead Assembly 2. Shaft Guard (inc 2 screws) 3. Loop Handle 4. Battery Pack 5. Throttle Lever “Release” 6. Throttle Lever 7. High / Low Speed Switch 8. Shoulder Strap 9. Chain Adjustment Tool for 85002 Attachment 10. -
Page 8: Handle
ASSEMBLY PROCEDURES Handle Assembly Fitting The Handle (See Fig. 2) 1. Components - 4x Screws, Loop Handle & Clamp. 2. Place Handle (1) over the shaft in the desired location. 3. Insert Clamp (2) from the bottom side of the handle. 4. - Page 9 ASSEMBLY PROCEDURES Attaching Hedge Trimmer Attachment / Adjusting Angle Fig. 7 Fig. 5 Fig. 6 Fig. 4 Once attachment is located in Pull locating pin (2) Loosen Knob (1) the drive release locating pin (2) and tighten knob (1). Adjust Angle Of Gear Box Fig.
- Page 10 ASSEMBLYPROCEDURES ASSEMBLY PROCEDURES Trimmer Line Assembly - Bump Head Trimmer Line Assembly - Bump Head upper spool cover housing Fig. 21 Fig. 19 Fig. 20 Upper Spool Spool middle Cover Middle plate spool Housing Plate Fig. 23 Fig. 24 Top of Spool Top of Spool Fig.
- Page 11 ASSEMBLY PROCEDURES Trimmer Line Assembly - Bump Head (continued) * 2.4mmø nylon line is recommended to provides best performance. The bump head can be fitted with line diameters from 2mm to 2.7mm. The maximum length of the line that can fit the head varies according to the line diameter. The maximum length capacity using 2.4mmø...
- Page 12 been recommended by the manufacturer. HEAD REMOVAL & REPLACEMENT ASSEMBLYPROCEDURES ASSEMBLY PROCEDURES BENT/CURVED SHAFT CUTTING HEAD 1. Replace blade protector. Text 2. Align hole in Mounting Washer & slot in Cutting Head Assembly Cutting Head Assembly spindle. Fig. 26 3. Insert Allen Key into hole & firmly Always ensure the line cutting blade on the guard Always ensure the line cutting blade on the guard is covered Spindle...
- Page 13 OPERATING INSTRUCTIONS Check the position & operation of controls to ensure you are comfortable before you start using the machine. Triggers and grip position should provide smooth operation, balance and comfort before starting the 36V Multi-tool. Check that all screws are securely fastened and also check all the safety devices.
- Page 14 OPERATING INSTRUCTIONS Starting The Engine 1 - Get Ready... Fig. 34 • Place the battery correctly into the multi-tool making sure the battery has been charged. (See Fig. 32) • Position the high / low speed switch to the correct position for your application.
-
Page 15: Guards
OPERATING INSTRUCTIONS Fig. 37 Switching Off The Multi-tool Emergency Stop Procedure • If it becomes necessary to stop the multi-tool immediately. Let go of the throttle lever. (See Fig. 37). Feeding Bump Head Line To increase the length of nylon trimming line when using the Bump Head; 1. -
Page 16: Maintenance Chart
MAINTENANCE & CARE Trimmer Body & Hedge Trimmer Attachment Gear Case • The reduction gears are lubricated by multi-purpose, lithium-based grease in the gear case. Supply new grease every 20 hours of use or more often depending on job condition. •... - Page 17 Never repair cutting attachments by welding, straightening or custom reworking of parts. This may result in product failure or serious injury. Never attempt maintenance that is not outlined in this manual. All repair work must be carried out by an Authorised Bushranger Power Equipment Dealer. ®...
-
Page 18: Warranty
WARRANTY 1. Australian Consumer Law (REG. 90): The benefits to the consumer given by this warranty are in addition to other rights and remedies of the consumer under a law in relation to the good or services to which this warranty relates. Our goods come with guarantees that cannot be excluded under the Australia Consumer Law. - Page 19 NOTES...
- Page 20 Images are for illustrative purposes only. Bushranger™ is a trademark of Roy Gripske & Sons Pty Ltd. RGS shall not be liable for technical or editorial errors or omissions contained herein, nor for incidental or consequential damages resulting from furnishing this material. The information is provided “as is”...
Need help?
Do you have a question about the MULTI-TOOL 36V9701 and is the answer not in the manual?
Questions and answers