Advertisement
Table of Contents
- 1 Table of Contents
- 2 English
- 3 Arming - Away
- 4 Arming - Stay
- 5 Disarming - off
- 6 Activating Emergency Requests
- 7 Activate/Deactivate Chime
- 8 Partition Arming
- 9 Partition Disarming
- 10 Checking System Status
- 11 Direct Device Bypass
- 12 Activating Duress Signals
- 13 Managing Badges and Codes
- 14 Notes
- Download this manual
Advertisement
Table of Contents

Related Manuals for Videofied XMA

Summary of Contents for Videofied XMA
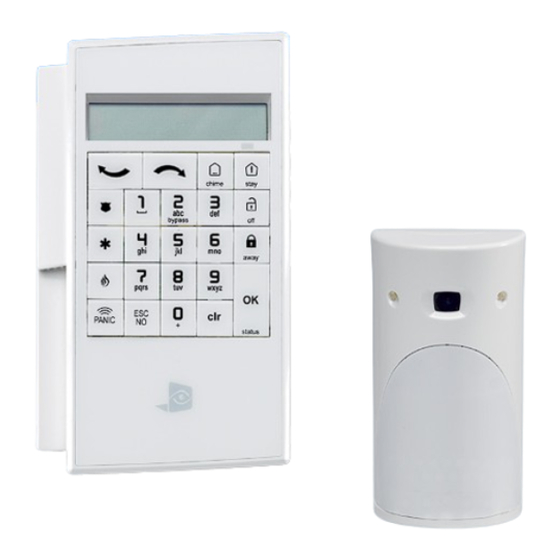
- Page 1 USER GUIDE Get Videofied. Visit us at www.videofied.com Your local installer: www.eaglesecuritysolutions.co.uk...
-
Page 2: Table Of Contents
1-12 We recommend that you read this user manual carefully to ensure that your security system is operated with maximum efficiency and in optimal conditions. The VIDEOFIED system complies with European radio standards and is designed to operate in ®... -
Page 3: English
ENGLISH Arming - Away 1. Keypad (XMA/WMB) Code Arming (XMA/WMB): Enter access code and press to confirm. The keypad display will show ARMING THE SYSTEM Quick Arm (XMA/WMB): Press and hold until the keypad rapdily beeps three times. -
Page 4: Arming - Stay
(if installed). At the end of the time delay the system is armed and the red LED on the reader flashes every two seconds. Arming - Stay 1. Keypad (XMA/WMB) Code Arming (XMA/WMB): Enter access code and press The keypad display will show... -
Page 5: Disarming - Off
Disarming - Off 1. Keypad (XMA/WMB) No Event: Code Disarming (XMA/WMB) Enter access code and press to confirm. The keypad display will show Mon 01/02 04:49 DISARMED LVL:1 Quick Disarm (XMA/WMB): Press and hold until the keypad rapdily beeps three times. -
Page 6: Activating Emergency Requests
The system is disarmed. Activating Emergency Requests Medical Emergency Police Emergency Fire Emergency 1. Keypad (XMA/WMB) Press the button for 3 seconds. They Keypad display flashes for 10 seconds. Press the desired emergency button. -
Page 7: Partition Arming
Partition Arming 1. Keypad (XMA/WMB) Code Partition Arming (XMA/WMB) Press until the desired partition is shown Enter a user code and press The system displays ARMING A A - - Note: Detection from an instant device during arming will stop the arming process and display . -
Page 8: Partition Disarming
Short beeps are emitted from the reader and internal sirens (if installed). At the end of the time delay the system is armed and the red LED on the reader flashes every two seconds. Partition Disarming 1. Keypad (XMA/WMB) No Event: Partition Code Disarming (XMA/WMB) ... -
Page 9: Checking System Status
4 times to indicate that there has been an event since arming and then system will be disarmed. Checking System Status 1. Keypad (XMA/WMB) Press and hold the button until the keypad beeps rapidly three times ... -
Page 10: Direct Device Bypass
Direct Device Bypass 1. Keypad (XMA/WMB) Press and hold the button until the keypad beeps rapidly three times The display will show for 10 seconds BADGE OR CODE Enter a user code for the system followed by ... -
Page 11: Managing Badges And Codes
Managing Badges / Access Codes 1. Keypad (XMA/WMB) Note: Badges and codes can only entered into the system by a Level 3 user code Accessing Level 3 Programming (XMA/WMB) The display will read DATE/TIME DISARMED LVL 1 ... - Page 12 Managing Badges / Access Codes - Continued Adding Badges/Codes (XMA/WMB) Note: Badges require WMB or BR badge reader learned into the system. Perform 'Accessing Level 3 Programming' and verify you are in Access Level 3 Press until the display reads...
- Page 13 Managing Badges / Access Codes - Continued Deleting Badges/Codes (XMA/WMB) Perform 'Accessing Level 3 Programming' and verify you are in Access Level 3 Press the until the display reads BADGES AND ACCESS CODES Press and use the...
-
Page 14: Notes
NOTES... - Page 15 NOTES...
- Page 16 NOTES Your local installer: www.eaglesecuritysolutions.co.uk...
Need help?
Do you have a question about the XMA and is the answer not in the manual?
Questions and answers