
Subscribe to Our Youtube Channel
Summary of Contents for Stirling Black Edition MD 18610
- Page 1 Overlock Sewing Machine Model Number MD 18610 INSTRUCTION MANUAL AFTER SALES SUPPORT www.medion.com.au 1300 884 987 MODEL: MD 18610 PRODUCT CODE: 701495 09/2020...
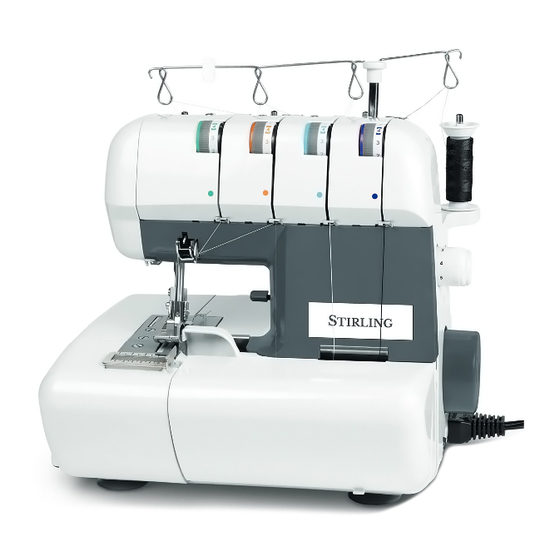
- Page 2 Main components...
- Page 3 Main components Thread tension dial – left needle (A) Thread tension dial – right needle (B) Thread tension dial – upper looper (C) Thread tension dial – lower looper (D) Telescopic thread guide bar Spool pin Stitch length dial Diff erential feed dial Hand wheel Socket for foot control On/Off...
- Page 4 Sewing mechanism Lever for lifting presser foot Needles Presser foot Lever for thread cutter Upper looper Lower thread guide Accessory compartment Lower looper Needle plate Knife mounting Lower knife Upper knife Thread cutter...
- Page 5 Sewing mechanism...
-
Page 6: Table Of Contents
Table of Contents Information about this user manual ..........7 Key to symbols ................7 Proper use ..................8 Declaration of compliance ............. 9 Safety information ................ 10 Keep electrical appliances away from children ......10 Mains cord and mains connection ..........10 Never carry out repairs yourself ........... - Page 7 Free arm ..................19 Threading the loopers ..............20 General information on threading ..........20 Threading the lower looper ............21 Threading the upper looper ............23 Threading the needles ..............24 Test run ..................26 Adjusting the thread tension ............27 Adjusting the thread tension for the needle threads ....
- Page 8 Positive differential feed ............... 44 Negative differential feed ............. 44 Setting the differential feed ............45 Setting the presser foot pressure ..........46 Sewing with cord/decorative yarn ..........47 Troubleshooting ................48 Storage ..................49 Cleaning and lubrication .............. 49 Disposal ..................
- Page 9 Overlock Sewing Machine Warranty Details REGISTER YOUR PURCHASE AT www.aldi.com.au/en/about-aldi/product-registration/ TO KEEP UP-TO-DATE WITH IMPORTANT PRODUCT INFORMATION The product is guaranteed to be free from defects in workmanship and parts for a period of 12 months from the date of purchase. Defects that occur within this warranty period, under normal use and care, will be repaired, replaced or refunded at our discretion.
-
Page 10: Information About This User Manual
Information about this user manual Thank you for choosing our product. We hope you enjoy using it. Please read the safety instructions and the manual carefully before using the appliance for the first time. Note the warnings on the appliance and in the user manual. Always keep the user manual close to hand. -
Page 11: Proper Use
Protection class II Protection class II electrical appliances are electrical appliances that have double and/or reinforced insulation throughout and do not have options to connect a protective earth conductor. The insulated enclosure of a protection class II electrical appliance can form the additional or reinforced insulation in part or in full. -
Page 12: Declaration Of Compliance
Declaration of conformity Medion AG hereby declares that the product conforms to all relevant Australian requirements. AFTER SALES SUPPORT www.medion.com.au MODEL: MD 18610 PRODUCT CODE: 701495 09/2020 1300 884 987... -
Page 13: Safety Information
Safety information Keep electrical appliances away from children This appliance can be used by children aged 8 years and older and by people with reduced physical, sensory or mental capacity or with a lack of experience and/or knowledge but only with proper supervision or if they have been told how to use the appliance safely and have understood the risks involved if they use it improperly. -
Page 14: Never Carry Out Repairs Yourself
Do not allow the cord to come into contact with any hot surfaces. Switch off the overlocker, switch off the power point and pull out the plug to carry out the following tasks: threading the needle, replacing the needle, adjusting the presser foot, cleaning and maintenance work, at the end of sewing work and when your work is interrupted. -
Page 15: Handling The Appliance With Care
Handling the appliance with care. The overlocker has suction feet for stability. Nevertheless, ensure that the machine is placed on a stable, level work surface and that all four feet are touching the work surface. When the appliance is in use, the air vents must remain free: do not allow any foreign objects (e.g. -
Page 16: Cleaning And Storage
Cleaning and storage Before cleaning, switch off the power point and pull out the plug. Use a soft, dry cloth for cleaning. Avoid the use of chemical solutions and cleaning products because these may damage the appliance surface and/or the labels on it. -
Page 17: Before Use
Before use Accessories Two-thread looper* Oil bottle (empty) Stitch finger* Tweezers Needle box* Spool holder (4 ×) (Type 130/705H No. 75 - 100) Cord guide Spool disc (4 ×) Screwdriver (small)* Accessories bag Screwdriver (large) Dust cover Hexagon wrench key Brush* Spare upper cutter Thread net (4 ×) -
Page 18: Setting Up The Telescopic Thread Guide Bar
Setting up the telescopic thread guide bar − Pull the telescopic thread guide bar (5) all the way out before threading. − Turn the telescopic thread guide bar so that the thread guides are directly above the spool pins (6). Spool holder Both industrial and domestic spools can be used with this machine. -
Page 19: Spool Net
Spool net Polyester or coarse nylon threads work loose when unwinding from the spool. Therefore, use the supplied spool net for such thread to ensure the thread feeds uniformly. − Pull the net over the spool from above. − Pull the net over the spool to the end and turn up the excess. -
Page 20: Controlling The Sewing Speed
Controlling the sewing speed The sewing speed is controlled using the foot control. This means that the sewing speed can be changed by exerting more or less pressure on the foot control. Foot pedal Safety switch This machine is equipped with a micro safety switch. -
Page 21: Operation
Operation Hand wheel Always turn the hand wheel (9) towards you, not away from you. Front cover To open the front cover (12), push the notch as far as possible to the right and then pull the front cover towards you. Edge guide When the edge guide (16) is used, the fabric is trimmed and sewn at a consistent distance... -
Page 22: Thread Cutter
Thread cutter Cut the threads using the thread cutter (33) on the side of the sewing machine or using scissors. Leave approx. 15 cm of thread hanging behind the eye of the needle. Free arm The free arm (13) must be opened in order to thread the machine. -
Page 23: Threading The Loopers
Threading the loopers General information on threading Threading is done in the following order: 1. STEP 1 lower looper purple 2. STEP 2 upper looper blue 3. STEP 3 right needle orange 4. STEP 4 left needle green Correct threading is essential to ensure that stitching is even and to prevent the thread from breaking. -
Page 24: Threading The Lower Looper
Threading the lower looper 1. Open the front cover and the free arm (13). 2. Turn the hand wheel (9) towards you until the looper (28) is in the most convenient position for threading. 3. Pass the thread through the eye on the telescopic thread guide bar (5). - Page 25 The thread must be correctly positioned between the two discs on the thread tensioner. 6. Place the thread in the lower thread guide (26). From this point, follow the thread guide diagram in the machine. (Fig. D) 7. In order to thread the rear eye of the looper, turn the hand wheel until the point when the rear part of the looper appears on the left- hand side of the mechanism.
-
Page 26: Threading The Upper Looper
Threading the upper looper 1. Pass the thread through the eye on the telescopic thread guide bar and the corresponding thread guide. (Fig. F) 2. Now pass the thread first through the corresponding thread guide. (Fig. G) 3. Place the thread between the two discs on the thread tensioner (3). -
Page 27: Threading The Needles
6. Pull around 10 cm of thread out of the looper eyes. Threading the needles 1. Turn the hand wheel towards you until the needles (22) are at their highest position. 2. Pass the thread through the eye on the telescopic thread guide bar (5). - Page 28 4. Place the thread between the two discs on the thread tensioner (1) & (2). (Fig. M) The thread must be correctly positioned between the two discs on the thread tensioner. 5. Pass the threads through the respective colour-coded thread guides (19). (Fig. N) 6.
-
Page 29: Test Run
Test run If the machine is being threaded for the first time, or if it has been re-threaded after the thread breaks during sewing, proceed as follows: − Holding the ends of the threads between your left fingertips, turn the hand wheel (9) slowly towards you for two or three turns and check whether the threads can be pulled. -
Page 30: Adjusting The Thread Tension
Adjusting the thread tension The thread tension required changes depending on the type and thickness of the Increase thread and fabric. thread tension − Examine the seams and adjust the thread tension on the machine accordingly. Thread tension: Reduce − Turn the thread tension selector (1) – ( 4) to thread tension a lower number: the tension is reduced. -
Page 31: Adjusting The Thread Tension For The Needle Threads
Adjusting the thread tension for the needle threads Thread on the left needle is Thread on the right needle too loose. is too loose. Rear side Rear side Front side Front side Increase needle thread Increase needle thread tension on the left. tension on the right. -
Page 32: Overview Of Machine Settings
Overview of machine settings The most appropriate thread tension setting for one fabric may not be correct for another fabric. The thread tension required depends on the stiffness and thickness of the fabric as well as the thread type and thickness. The following table provides guidance for finding the correct thread tension: Thread Fabrics... - Page 33 Thread Fabrics Thread Needles Stitch length tension heavy wool: cotton for general 2.5–4.0 mm A: 5–7 sewing: velour, no. 60 standard: 3.0 B: 5–7 type: camel-hair, polyester C: 3–5 130/705 H Astrakhan no. 50–60 D: 3–5 no. 90 light cotton 2.0–3.5 mm A: 2–4 synthetics:...
-
Page 34: Changing The Thread
Changing the thread The following method makes changing the thread very easy, eliminating the need to completely re-thread. − Cut the thread above the spindle and knot the ends of the old and new thread together using a reef knot, as shown in the illustration. -
Page 35: Setting The Stitch Length
Setting the stitch length Turn the stitch length dail (7) until the desired length is shown. The higher the number, the longer the stitch. Stitch length The stitch length can be set from 1 to 5 mm. dial Almost all overlocking tasks are carried out with a stitch length of 2.5 to 3.5 mm. -
Page 36: The Correct Cutting Width
The correct cutting width Cutting width Front side Reducing the cutting width Choose a narrower cutting width if the fabric edges curl when sewing. − To do this, turn the cutting width adjustment knob clockwise. Thread is sewn across fabric edge Front side Increasing the cutting width Select an increased cutting width if the thread... -
Page 37: Replacing Needles
Replacing needles This machine is supplied with type 130/705H needles (for domestic machines) NOTICE! Risk of damage! Bent or blunt needles can cause damage to the machine and sewing fabric. Switch off the machine. Replace the defective needle. −... -
Page 38: Replacing The Knife
Replacing the knife Switch off the machine and the power point and pull out the plug before replacing the knife. The lower knife is made of special material and does not need to be replaced. This is how to replace the upper knife when it becomes blunt: 1. - Page 39 6. Now position the upper knife in such a way that its blade extends beyond the cover of the cutting edge of the lower knife by 0.5– 1.0 mm (see illustration). Close the free arm before checking the gap, and open it again to read the value correctly.
-
Page 40: Disengaging The Upper Knife
Disengaging the upper knife If you would like to sew without simultaneously cutting the edges, you can disengage the upper knife. NOTICE! Risk of damage! If the fabric edge is too wide, this can damage the upper looper and the needles. ... -
Page 41: Converting To Two-Thread Operation
Converting to two- thread operation You can also use your machine solely as a two-thread machine. To do so, use the two- thread looper and the left needle only. 1. Switch off the machine and the power point and pull out the plug. 2. -
Page 42: Narrow And Wide Overlocking With Three Threads
Narrow and wide overlocking with three threads This machine can be converted from four to three threads when overlocking. − Remove either the left or right needle and the corresponding thread (see also ‘Replacing needles’ on page 34). The machine is now ready to overlock with three threads. - Page 43 When using only the left needle the stitch width is 6 mm. 6 mm Rear side Front side AFTER SALES SUPPORT www.medion.com.au MODEL: MD 18610 PRODUCT CODE: 701495 09/2020 1300 884 987...
-
Page 44: Stitch Finger
Stitch finger When sewing light fabric with three threads, loops may form on the seams. In that case, change over the stitch finger (35). − Switch off the machine and the power point and pull out the plug. − Open the front cover (12) and the free arm (13). -
Page 45: Blind Hem, Narrow Edges Or Picot Edges
Blind hem, narrow edges or picot edges For thin fabrics such as crepe de chine, georgette or silk, rolled hems, narrow hems or picot edges are suitable for creating a clean seam. Due to the fine nature of these hems, they are not suited to firm or heavy fabrics. -
Page 46: Differential Feed
Differential feed The differential feed prevents wavy seams on knit fabrics and stops layers of fabric from slipping. It also prevents lightweight fabrics from puckering. How it works The machine has two sets of feed dogs, one front set (A) and one rear set (B). Both of these sets move independently. -
Page 47: Positive Differential Feed
Positive differential feed With positive differential feed, the front feed dogs (A) move further than the rear feed dogs (B). This ’accumulates’ fabric under the presser foot, preventing the fabric from becoming wavy. Negative differential feed With negative differential feed, the front feed dogs (A) do not move as far as the rear feed dogs (B). -
Page 48: Setting The Differential Feed
Setting the differential feed The differential feed is set by turning the differential feed control (8). The feed can also be set while sewing. Differential feed control Use the following table to select a setting: Application Feed type Setting Non-wavy positive seams, differential... -
Page 49: Setting The Presser Foot Pressure
Setting the presser foot pressure The factory-set presser foot pressure is correct for all common sewing tasks and does not need to be adjusted. If the pressure of the presser foot needs adjusting despite this, you can regulate it using the dial on the rear of the front cover for regulating presser foot pressure. -
Page 50: Sewing With Cord/Decorative Yarn
Sewing with cord/ decorative yarn Corded seams are used for strength when sewing knit fabric shoulder, sleeve and side seams. Decorative use of knitting yarn in a contrasting colour can also add an attractive feature to the finished garment. The machine is equipped with a sewing foot that enables the cord or decorative yarn to be fed to the right or the left of the safety stitch. -
Page 51: Troubleshooting
Troubleshooting Please read this section before contacting our Service Centre. Problem Cause Remedy Page Needles break Needles are bent, blunt Insert a new needle or the tip is damaged Needles are inserted Insert the needles incorrectly correctly in the needle holder You pulled too hard on Guide the fabric the fabric... -
Page 52: Storage
Problem Cause Remedy Page The machine has not Thread the machine been threaded correctly correctly Thread is stuck Check the route of the individual threads Fabric feed has not been Set the feed to 0.7 adjusted Fabric is not cut Upper knife is blunt or Replace the knife or cleanly... - Page 53 3. Apply a couple of drops of oil to the marked points. Use only high-quality sewing machine oil. 4. Close the free arm and the front cover. 5. For test purposes, now sew with a piece of test fabric to check that the machine is working correctly.
-
Page 54: Disposal
Disposal PACKAGING Your overlocker has been packaged to protect it from damage in transit. Packaging materials are raw materials and can therefore be reused or recycled. DEVICE All old appliances marked with the symbol illustrated must not be disposed of in normal household waste. If you can no longer use your electrical device, dispose of it in accordance with the legal provisions applicable in your country. -
Page 55: Privacy Statement
Privacy statement Dear customer, We wish to inform you that we, MEDION AG, Am Zehnthof 77, 45307 Essen, Germany process your personal data as a data controller. For matters regarding data protection, we are supported by our company data protection officer who can be contacted at MEDION AG, Datenschutz, Am Zehnthof 77, D –... -
Page 56: Service Information
Service information Please contact our Customer Service team if your device ever stops working the way you want or expect it to. There are several ways for you to contact us: • In our Service Community, you can meet other users, as well as our staff, and you can exchange your experiences and pass on your knowledge there. -
Page 57: Legal Notice
Legal Notice Copyright © 2020 Date: 15. May 2020 All rights reserved. Version: 3.2 These operating instructions are protected by copyright. Mechanical, electronic and any other forms of reproduction are prohibited without the written permission of the manufacturer. Copyright is owned by the company: MEDION AG Am Zehnthof 77 45307 Essen... - Page 58 Overlock Sewing Machine Repair and Refurbished Goods or Parts Notice REGISTER YOUR PURCHASE AT www.aldi.com.au/en/about-aldi/product-registration/ TO KEEP UP-TO-DATE WITH IMPORTANT PRODUCT INFORMATION Unfortunately, from time to time, faulty products are manufactured which need to be returned to the Supplier for repair. Please be aware that if your product is capable of retaining user-generated data (such as files stored on a computer hard drive, telephone numbers stored on a mobile telephone, songs stored on a portable media player, games saved on a games console or files stored...
- Page 59 AFTER SALES SUPPORT www.medion.com.au MODEL: MD 18610 PRODUCT CODE: 701495 09/2020 1300 884 987...
Need help?
Do you have a question about the Black Edition MD 18610 and is the answer not in the manual?
Questions and answers