Table of Contents
Advertisement
Quick Links
A L L
P U R P O S E
M E T A L
G A R D E N
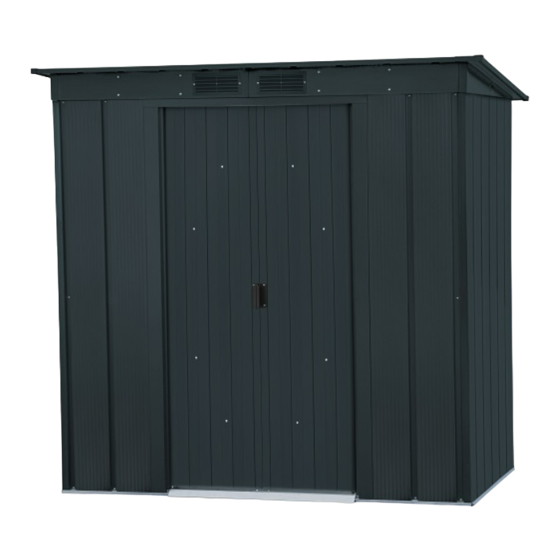
(EN) Eco Pent Roof Type Metal Garden Shed
(FR) Eco Abri de jardin Metal Monopente
(PT) Eco Pent Roof Abrigo de Jardim em Metal
(ES) Eco Pent Roof Cobertizo Metálico
(EN) OWNER'S MANUAL /
Instructions for Assembly
Size 8 Ft x 4 Ft / 2.6 m x 1.2 m
Ver: 0.0
(FR) MANUEL D'INSTRUCTION /
Instructions pour l'Assemblage
Dimension 8 Pieds x 4 Pieds / 2.6 Mètre x 1.2 Mètre
Ver: 0.0
(PT) MANUAL DO PROPRIETARIO/
Intruções de montagem.
Tamanho 8 pés x 4 pés / 2.6 Metro x 1.2Metro
Ver: 0.0
(ES) MANUAL DE USO /
Instrucciones de montaje
Tamaño 8 Pies x 4 Pies / 2.6 Metros x 1.2 Metros
Ver: 0.0
(DE) BENUTZERHANDBUCH /
Montageanleitung
Größe: 8 Ft x 4 Ft / 2.6 m x 1.2 m
Version: 0.0
(PL) PODRĘCZNIK UŻYTKOWNIKA /
Instrukcja montażu
Wymiary 8 Stopy x 4 Stopy / 2.6 Metr x 1.2Metr
Wersja: 0.0
(NL) GEBRUIKSAANWIJZING VOOR EIGENAAR/
Instructies voor bouw
Maat 8 voet x 4 voet / 2.6 Meter x 1.2Meter
Versie: 0.0
(EN)
• Tall Walk in Shed
• Quick & Easy Assembly
• Ridge Reinforced Walls
• Snow load tested max. 20lbs/sq.foot
(As per IP Standard).
• Wide Double Doors
• Available in Various Sizes
(FR)
• Promenade debout dans l'abri
• Assemblage rapide & facile
• Murs à arête renforcé
• Charge de neige testé max. 20lbs/sq.Foot
(conformément à la norme IP).
• Portes double large
• Disponible en différentes
dimensions
• Altura primisível a andamento de pé.
(PT)
• Rápida e fàcil montagem.
• Paredes reforçadas "Ridge".
• Carga de neve testado max. 20lbs/sq.Foot
(conforme padrão IP).
• Amplas Portas Duplas.
• Disponível em diversas dimenções.
S H E D S
• Se puede estar de pie en su interior
(ES)
• Montaje fácil y rápido
• Paneles corrugados reforzados.
• Carga de nieve probado max. 20LBS/sq.Foot
(según el estándar de IP).
• Amplia puerta de doble hoja
• Varios tamaños disponibles
(DE) • Begehbares Gerätehaus
• Leichter Aufbau
• Wände mit Verstärkungsrippen
• Schneelast max. getestet. 20lbs/sq.Foot
(gem. Standard IP).
• Breite Doppeltüren
• Verfügbar in verschiedenen Größen
• Wysokie wejście do magazynka
(PL)
• Szybki i łatwy montaż
• Wzmocnione ściany profilowane
• Obciążenia śniegiem testowałem max.
20lbs/sq.Foot (jak na IP Standard).
• Szerokie dwuskrzydłowe drzwi
• Dostępne w różnych rozmiarach
(DE) Eco Metallgerätehaus mit Pultdach
(DE) Eco Metallgerätehaus mit Pultdach
(PL) Eco Wysuniętych Metal Roof Garden Shed
(PL) Eco Wysuniętych Metal Roof Garden Shed
(NL) Eco Tinnen dak Metalen tuinschuur
(NL) Eco Tinnen dak Metalen tuinschuur
(EN) Customer Service Hotline.
(FR) Service Hotline Client.
(PT) Linha de apoio ao cliente.
(ES) La Línea Directa del Servicio del cliente.
(DE) Kundendienst Hotline.
(PL) Linia telefoniczna dla klientów.
(NL) Directe servicelijn.
(800) 483-4674
www.duramaxbp.com
(NL)
• Walk-in schuurtje
• Makkelijke en snelle montage
• Versterkte geribbelde platen
• Sneeuw belasting getest max. 20lbs/sq.Foot (volgens het
standaard IP-).
• Brede dubbele deur
• Beschikbaar in verschillende afmetingen
(EN) Call us for any missing or damaged parts.
Do not return to the store.
(FR) Appelez-nous pour toute les pièces manquantes ou endommagées.
Ne pas retourner au magasin.
(PT) Contacta-nos para qualquer falta ou partes danificadas.
Não devolver à loja.
(ES) Llámenos para cualquier perder o partes dañadas.
No vuelva a la tienda.
(DE) Bitte melden sie sich bei uns, wenn Teile fehlen oder beschädigt
sind. Senden Sie nichts an das Geschäft zurück.
(PL) Zadzwoń do nas w przypadku braku części lub ich zniszczenia.
Nie zwracaj towaru do sklepu.
(NL) Bel ons als er onderdelen missen of beschadigd zijn.
Niet terug naar de winkel.
Advertisement
Table of Contents

Related Manuals for USP DuraMax Eco Pent


Summary of Contents for USP DuraMax Eco Pent
- Page 1 A L L P U R P O S E M E T A L G A R D E N S H E D S (EN) Eco Pent Roof Type Metal Garden Shed (DE) Eco Metallgerätehaus mit Pultdach (DE) Eco Metallgerätehaus mit Pultdach (FR) Eco Abri de jardin Metal Monopente (PL) Eco Wysuniętych Metal Roof Garden Shed (PL) Eco Wysuniętych Metal Roof Garden Shed...
- Page 2 (EN) Building Dimensions : Storage Exterior Dimension Interior Dimension Approximate Door Opening Size (Wall to Wall) Base Dimension Roof Edge to Edge Area Volume inch inch inch inch 8 Ft x 4 Ft 27 1/4 Sq. Ft 148 5/8 Cu.Ft 41 3/4 Width 103 1/2...
- Page 3 (EN) Duramax Storage Shed Limited 15 Year Warranty U.S. Polymer Inc. will send a replacement part free of charge, in the event of material defects and or workmanship for a period of 15 years from the date of purchase. This warranty is extended only to the original purchaser. A purchase receipt or other proof of date of original purchase will be required before warranty service is rendered.
- Page 4 (DE) Duramax Gerätehaus 15 Jahre beschränkte Garantie U.S. Polymer Inc. liefert im Falle von Material- oder Verarbeitungsfehlern kostenlos Ersatzteile für einen Zeitraum von 15 Jahren ab dem Kaufdatum. Diese Garantie gilt nur für den Erstkäufer. Für die Inanspruchnahme der Garantieleistungen ist eine Kaufquittung oder ein sonstiger Kaufnachweis vorzulegen.
- Page 5 (EN) SAFETY & PRECAUTIONS For your own safety, please read and follow these instructions during the shed assembly. Before You Begin... 1. Check your local building codes regarding footings, location, etc. CAUTION 2. Select a site that allows enough working space around the shed. 3.
- Page 6 (FR) SÉCURITÉ ET PRÉCAUTIONS Pour votre propre sûreté, svp lisez et suivez ces instructions avant et pendant le montage. Avant de commencer... 1. Vérifiez vos codes de la construction et de l'habitation concernant la pose, l'emplacement, etc. ATTENTION 2. Choisissez un site qui laisse assez d'espace de travail autour de l'abri. 3.
- Page 7 (PT) SEGURANÇA E CUIDADOS Para sua própria segurança, leia e siga as instruções durante a instalação do galpão. Antes de iniciar a montagem... 1. Cheque os detalhes da construção local relacionados à fundação, localização, etc. CUIDADO 2. Escolha um local espaçoso que permita a realização de trabalho ao redor do galpão. 3.
- Page 8 (ES) SEGURIDAD Y PRECAUCIONES Para su propia seguridad, lea y siga las instrucciones durante el ensamblaje del cobertizo. Antes de comenzar ... PRECAUCION 1. Consulte los códigos de construcción locales relativos a cimentación, localización etc. 2. Seleccione un sitio que permite suficiente espacio para trabajar alrededor de la nave.
- Page 9 (DE) SICHERHEITS U.- VORSICHTSMASSNAHMEN Um für Ihre eigene Sicherheit zu sorgen, bitte lesen Sie die folgenden Anweisungen durch und befolgen Sie siewährend der Schuppenmontage. Bevor Sie anfangen..1. Überprüfen Sie die lokalen Bauvorschriften hinsichtlich des Fundaments, des Standorts usw. VORSICHT 2.
- Page 10 (PL) ŚRODKÓW OSTROŻNOŚCI Dla własnego bezpieczeństwa przeczytaj poniższe instrukcje i podczas montażu magazynka postępuj zgodnie z nimi. Przed rozpoczęciem montażu... UWAGA 1. Sprawdź lokalne przepisy budowlane dotyczące fundamentów, lokalizacji, itd. 2. Wybierz miejsce, które zapewnia wystarczająco dużo przestrzeni do pracy. 3.
- Page 11 (NL) VEILIGHEIDSVOORSCHRIFTEN Voor uw eigen veiligheid, lees en volg deze instructies gedurende de bouw van het schuurtje. Voordat u begint... 1. Controleer uw locale woning code in verband met bodem, locatie enz. VOORZICHTIG 2. Selecteer een zijde die voor genoeg werkruimte om het schuurtje zorgt. 3.
- Page 12 (EN) Note : Before starting installation, please refer Safety & Precautions. (FR) Note: Avant de commencer l'installation, référez-vous svp à Sécurité et Précautions. (PT) Nota: Antes de iniciar a instalação, cheque item “Segurança e Cuidados”. (ES) Pozor : Antes de comenzar la instalación, consulte Seguridad y Precauciones. (DE) Anmerkung: Lesen Sie vor dem Aufbau die Sicherheitsanweisungen.
-
Page 13: Table Of Contents
(EN) Parts List (DE) Teileliste (FR) Liste des pièces (PL) Lista części (PT) Lista de Peças (NL) Onderdelenlijst (ES) La Lista de partes (EN) Note: Check all parts prior to installation. (FR) Note: Vérifier toutes les pièces avant l’installation. (PT) Nota: Confirme todas as peças antes da instalação. (ES) Nota: Verifica todo despide antes de instalación. - Page 14 (EN) Exploded View (DE) Explosionszeichnung (FR) Vue Explosée (PL) Rysunek złożeniowy (PT) Vista esplodida (NL) Barsten bekijken (ES) El Panorama estallado RFSLR RPSO RFRO RPCO RFLO RPCO RPCO RFRO RFLO GPSL RPSO SBSLR RFSLR FBSLR RSLRB FB1B SBSLR FBSLR FB2B GPSR ABBLR ASLR...
- Page 15 (EN) Quick Start (DE) Schnellstart (FR) Démarrage rapide (PL) Szybaki start (NL) Snabbstart (PT) Início Rápido (ES) Inicio rápido # 18-22 # 22-33 # 34-44 # 45-53 (EN) IMPORTANT: USE HAND GLOVES TO PREVENT INJURY. (DE) WICHTIG: BENUTZEN SIE HANDSCHUHE, UM VERLETZUNGEN ZU VERMEIDEN. (FR) IMPORTANT: UTILISER LES GANTS POUR PREVENIR LES ACCIDENTS.
- Page 16 (DE) Fundament (EN) Foundation (FR) Fondation (PL) Podstawa (NL) Fundering (PT) Fundação (ES) Fundacion (EN) DuraMax must be installed on a Duramax Foundation, level wooden platform or a level concrete foundation. (FR) Duramax doit être installé sur une fondation Duramax ou une plate-forme en bois de niveau ou une fondation en béton de niveau. (PT) Duramax deve ser instalado sobre uma base Duramax ou uma plataforma de madeira nível ou uma fundação de concreto nível.
- Page 17 (EN) Use pressure treated weather proof wood studs 2” x 4” (Actual size 2” x 3 1/2”, 50mm x 88.9mm) to create a platform frame that has an outside dimension of 47” x 102” (1193.8mm x 2590.8mm). Using exterior grade CDX 3/4” (19mm) weather proof marine grade plywood, cut and fit together the sheets to form solid foundation as shown.
- Page 18 (PL) Umożliwia utworzenie platformy ramka, która ma wymiar zewnętrzny 94”x 125” (2387.6 mm x 3175 mm) traktowane ciśnienia pogoda dowód drewna stadniny 2” x 4” (rzeczywisty rozmiar 2 ”x 3 1/2”, 50mm x 88,9 mm). Za pomocą zewnętrznego stopień CDX 3/4'(19mm) pogoda dowód morskich sklejkę, wyciąć i pasują do siebie arkusze do postaci solidne podstawy jak pokazano.
- Page 19 (EN) OPTION : 2- ASSEMBLY ON CONCRETE FOUNDATION. (DE) OPTION: 2-MONTAGE AUF BETONFUNDAMENT. (FR) OPTION: 2-MONTAGE SUR UNE FONDATION EN BÉTON. (PL) OPCJA: 2-MONTAZ NA FUNDAMENTY BETONOWE. (PT) OPÇÃO: 2-MONTAGEM EM BASE DE CONCRETO. (NL) OPTIE: 2-VERGADERING OVER CONCRETE STICHTING. (ES) OPCIÓN: 2-MONTAJE SOBRE BASE DE HORMIGÓN.
-
Page 20: (Es) Qty
(DE) Bodenrahmen (EN) Base Frame (FR) Canaux de base (PL) Rama fundamentowa (NL) Basis frame (PT) Base de armação (ES) Armazón de la base (EN) Parts needed (DE) Benötigte Teile (FR) Pièces nécessaires (PL) Niezbędne elementy (PT) Peças Necessárias (NL) Onderdelen nodig (ES) Las partes necesitaron (EN) Set the Torque limit of your Screw drill to #3 or #4 to en sure the Screws do not (EN) CODE... -
Page 21: Bsc
BLB & BRB (x1) S1 (x4) BSC (x2) (EN) Front (DE) Vorne (FR) Avant (PL) Przód (PT) Frente (NL) Vooraan (ES) Frente BBF (x2) S1 (x4) 1 & 2 1 & 2 (EN) Front (DE) Vorne (FR) Avant (PL) Przód (PT) Frente (NL) Vooraan (ES) Frente... -
Page 22: Bbf
(DE) OPTION: 1- BODENRAHMEN MONTAGE AUF HOLZ-FUNDAMENT. (EN) OPTION : 1 - BASE FRAME ASSEMBLY ON WOODEN FOUNDATION (PL) OPCJA: 1-RAMA FUNDAMENTOWA MONTAZ NA DREWNIANE FUNDACJI. (FR) OPTION: 1- CANAUX DE BASE L'ASSEMBLÉE SUR BASE EN BOIS (NL) OPTIE: 1-BASIS FRAME VERGADERING OP HOUTEN FOUNDATION. (PT) OPÇÃO: 1- BASE DE ARMAÇÃO MONTAGEM EM BASE DE MADEIRA. - Page 23 (EN) OPTION : 2 - BASE FRAME ASSEMBLY ON CONCRETE FOUNDATION. (DE) OPTION: 2- BODENRAHMEN MONTAGE AUF BETONFUNDAMENT. (FR) OPTION: 2- CANAUX DE BASE MONTAGE SUR UNE FONDATION EN BÉTON. (PL) OPCJA: 2- RAMA FUNDAMENTOWA MONTAZ NA FUNDAMENTY BETONOWE. (PT) OPÇÃO: 2- BASE DE ARMAÇÃO MONTAGEM EM BASE DE CONCRETO. (NL) OPTIE: 2- BASIS FRAME VERGADERING OVER CONCRETE STICHTING.
- Page 24 F1 (x5) ECG (x1) S8 (x5) 1 & 2 (EN) Front (DE) Vorne (FR) Avant (PL) Przód (PT) Frente (NL) Vooraan (ES) Frente (EN) Walls & Columns (DE) Wände und Säulen (FR) Murs et colonnes (PL) Ściany I Kolumy (PT) Paredes e Colunas (NL) Panelen en stijlen (ES) Las paredes &...
- Page 25 WFE (x1) PW (x3) S1 (x3) (EN) Front (DE) Vorne (FR) Avant (PL) Przód (PT) Frente (NL) Vooraan (ES) Frente WCFE (x1) S1 (x3) S3 (x1) PW (x4) WCFE WCFE WCFE (EN) Right (DE) Rechts (FR) Droite (PL) Prawa (PT) Direita (NL) Rechter (ES) Correcta (EN) Note: Make sure the overlapping position is as shown in fig.1.
- Page 26 SRB (x1) PW (x4) S1 (x4) WCFE 1 & 2 WCFE WCFE TS (x2) (EN) Front (DE) Vorne (FR) Avant (PL) Przód (PT) Frente (NL) Vooraan (ES) Frente (EN) Note: Make sure the position of the projection on (TS) towards inside. (FR) Note: Assurez-vous de la position de la projection sur (TS) vers l’intérieur.
- Page 27 WFE (x1) PW (x3) S1 (x3) S1 PW WCFE (x1) S1 (x3) S3 (x1) PW (x4) WCFE WCFE WCFE S3 PW S1 PW (EN) Note: Make sure the overlapping position is as shown in fig.1. (FR) Note: Assurez-vous que la position chevauchement est indiquée dans la Fig 1. (PT) Nota: Certifique-se que a posição se sobrepõem como mostrado na fig.1.
- Page 28 SLB (x1) PW (x4) S1 (x4) WCFE S1 PW WCFE WCFE TS (x2) (EN) Note: Make sure the position of the projection on (TS) towards inside. (FR) Note: Assurez-vous de la position de la projection sur (TS) vers l’intérieur. (PT) Nota: Certifique-se que a posição da projeção sobre (TS) para o lado interior. (ES) Nota: Cerciórese la posición de la proyección en (TS) hacia adentro.
- Page 29 S1 (x4) SSB (x1) WCBE (x1) S1 (x3) S3 (x1) PW (x4) WCFE WCBE WCFE S3 PW WCBE S1 PW (EN) IMPORTANT: USE HAND GLOVES TO PREVENT INJURY. (DE) WICHTIG: BENUTZEN SIE HANDSCHUHE, UM VERLETZUNGEN ZU VERMEIDEN. (FR) IMPORTANT: UTILISER LES GANTS POUR PREVENIR LES ACCIDENTS. (PL) WAŻNE: UŻYWAJ RĘKAWIC, ABY ZAPOBIEC URAZOM.
- Page 30 WSE (x1) S1 (x3) S3 (x1) PW (x4) WCBE WCBE WCBE (EN) Note: Make sure the overlapping position is as shown in fig.1. (FR) Note: Assurez-vous que la position chevauchement est indiquée dans la Fig 1. (PT) Nota: Certifique-se que a posição se sobrepõem como mostrado na fig.1. (ES) Nota: Cerciórese la posición que se superpone es como mostrada en el higo.
- Page 31 ABBLR (x1) S1 (x3) PW (x3) ABBLR ASLR ABBLR ASLR WCBE 1 & 2 ASLR ABBLR WCBE WCBE (EN) Note: Top angle (ABBLR) must sit on top angle (ASLR). (FR) Note: Angle supérieur (ABBLR) doit s’asseoir sur l’angle (ASLR). (PT) Nota: Ângulo superior (ABBLR) têm que se apoiar em cima do ângulo (ASLR). (ES) Nota: El ángulo (ABBLR) primero debe sentarse en el ángulo (ASLR) primero.
- Page 32 WSE (x1) S1 (x3) S3 (x1) PW (x4) WCBE WCBE WCBE S3 PW S1 PW (EN) Note: Make sure the overlapping position is as shown in fig.1. (FR) Note: Assurez-vous que la position chevauchement est indiquée dans la Fig 1. (PT) Nota: Certifique-se que a posição se sobrepõem como mostrado na fig.1.
- Page 33 ABBLR (x1) S1 (x5) PW (x3) ABBLR ABBLR ASLR ASLR ABBLR ABBLR WCBE WCBE ASLR 1&2 S1 PW ABBLR ABBLR WCBE (EN) Note: Top angle (ABBLR) must sit on top angle (ASLR). (FR) Note: Angle supérieur (ABBLR) doit s’asseoir sur l’angle (ASLR). (PT) Nota: Ângulo superior (ABBLR) têm que se apoiar em cima do ângulo (ASLR).
-
Page 34: Dcl
WSE (x1) S1 (x8) S3 (x2) PW (x10) S1 PW S3 PW S3 PW S1 PW (EN) Note: Make sure the overlapping position is as shown in fig.1. (FR) Note: Assurez-vous que la position chevauchement est indiquée dans la Fig 1. (PT) Nota: Certifique-se que a posição se sobrepõem como mostrado na fig.1. - Page 35 S1 (x8) DCR (x1) SCB (x1) S1 (x2) (EN) IMPORTANT: USE HAND GLOVES TO PREVENT INJURY. (DE) WICHTIG: BENUTZEN SIE HANDSCHUHE, UM VERLETZUNGEN ZU VERMEIDEN. (FR) IMPORTANT: UTILISER LES GANTS POUR PREVENIR LES ACCIDENTS. (PL) WAŻNE: UŻYWAJ RĘKAWIC, ABY ZAPOBIEC URAZOM. (PT) IMPORTANTE: USAR LUVAS PARA EVITAR LESÕES.
-
Page 36: Sbslr
(DE) Dach (EN) Roof (FR) Toit (PL) Dach (NL) Dak (PT) Telhado (ES) El techo (EN) Note: All parts are clearly marked and care should be taken to use the correct one. Remove the polyethylene film before start assembling. (FR) Note: Toutes les pièces sont clairement identifiées et il faut veiller à utiliser la bonne. Retirer le film de polyéthylène avant de commencer l’assemblage. - Page 37 S1 (x4) FB2B FB2B FB2B FBSLR 1&2 FB2B FB2B FBSLR S1 (x4) FB1B FB1B FBSLR FB1B FBSLR 1&2 FBSLR FB1B FB1B (EN) IMPORTANT: USE HAND GLOVES TO PREVENT INJURY. (DE) WICHTIG: BENUTZEN SIE HANDSCHUHE, UM VERLETZUNGEN ZU VERMEIDEN. (FR) IMPORTANT: UTILISER LES GANTS POUR PREVENIR LES ACCIDENTS. (PL) WAŻNE: UŻYWAJ RĘKAWIC, ABY ZAPOBIEC URAZOM.
- Page 38 S3 (x1) S1 (x2) FBSLR (x2) FB1B FB1B FB2B 1&2 FBSLR FB2B FBSLR FB1B FB2B S1 (x4) GPSL (x1) GPSL GPSL GPSL FB1B ASLR ASLR ABBLR ABBLR ASLR 1 & 2,3 ABBLR GPSL ABBLR (EN) IMPORTANT: USE HAND GLOVES TO PREVENT INJURY. (DE) WICHTIG: BENUTZEN SIE HANDSCHUHE, UM VERLETZUNGEN ZU VERMEIDEN.
- Page 39 S3 (x2) FBSLR (x1) FBSLR FBSLR 1 & 2 FB1B GPSL GPSL FB1B FBSLR FB1B GPSL S1 (x4) GPSR (x1) GPSR GPSR GPSR FB2B ASLR ASLR ABBLR ABBLR ASLR 1, 2 &3 GPSR ABBLR ABBLR (EN) IMPORTANT: USE HAND GLOVES TO PREVENT INJURY. (DE) WICHTIG: BENUTZEN SIE HANDSCHUHE, UM VERLETZUNGEN ZU VERMEIDEN.
- Page 40 S3 (x2) FBSLR (x1) FBSLR FBSLR 1 & 2 FB2B GPSR GPSR FB2B FBSLR FB2B GPSR S3 (x10) RSLRB (x2) SBSLR (x3) SBSLR RSLRB SBSLR RSLRB RSLRB RSLRB SBSLR SBSLR RSLRB (EN) Taper side (DE) Spitzes Ende (FR) l’inclinaison latérale (PL) Pochyła część (PT) Lado Taper (NL) Tapse zijde (ES) Estréchese el lado...
- Page 41 S3 (x4) PW (x4) 1&2 GPSR RSLRB GPSR RSLRB GPSR RSLRB RSLRB GPSL S3 (x4) RSM (x1) FB1B FB1B FB2B FB2B FB1B RSLRB FB2B 3&4 1&2 RSLRB (EN) IMPORTANT: USE HAND GLOVES TO PREVENT INJURY. (DE) WICHTIG: BENUTZEN SIE HANDSCHUHE, UM VERLETZUNGEN ZU VERMEIDEN. (FR) IMPORTANT: UTILISER LES GANTS POUR PREVENIR LES ACCIDENTS.
- Page 42 S3 (x4) RPSO (x1) PW (x8) S1 (x4) FB2B RPSO FB2B GPSR RSLRB RPSO ABBLR GPSR S3 (x5) PW (x11) S1 (x6) RPCO (x1) FB2B RSLRB RPCO RPCO RPSO ABBLR RPSO (EN) Note: Make sure the overlapping position for roof panel is as shown in blowup. (FR) Note: Assurez-vous que la position chevauchement des parois de toit est telle qu’indiquée dans l’exposé.
- Page 43 S3 (x5) PW (x11) S1 (x6) RPCO (x1) FB1B RSLRB RPCO RPCO ABBLR RPCO RPCO (EN) Note: Make sure the overlapping position for roof panel is as shown in blowup. (FR) Note: Assurez-vous que la position chevauchement des parois de toit est telle qu’indiquée dans l’exposé. (PT) Nota: Certifique-se que a sobreposição de posição para o painel do telhado é...
-
Page 44: Rfslr
S3 (x6) RPSO (x1) PW (x10) S1 (x4) RPSO RPSO RPCO RPCO (EN) Note: Make sure the overlapping position for roof panel is as shown in blowup. (FR) Note: Assurez-vous que la position chevauchement des parois de toit est telle qu’indiquée dans l’exposé. (PT) Nota: Certifique-se que a sobreposição de posição para o painel do telhado é... - Page 45 RFLO (x2) PW (x10) S3 (x2) S2 (x8) RFRO (x2) RFRO S3 PW RFLO S3 PW S2 PW RFLO RFRO S2 (x4) TC (x2) (EN) IMPORTANT: USE HAND GLOVES TO PREVENT INJURY. (DE) WICHTIG: BENUTZEN SIE HANDSCHUHE, UM VERLETZUNGEN ZU VERMEIDEN. (FR) IMPORTANT: UTILISER LES GANTS POUR PREVENIR LES ACCIDENTS.
- Page 46 S1 (x4) VC (x2) (EN) IMPORTANT: USE HAND GLOVES TO PREVENT INJURY. (DE) WICHTIG: BENUTZEN SIE HANDSCHUHE, UM VERLETZUNGEN ZU VERMEIDEN. (FR) IMPORTANT: UTILISER LES GANTS POUR PREVENIR LES ACCIDENTS. (PL) WAŻNE: UŻYWAJ RĘKAWIC, ABY ZAPOBIEC URAZOM. (PT) IMPORTANTE: USAR LUVAS PARA EVITAR LESÕES. (NL) BELANGRIJK: GEBRUIK HANDSCHOENEN OM VERWONDINGEN TE VERMIJDEN.
-
Page 47: Tslb
(DE) Die Tür (EN) Door (FR) Porte (PL) Drzwi (NL) De deur (PT) Porta (ES) La puerta (EN) Parts needed (DE) Benötigte Teile (FR) Pièces nécessaires (PL) Niezbędne elementy (PT) Peças Necessárias (NL) Onderdelen nodig (ES) Las partes necesitaron (EN) CODE (DE) CODE (EN) QTY (DE) STCK... - Page 48 (EN) Right Door Assembly (DE) Montage der rechten Tür (FR) Assemblage Porte Droite (PL) Montaż prawych drzwi (PT) Montagem da Porta Direita (NL) Montage van de rechterdeur (ES) La Asamblea correcta de la Puerta DPRB (x1) DSS (x1) PW (x4) S3 (x4) DPRB (EN) Note: Remove the Polyethylene Film before...
- Page 49 S1 (x1) DSCB DSCB DPRB DSCB DSCB TSRB (x1) S1 (x2) TSRB TSRB TSRB 1 & 2 DPRB DPRB DSCB DPRB TSRB (EN) IMPORTANT: USE HAND GLOVES TO PREVENT INJURY. (DE) WICHTIG: BENUTZEN SIE HANDSCHUHE, UM VERLETZUNGEN ZU VERMEIDEN. (FR) IMPORTANT: UTILISER LES GANTS POUR PREVENIR LES ACCIDENTS. (PL) WAŻNE: UŻYWAJ RĘKAWIC, ABY ZAPOBIEC URAZOM.
- Page 50 PW (x1) S1 (x2) S3 (x1) BSRB (x1) BSRB DPRB DSCB DSCB BSRB BSRB BS (x2) PW (x2) S3 (x2) DPRB DPRB (EN) IMPORTANT: USE HAND GLOVES TO PREVENT INJURY. (DE) WICHTIG: BENUTZEN SIE HANDSCHUHE, UM VERLETZUNGEN ZU VERMEIDEN. (FR) IMPORTANT: UTILISER LES GANTS POUR PREVENIR LES ACCIDENTS. (PL) WAŻNE: UŻYWAJ RĘKAWIC, ABY ZAPOBIEC URAZOM.
- Page 51 DH (x1) S3 (x2) DPRB DPRB (EN) Right Door Assembly (DE) Montage der rechten Tür (FR) Assemblage Porte Droite (PL) Montaż prawych drzwi (PT) Montagem da Porta Direita (NL) Montage van de rechterdeur (ES) La Asamblea correcta de la Puerta DPLB (x1) DSS (x1) PW (x4)
- Page 52 DSCB (x1) PW (x4) S3 (x4) DSCB DSCB DPLB DSCB S1 (x1) DSCB DSCB DPLB DSCB DSCB (EN) IMPORTANT: USE HAND GLOVES TO PREVENT INJURY. (DE) WICHTIG: BENUTZEN SIE HANDSCHUHE, UM VERLETZUNGEN ZU VERMEIDEN. (FR) IMPORTANT: UTILISER LES GANTS POUR PREVENIR LES ACCIDENTS. (PL) WAŻNE: UŻYWAJ RĘKAWIC, ABY ZAPOBIEC URAZOM.
- Page 53 TSLB (x1) S1 (x2) TSLB TSLB TSLB 1 & 2 DPLB DSCB DPLB TSLB DSCB S1 (x2) S3 (x1) PW (x1) BSLB (x1) DSCB DPLB BSLB DPLB BSLB BSLB (EN) IMPORTANT: USE HAND GLOVES TO PREVENT INJURY. (DE) WICHTIG: BENUTZEN SIE HANDSCHUHE, UM VERLETZUNGEN ZU VERMEIDEN. (FR) IMPORTANT: UTILISER LES GANTS POUR PREVENIR LES ACCIDENTS.
- Page 54 BS (x2) PW (x2) S3 (x2) DPLB DPLB DH (x1) S3 (x2) DPLB DPLB (EN) IMPORTANT: USE HAND GLOVES TO PREVENT INJURY. (DE) WICHTIG: BENUTZEN SIE HANDSCHUHE, UM VERLETZUNGEN ZU VERMEIDEN. (FR) IMPORTANT: UTILISER LES GANTS POUR PREVENIR LES ACCIDENTS. (PL) WAŻNE: UŻYWAJ RĘKAWIC, ABY ZAPOBIEC URAZOM.
- Page 55 S1 (x4) FB1B FB2B DPLB DPRB DPLB DPRB (EN) To get proper alignment of the door realign the holes with door panel. See fig. (FR) Pour obtenir un bon alignement de laporte, réaligner les trous avec la paroi de porte. Voir fig.
- Page 56 (EN) “We recommend to clear snow from the Roof top after each Snowfall .” A snow depth of more than 10 cm can become hazardous! (FR) “Nous recommandons d’enlever la neige du Toit après chaque Enneigement.” Une épaisseur de neige de plus de 10 cm peut devenir dangereux ! (PT) “Recomendamos para limpar a neve do telhado depois de cada queda de neve .”...
- Page 57 (EN) Important Warranty Information (DE) Wichtige Informationen zur Gewährleistung (FR) Informations Importantes Concernant La Garantie (PL) Ważne Informacje o gwarancji (PT) ImportantesInformações de Garantia (NL) Belangrijke Informatie over de garantie (ES) Información importante sobre la garantía (EN) The 'DURAMAX' shed has been tested and passed high wind loads in a controlled laboratory environment when installed with the high wind installation guidelines.
- Page 58 (EN) ADDITIONAL ACCESSORIES AVAILABLE (DE) WEITERES ZUBEHöR (FR) ACCESSOIRES ADDITIONNELS DISPONIBLES (PL) DOSTĘPNE DODATKOWE AKCESORIA (PT) ACESSóRIOS ADICIONAIS DISPONíVEIS (NL) EXTRA ACCESOIRES AANWEZIG. (ES) ACCESORIOS ADICIONALES DISPONIBLES (EN) These accessories are required in case of heavy snow or high wind areas. Please choose relevant accessories according to your needs.
- Page 59 (EN) ANCHOR KIT (Foundation) (FR) KIT D'ANCRE (Base) (PT) KIT DE APOIO (Base) (ES) KIT DE ANCLAJE (Fundación) (DE) ANKER-KIT (Fundament) (PL) ZESTAW DO MOCOWANIA (Podstawa) (NL) ANKER GEREEDSCHAP (Fundering) (EN) Strap clamping for shed assembly with foundation(Wood / Metal) on concrete. To prevent shed from displacement.
- Page 60 U.S. Polymers, Inc. 1057 S. Vail Ave Montebello, CA 90640, w w w . d u r a m a x b p . c o m United States of America SKU# RD-0.0 16-01-2018...
Need help?
Do you have a question about the DuraMax Eco Pent and is the answer not in the manual?
Questions and answers