
Related Manuals for Klarstein Steakreaktor 2.0


Summary of Contents for Klarstein Steakreaktor 2.0
- Page 1 Steakreaktor 2.0 Hochtemperaturgrill High-Temperature Grill Parrilla de alta temperatura Gril haute température Griglia ad alta temperatura 10032675 10032676...
-
Page 3: Table Of Contents
Sehr geehrter Kunde, wir gratulieren Ihnen zum Erwerb Ihres Gerätes. Lesen Sie die folgenden Hinweise sorgfältig durch und befolgen Sie diese, um möglichen Schäden vorzubeugen. Für Schäden, die durch Missachtung der Hinweise und unsachgemäßen Gebrauch entstehen, übernehmen wir keine Haftung. Scannen Sie den folgenden QR-Code, um Zugriff auf die aktuellste Bedienungsanleitung und weitere Informationen rund um das Produkt zu erhalten. -
Page 4: Sicherheitshinweise
SICHERHEITSHINWEISE Bevor Sie den Hochtemperaturgrill in Betrieb nehmen, lesen Sie die nachstehenden Hinweise aufmerksam durch und bewahren Sie diese Bedienungsanleitung auf, falls Sie später etwas nachlesen wollen. Wenn Sie den Artikel an jemand anderen weitergeben, geben Sie auch diese Bedienungsanleitung mit. Verwendungszweck •... - Page 5 Gefahr durch Elektrizität • Der Grill darf nicht in Wasser oder andere Flüssigkeiten getaucht werden. Stromschlaggefahr! • Der Grill darf nicht mit Wasser oder andere Flüssigkeiten abgestrahlt werden. Stromschlaggefahr! • Benutzen Sie das Gerät daher auch nicht in der Nähe von Feuchtquellen wie z. B. einem Waschbecken.
- Page 6 Gefahr von Verbrennungen/Verbrühungen und Brand VORSICHT Verbrennungsgefahr! Die Gehäuseteile werden während des Gebrauchs heiß. Berühren Sie sie nicht während das Gerät läuft! • Seien Sie besonders vorsichtig, wenn Sie Lebensmittel in das heiße Gerät legen, erhitzte Lebensmittel oder Zubehörteile herausnehmen. Benutzen Sie Topfl appen. •...
- Page 7 • Halten Sie den Grill fern von Wasser. Das gilt besonders, wenn der Ofen heiß ist. • Verwenden Sie ausschließlich das mitgelieferte Zubehör oder unsere unter www.klarstein.de erhältlichen Zubehörteile zum Betrieb des Hochtemperaturgrills. • An der Unterseite des Gerätes befinden sich Gerätefüße. Da die Möbel bzw.
-
Page 8: Geräteübersicht Und Bedienelemente
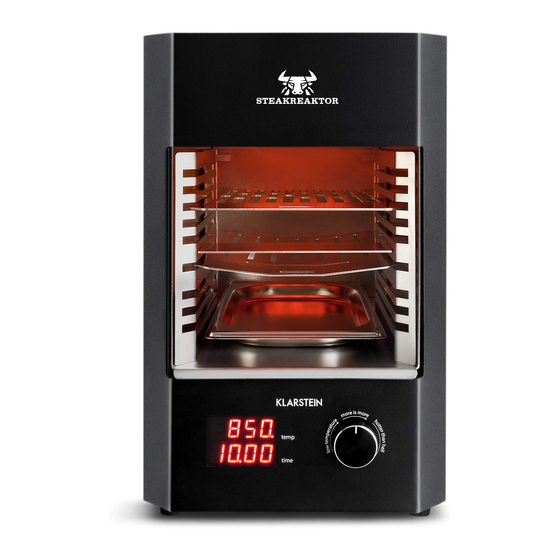
GERÄTEÜBERSICHT UND BEDIENELEMENTE Grillrost Führungsgriff Fettauffangschale Grillraum Anzeige Regler Netzschalter Sicherung Netzkabel... -
Page 9: Vor Dem Ersten Betrieb
VOR DEM ERSTEN BETRIEB Auspacken 1. Nehmen Sie Gerät und Zubehör aus dem Karton. 2. Bewahren Sie die beiden Verpackungskartons und die beiliegende Polsterung für den Steakreaktor auf. Nur mit dieser speziellen Verpackung ist ein sicherer Transport im Reklamationsfall möglich. 3. -
Page 10: Inbetriebnahme Und Bedienung
Grilleinsatz und die Fettauffangschale einsetzen Für eine vereinfachte Reinigung des Geräts ist der Grilleinsatz zu entnehmen. Führen sie den Einsatz in den Grillraum ein. Achten Sie dabei darauf, dass der Einsatz nicht mit der Heizung in Kontakt kommt um Beschädigungen zu vermeiden. Der korrekte Sitz ist dann erreicht, wenn die auf der Oberseite des Grilleinsatzes befindlichen Rasthaken auf den passenden Bolzen im Grillraum einrasten. - Page 11 Einschalten und Temperatur einstellen Um das Gerät einzuschalten, drücken Sie auf den Netzschalter auf der Rückseite des Geräts. Für kurze Zeit er- scheint im Display die Anzeige der Softwareversion, z.B. R09. Mit dem Regler lässt sich die Einstellung der Temperatur des Heizelements erhöhen oder verringern.
- Page 12 Grillen Übliche Grillzeiten liegen zwischen einer und drei Minuten je Seite des Grillguts. Hinweise zum Zubereiten verschiedener Lebensmittel und Fleischsorten finden Sie in der Tabelle „Zubereitungsformen“. Bessere Ergebnisse erzielt man wenn das Fleisch durchgängig auf die Zimmertemperatur vortemperiert ist. Dazu sollte das Fleisch ca.
- Page 13 Führen Sie das Abtropfblech unter Zuhilfenahme des Führungsgriffs in die Schiene 6 des vorgeheizten Grilleinsatzes ein. Legen Sie das Fleisch auf den nicht vorgeheizten Rost und führen Sie diesen unter Zuhilfenahme des Führungsgriffs in die Schiene 1 bis 5 des vorgeheizten Grilleinsatzes ein.
-
Page 14: Grundlagen Des Hochtemperaturgrillens
Abtropfblech Standardmäßig sollte das Abtropfblech während des Grillvorgangs in die Schiene 6 eingeführt sein. Dabei kann es heiß werden und sollte genau wie der Grillrost ausschließlich mit dem Führungsgriff bedient werden. Das Abtropfblech trennt den oberen und unteren Grillraum und verhindert die Aufheizung des unteren Bereiches. - Page 15 Der Umgang mit einem Hochtemperaturgrill unterscheidet sich stark zu dem Umgang mit handelsüblichen Elektrogrills. Die Leistung je Fläche liegt ca. 10-mal höher. Das Zubereiten eines Steaks teilt sich grundsätzlich in folgende Schritte auf: 1. Gerät auf die Zieltemperatur vorheizen 2. Grillraum 2-3 Minuten vorwärmen 3.
-
Page 16: Zubereitungsformen Und Richtwerte Zum Einstellen Und Verwenden Des Steakreaktors
ZUBEREITUNGSFORMEN UND RICHTWERTE ZUM EINSTELLEN UND VERWENDEN DES STEAKREAKTORS Well Fleisch Gewicht Schiene Rare* Medium** °C (je Seite) Ruhen Anmerkung done*** Filet (Rind) 100 g 3 Min. 4 Min. 800 °C Min. Min. 200 g 4 Min. 5 Min. 800 °C Min. - Page 17 Well Fleisch Gewicht Schiene Rare* Medium** °C (je Seite) Ruhen Anmerkung done*** Nacken- 200 g 3-4 Min. 850 °C Nicht Schwein immer gut steak nötig durch braten. (Schwein) Bauch- 100 g 3-4 Min. 800 °C Nicht Je nach Wunsch kann fleisch nötig die Garzeit verkürzt...
-
Page 18: Tipps
TIPPS • Allgemein ist es immer von Vorteil, wenn das Fleischstück möglichst dick, viel Fett und noch besser eine durchzogene Fettmarmorierung besitzt. • Salzen und vor allem Pfeffern erst nach dem Grillvorgang. Natürlich kann man auch je nach Belieben, das Fleisch vorher mit einer trocken Marinade (Rub) einreiben. -
Page 19: Reinigung Und Pflege
Abschalten und Abkühlen Falls die eingestellte Zeit abgelaufen ist oder der Grillvorgang abgebrochen wird laufen die Lüfter weiter. Das ist wichtig um sicher zu stellen dass sich das Gehäuse nicht zu weit erwärmt durch die im Gerät befindliche Restwärme. Schalten Sie den Netzschalter erst dann ab, wenn sich die Lüfter selbstständig abgeschaltet haben. -
Page 20: Fehlerbehebung
FEHLERBEHEBUNG Problem Mögliche Ursache Lösungsansatz Rauchentwicklung Die Speise berührt die Gerät abschalten und die während des Betriebs Keramikheizung. Speise neu positionieren. Vorsicht: Speisen, Zubehör und Innenraum sind heiß! Die Speise qualmt ohne Unterbrechen Sie den die Heizung zu berühren. Grillprozess umgehend und lassen das Gerät abkühlen. - Page 21 Problem Mögliche Ursache Lösungsansatz Das Gerät wird von außen Grilleinsatz nicht Schalten Sie das Gerät sehr heiß. eingesetzt. aus, lassen Sie es vollständig abkühlen und Setzen Sie den Grilleinsatz ein. Blockierte Lüftungsschlitze. Entfernen Sie alle Gegenstände, die Lüftungsschlitze blockieren. Blockierte Lufteinlässe. Sorgen Sie dafür, dass die Lufteinlässe an der Unterseite des Geräts frei...
-
Page 22: Hinweise Zur Entsorgung
HINWEISE ZUR ENTSORGUNG Befindet sich die linke Abbildung (durchgestrichene Mülltonne auf Rädern) auf dem Produkt, gilt die Europäische Richtlinie 2012/19/EU. Diese Produkte dürfen nicht mit dem normalen Hausmüll entsorgt werden. Informieren Sie sich über die örtlichen Regelungen zur getrennten Sammlung elektrischer und elektronischer Gerätschaften. - Page 23 Dear Customer, Congratulations on purchasing this device. Please read the following instructions carefully and follow them to prevent possible damages. We assume no liability for damage caused by disregard of the instructions and improper use. Scan the QR code to get access to the latest user manual and more product information.
-
Page 24: Safety Precautions
SAFETY PRECAUTIONS Before you start the high-temperature grill, read the following instructions carefully and keep this manual for future reference. If you pass on the product to someone else, please also pass on this manual. Usage • This high-temperature grill is only suitable for the heating, grilling and browning of foods such as meat, fi sh or vegetables. - Page 25 Electrical hazard • The grill must not be immersed in water or other liquids. Risk of electric shock. • The grill must not be blasted with water or other liquids. Risk of electric shock. • Therefore do not use the unit near sources of moisture such as a sink. •...
- Page 26 Risk of burns / scalds and fi re CAUTION Risk of burns. The housing parts are hot during use. Do not touch while the unit is in operation. • Be especially careful when putting food into the hot device or removing heated food or accessories.
- Page 27 • Keep the grill away from water. This is especially true when the oven is hot. • Use only the accessories supplied or accessories available at www.klarstein.de for operating the high-temperature grill.
-
Page 28: Device Overview And Operating Elements
DEVICE OVERVIEW AND OPERATING ELEMENTS Grill Guide Handle Grease drip tray Grill room Display Regulator Power switch Fuse Power cord... -
Page 29: Before First Use
BEFORE FIRST USE Unpacking 1. Take the unit and accessories out of the box. 2. Keep the two wrapping cartons and the enclosed padding for the steak reactor. Only with this special packaging a safe transport is possible in case of complaint. 3. -
Page 30: Operation And Usage
Insert grill box and the grease drip tray For a simplified cleaning of the device, the grill attachment may be removed. Insert the attachment into the grill compartment. To prevent damage, make sure that the attachment does not come into contact with the heating element. The attachment is properly inserted when the latching hooks located on the top of the grill attachment engage the matching bolt in the grill compartment. - Page 31 Turning on the unit and setting the temperature To turn on the device, press the power button on the back of the device. For a short moment, the software version will be displayed, e.g. R09. The controller may be used to increase or decrease the temperature setting of the heating element.
- Page 32 Making Barbecue Usual cooking time is between one and three minutes on each side of the food. Notes on cooking different foods and meats can be found in the table “forms of preparation”. The meat should be taken out of the refrigerator about 1 to 2 hours before grilling and slowly brought to room temperature.
- Page 33 Insert the drip tray into rail 6 of the preheated grill attachment using the guide handle. Place the meat on the non-preheated grate and insert it into rails 1 to 5 of the preheated grill attachment using the guide handle. Runner 1 and 2 Runner 3 and 4 Runner 5 and 6...
-
Page 34: Basic Information On High Temperature Grilling
Drip tray By default, the drip tray should be inserted in rail 6 during the grilling process. It can get hot and, just like the grill, should only be operated with the guide handle. The drip tray separates the upper and lower grill compartments and prevents the heating of the lower area. - Page 35 The usage of a high-temperature grill is very different from the usage with customary grills. The performance per area is about ten times higher. The preparation of a steak is dived into the following steps: 1. Preheat device. 2. Position and insert the meat 3.
-
Page 36: Forms Of Preparation And Guidelines For Setting And Using The Steakreaktor
FORMS OF PREPARATION AND GUIDELINES FOR SETTING AND USING THE STEAKREAKTOR Well Rest Meat Weight Rail Rare* Medium** °C (each side) Note done*** time Filet (beef) 100 g 3 min. 4 min. 800 °C min. min. 200 g 4 min. 5 min. - Page 37 Well Rest Meat Weight Rail Rare* Medium** °C (each side) Note done*** time Neck 200 g 3-4 min. 850 °C Always thoroughly of pork cook pork through.. (pork) Pork belly 100 g 3-4 min. 800 °C According to your (pork) preferences, the cooking time may be shortened or...
-
Page 38: Tips
TIPS • In general, it is always advantageous if the piece of meat is as thick as possible, has a lot of fat and even better has fat marbling running through it. Salt and pepper after grilling only. Of course you can rub the meat with a dry marinade first. A liquid marinade is not to recommended. -
Page 39: Cleaning And Care
Turn off and allow to cool down If the set time has run out or the grilling procedure has been interrupted, the fans keeps on running. This is important to make sure that the case does not heat up to much by the residual heat in the device. -
Page 40: Troubleshooting
TROUBLESHOOTING Problem Possible reason Solution Smoke generation during Food is touching the cera- Switch off the unit and operation mic heating element. reposition the food. Caution: food, accessories and interior are hot. The food is smoking Interrupt the grilling without touching the process immediately and heating. - Page 41 Problem Possible reason Solution The outside of the device is Grill insert not in place. Turn the unit off and allow very hot. to cool completely, then insert the grill insert. Blocked vents. Remove any items that may be blocking the vents. Blocked air intakes.
-
Page 42: Hints On Disposal
HINTS ON DISPOSAL According to the European waste regulation 2012/19/EU this symbol on the product or on its packaging indicates that this product may not be treated as household waste. Instead it should be taken to the appropriate collection point for the recycling of electrical and electronic equipment. - Page 43 Estimado cliente, Le felicitamos por la adquisición de este producto. Lea atentamente las siguientes instrucciones y sígalas para evitar posibles daños. No asumimos ninguna responsabilidad por los daños causados por el incumplimiento de las instrucciones y el uso inadecuado. Escanee el siguiente código QR para obtener acceso a la última guía del usuario y más información sobre el producto.
-
Page 44: Indicaciones De Seguridad
INDICACIONES DE SEGURIDAD Antes de poner en marcha el horno de alta temperatura, lea atentamente las siguientes indicaciones y conserve este manual de instrucciones para consultas posteriores. Si cede el producto a otra persona, entréguele también este manual. Finalidad del producto •... - Page 45 Riesgos causados por electricidad • La barbacoa no debe sumergirse en agua ni en ningún otro líquido, existe riesgo de descarga eléctrica. • La barbacoa no debe rociarse con agua ni con ningún otro líquido, existe riesgo de descarga eléctrica. •...
- Page 46 Riesgo de quemaduras e incendios ATENCIÓN Riesgo de quemaduras. La estructura del aparato alcanza temperaturas muy elevadas durante su utilización. No la toque mientras el aparato está en funcionamiento. • Tenga especial cuidado al introducir alimentos dentro del aparato encendido o al extraer estos o los accesorios.
- Page 47 • Mantenga el aparato alejado del agua, sobre todo cuando esté caliente. • Utilice exclusivamente los accesorios recomendados por el fabricante o los disponibles en www.klarstein.es para utilizar con la barbacoa de alta temperatura. • En la parte inferior del aparato encontrará las patas. Puesto que los muebles o la superficie del suelo están compuestos de distintos materiales y pueden tratarse...
-
Page 48: Descripción Del Aparato Y Controles
DESCRIPCIÓN DEL APARATO Y CONTROLES Interiores de parilla Mango Recipiente para grasa Cámara Indicador Regulador Interruptor Fusible Cable de alimentation... -
Page 49: Antes Del Primer Uso
ANTES DEL PRIMER USO Desembalaje 1. Retire el aparato y sus accesorios de la caja de cartón. 2. Conserve ambos embalajes de cartón y el acolchado incluido para el horno de alta temperatura. Solo se garantizará un transporte seguro con este embalaje especial en caso de reclamación. -
Page 50: Puesta En Marcha Y Uso
Colocar la pieza de la barbacoa y la bandeja colectora de grasa Para facilitar la limpieza del aparato, retire la pieza de la barbacoa. Introduzca la pieza en la cámara. Asegúrese de que esta no entre en contacto con el elemento calefactor para evitar daños. - Page 51 Encendido y ajuste de temperatura Durante un breve periodo de tiempo aparece en el display el indicador de la versión de software, p. ej., R09. Con el regulador puede configurarse la temperatura de la resistencia. La temperatura máxima es de 850 °C. Presione el regulador para confirmar la temperatura seleccionada.
- Page 52 Asar Los tiempos de asado habituales suelen establecerse entre uno y dos minutos para cada lado del alimento en cuestión. Las indicaciones para preparar distintos tipos de alimentos y tipos de carne puede consultarlas en la tabla „modos de preparación“. La carne debe retirarse del frigorífico de 1 a 2 horas antes del asado para adquirir la temperatura ambiente poco a poco.
- Page 53 Pase la bandeja de goteo con ayuda del mango guía por el riel 6 de la pieza de la barbacoa precalentada. Coloque la carne en la parrilla sin precalentar y guía esta última con ayuda del mango guía hasta los rieles 1 a 5 de la pieza precalentada de la barbacoa.
-
Page 54: Fundamentos Básicos De La Barbacoa De Alta Temperatura
Bandeja de goteo Por defecto, la bandeja de goteo estará introducida en el riel 6 durante el proceso de asado. Por ello, puede alcanzar temperaturas elevadas y debe manejarse exclusivamente con el mango guía, igual que la parrilla. La bandeja de goteo separa el espacio superior e inferior del interior de la barbacoa y evita el calentamiento de la zona inferior. - Page 55 El proceso con una barbacoa de alta temperatura difiere en gran medida con respecto al funcionamiento de las parrillas eléctricas comunes. La potencia de cada superficie es aprox. 10 veces mayor. La preparación de un filete se divide en los siguientes pasos: 1.
-
Page 56: Formas De Preparación Y Valores Orientativos Para Configurar Y Utilizar La Barbacoa De Alta Temperatura
FORMAS DE PREPARACIÓN Y VALORES ORIENTATIVOS PARA CONFIGURAR Y UTILIZAR LA BARBACOA DE ALTA TEMPERATURA Poco °C (Cada Carne Peso Ranura Medio** Reposo Nota hecho* hecho*** lado) Filete (Res) 100 g 2 min. 3 min. 4 min. 800 °C 2-5 min. 200 g 3 min. - Page 57 Poco °C (Cada Carne Peso Ranura Medio** Reposo Nota hecho* hecho*** lado) Espinazo 200 g 3-4 min. 850 °C Siempre hay que asar (cerdo) muy bien la carne de cerdo Panza 100 g 3-4 min. 800 °C Según el deseo, se (cerdo) puede disminuir o prolongar el tiempo...
-
Page 58: Consejos
CONSEJOS • En general se recomienda que el trozo de carne tenga bastante grasa, sea grueso y a ser posible, tenga vetas de grasa de manera homogénea. • Salpimiente el alimento antes del proceso de asado. Por supuesto, también puede sazonar la carne con una marinada seca al gusto. -
Page 59: Limpieza Y Cuidado
Apagado y enfriado Si ha transcurrido el tiempo configurado o se ha interrumpido el proceso, el ventilador continuará funcionando. Esto es importante para asegurarse de que la estructura no se calienta demasiado por los restos de calor acumulados en la barbacoa. Apague el interruptor cuando los ventiladores se hayan apagado por completo. -
Page 60: Resolución De Problemas
RESOLUCIÓN DE PROBLEMAS Problema Posible causa Solución Formación de humo El alimento está tocando Apague el aparato y durante el funcionamiento la resistencia de cerámica. coloque de nuevo los alimentos. Advertencia: los alimentos, los accesorios y el interior se encuentran a una temperatura elevada. - Page 61 Problema Posible causa Solución La parte exterior del El elemento interior no Apague el aparato, aparato alcanza está colocado. deje que se enfríe temperaturas muy completamente y coloque elevadas. el elemento interior. Ranuras de ventilación Retire todos los objetos bloqueadas. que obstruyen las ranuras de ventilación.
-
Page 62: Retirada Del Aparato
RETIRADA DEL APARATO Si el aparato lleva adherida la ilustración de la izquierda (el contenedor de basura tachado) entonces rige la normativa europea, directiva 2012/19/UE. Este producto no debe arrojarse a un contenedor de basura común. Infórmese sobre las leyes territoriales que regulan la recogida separada de aparatos eléctricos y electrónicos. - Page 63 Chère cliente, cher client, Toutes nos félicitations pour l’acquisition de ce nouvel appareil. Veuillez lire attentivement et respecter les instructions de ce mode d’emploi afin d’éviter d’éventuels dommages. Nous ne saurions être tenus pour responsables des dommages dus au non-respect des consignes et à...
-
Page 64: Consignes De Sécurité
CONSIGNES DE SÉCURITÉ Avant de mettre ce barbecue haute température en marche, lire attentivement les instructions qui suivent et bien conserver ce mode d’emploi pour pouvoir le consulter ultérieurement. Si cet appareil est remis à une autre personne, lui fournir également le mode d’emploi. - Page 65 Dangers électriques • Ne pas plonger le gril dans l’eau ou dans tout autre liquide. Risques d’électrocution ! • Ne pas asperger l’appareil d’eau ou de tout autre liquide. Risques d’électrocution ! • Par conséquent, ne pas utiliser l’appareil à proximité de sources humides comme par exemple un évier.
- Page 66 Danger de brûlure/d’ébouillantement et d’incendie ATTENTION Risques de brûlure ! Les éléments du boîtier chauffent pendant le fonctionnement de l’appareil. Ne pas les toucher quand l’appareil est en marche ! • Être extrêmement vigilant au moment d’introduire la nourriture dans l’appareil chaud ou d’en sortir des aliments chauds ou des accessoires.
- Page 67 • Tenir le gril à l’écart de l’eau. Cela vaut particulièrement lorsque le four est chaud. • Utiliser uniquement les accessoires fournis ou les accessoires disponibles sur www. klarstein.fr pour faire fonctionner le gril à haute température. • Le dessous de l’appareil est équipé de pieds. Parce que les surfaces des meubles ou des sols sont constituées de différents matériaux et sont traités avec des produits...
-
Page 68: Aperçu De L'appareil Et Éléments De Commande
APERÇU DE L’ APPAREIL ET ÉLÉMENTS DE COMMANDE Grille Poignée de guidage Lèchefrite Espace de cuisson Indicateur Régulateur Interrupteur Fusible Cordon d‘alimentation... -
Page 69: Avant La Première Utilisation
AVANT LA PREMIÈRE UTILISATION Déballage 1. Sortir l’appareil et les accessoires du carton. 2. Conserver les deux cartons d’emballage ainsi que les rembourrages du Steakreaktor. Seul ce mode d’emballage est possible pour le transport sécurisé de l’appareil en cas de réclamation. 3. -
Page 70: Mise En Marche Et Utilisation
Installation de la grille de barbecue et du bac de récupération des graisses Retirez la grille de barbecue pur vous faciliter le nettoyage de l‘appareil. Glissez la grille dans le barbecue. Ce faisant, veillez à ce que la grille ne touche pas l‘élément chauffant pur éviter des dégâts. - Page 71 Mise en marche et réglage de la température Pour mettre l’appareil en marche, appuyer sur l’interrupteur situé à l’arrière de l’appareil. La version du software apparaît brièvement à l‘écran, par ex R09. Vous pouvez augmenter ou réduire la température de l‘élément chauffant à l‘aide du bouton de réglage.
- Page 72 Grillade Les temps habituels de grillade sont de une à trois minute pour chaque côté des pièces de viande. Se reporter au tableau sur les « types de préparation » pour obtenir plus d’informations sur la préparation des différents aliments et des différentes sortes de viande.
- Page 73 Insérez la plaque d‘égouttage à l‘aide de la poignée de guidage dans les rails 6 de l‘accessoire barbecue pré-chauffé. Posez la viande sur la grille non préchauffée et glissez celle-ci sur les rails 1 à 5 de l‘accessoire barbecue préchauffé, à l‘aide de la poignée de guidage.
-
Page 74: Principes De Base De La Grillade À Haute Température
Plaque d‘égouttage Par défaut, le bac d‘égouttage doit être installé pendant le processus de cuisson sur le rail 6. Il peut devenir très chaud et, tout comme la grille, vous ne devez le manipuler qu‘avec la poignée de guidage. La plaque d‘égouttage sépare les espaces de cuisson supérieur et inférieur et empêche le chauffage de la zone inférieure. - Page 75 Le maniement d’un gril à haute température diffère grandement du maniement d’un gril électrique classique. La puissance pour chaque surface est environ 10 fois plus élevée. La préparation d’un steak se décompose principalement selon les étapes suivantes : 1. Chauffer l’appareil 2.
-
Page 76: Modes De Préparation Et Données De Référence Pour Le Réglage Et L'utilisation Du Four À Steak
MODES DE PRÉPARATION ET DONNÉES DE RÉFÉRENCE POUR LE RÉGLAGE ET L‘UTILISATION DU FOUR À STEAK Bien Laisser Étage Viande Poids saignant* °C (Par côté) Remarque point** cuit*** reposer Filet 100 g 2 Min. 3 Min. 4 Min. 800 °C 2-5 Min. - Page 77 Bien Laisser Étage Viande Poids saignant* A point** °C (Par côté) Remarque cuit*** reposer Echine de 200 g 3-4 Min. 850°C Bien griller le porc. porc nécessaire Poitrine 100 g 3-4 Min. 800°C Le temps de cuisson (porc) nécessaire peut selon les conve- nances être rallongé...
-
Page 78: Astuces
ASTUCES • En général, il est toujours avantageux que le morceau de viande soit le plus épais possible, contienne beau- coup de gras et encore mieux qu‘il soit marbré de graisse. • Avant la grillade, saler et surtout poivrer la viande. Naturellement, il est possible de faire mariner la viande à... -
Page 79: Nettoyage Et Entretien
Débrancher et laisser refroidir Si le temps paramétré est écoulé, ou si la grillade est interrompue, les ventilateurs continuent de fonctionner. Cela est particulièrement important pour assurer que l’intérieur du gril ne surchauffe pas en raison des résidus de chaleur persistants. N’éteindre l’appareil en appuyant sur l’interrupteur qu’à... -
Page 80: Résolution Des Problèmes
RÉSOLUTION DES PROBLÈMES Problème Cause possible Solution Dégagement de fumée La nourriture touche Débrancher l’appareil et pendant le fonctionne- l’élément chauffant en repositionner la nourriture. ment de l’appareil. céramique. Attention : la nourriture, les accessoires et l’espace de cuisson sont brûlants ! La nourriture dégage de Interrompre la fumée sans toucher... - Page 81 Problème Cause possible Solution Les surfaces extérieures de Les parois du gril n’ont pas Débrancher l’appareil, le l’appareil sont brûlantes. été installées. laisser refroidir entièrement et installer les parois du gril. Les fentes d’aération sont Retirer tous les objets obstruées. obstruant les fentes d’aération.
-
Page 82: Informations Sur Le Recyclage
INFORMATIONS SUR LE RECYCLAGE Vous trouverez sur le produit l’image ci-contre (une poubelle sur roues, barrée d‘une croix), ce qui indique que le produit se trouve soumis à la directive européenne 2012/19/UE. Renseignez- vous sur les dispositions en vigueur dans votre région concernant la collecte séparée des appareils électriques et électroniques. - Page 83 Gentile cliente, La ringraziamo per aver acquistato il dispositivo. La preghiamo di leggere attentamente le seguenti istruzioni per l’uso e di seguirle per evitare possibili danni. Non ci assumiamo alcuna responsabilità per danni scaturiti da una mancata osservazione delle avvertenze di sicurezza e da un uso improprio del dispositivo.
-
Page 84: Avvertenze Di Sicurezza
AVVERTENZE DI SICUREZZA Prima di mettere in funzione il dispositivo, leggere attentamente tutte le avvertenze e conservare il manuale per eventuali consultazioni future. In caso di cessione del dispositivo a terzi, cedere anche il presente manuale. Utilizzo conforme • La griglia è destinata esclusivamente a riscaldare, grigliare e cuocere alimenti quali carne, pesce o verdure. - Page 85 Pericoli causati dall’elettricità • Non immergere mai il dispositivo in acqua o in altri liquidi. Pericolo di scosse elettriche! • Non utilizzare il dispositivo vicino a fonti di umidità come ad esempio un lavandino. • Non utilizzare mai il dispositivo all‘aperto. •...
- Page 86 Rischio di ustioni/scottature e incendi ATTENZIONE Pericolo di ustioni! Il dispositivo diventa molto caldo quando è in funzione. Non toccarlo! • Prestare particolare attenzione quando si introduce il cibo nel dispositivo caldo o quando si tolgono gli ali- menti o gli accessori. Utilizzare sempre le presine o simili. •...
- Page 87 • Tenere la griglia lontano dall‘acqua soprattutto quando è calda. • Usare solo gli accessori inclusi nella consegna oppure acquistarli sul nostro sito www.klarstein.it. • Nella parte inferiore del dispositivo si trovano i piedi di appoggio. Dal momento che i mobili o le superfici del pavimento vengono trattati con vari prodotti, non si può...
-
Page 88: Descrizione Del Prodotto E Comandi
DESCRIZIONE DEL PRODOTTO E COMANDI Griglia Impugnatura Vassoio antigoccia Zona di cottura Indicatore Regolatore Interruttore Fusibile Cavo di rete... -
Page 89: Avvertenze Per Il Primo Utilizzo
AVVERTENZE PER IL PRIMO UTILIZZO Disimballaggio 1. Rimuovere il dispositivo e gli accessori dalla confezione. 2. Conservare entrambe le confezioni e il materiale di imballaggio. Il trasporto sicuro del dispositivo in caso di reclamo è possibile solo imballando il dispositivo nella confezione originale. -
Page 90: Messa In Funzione E Utilizzo
Inserire l´inserto griglia e la vaschetta raccogligrasso Per facilitare la pulizia del dispositivo, è possibile rimuovere l´inserto della griglia. Inserire l´inserto nella zona di cottura e accertarsi che non venga a contatto con l’elemento riscaldante per evitare danni. L´inserto della griglia è posizionato correttamente quando i gancetti posti sulla parte superiore si incastrano negli appositi bulloni. - Page 91 Accensione e impostazione della temperatura Sul display appare brevemente la versione del software, ad esempio R09. Utilizzare la manopola per aumentare o diminuire l´impostazione della temperatura dell’elemento riscaldante. La temperatura massima impostabile è di 850°C Premere la manopola per confermare la temperatura impostata. Regolare il tempo di cottura Dopo aver confermato la temperatura, è...
- Page 92 Grigliare I tempi di cottura solitamente sono compresi tra uno e tre minuti per ciascun lato. Nella tabella “consigli per la preparazione”, sono contenute indicazioni per la preparazione di diversi tipi di alimenti e tipi di carne. Per ottenere risultati ottimali, togliere la carne dal frigorifero 1 o 2 ore prima della cottura e lasciarla riscaldare lentamente a temperatura ambiente.
- Page 93 Inserire la vaschetta raccogligocce con l´aiuto dell´impugnatura nel binario 6 dell´inserto della griglia preris- caldato. Mettere la carne sulla griglia non preriscaldata e inserire quest´ultima con l´aiuto dell´impugnatura nei binari da 1 a 5 dell´inserto della griglia preriscaldato. Binario 1 e 2 Binario 3 e 4 Binario 5 e 6 Scegliere un binario in base allo spessore della carne.
-
Page 94: Basi Della Cottura Ad Alta Temperatura
Vaschetta raccogligocce Normalmente la vaschetta raccogligocce deve essere inserita nel binario 6 durante la cottura. Tenere presente che la vaschetta diventa calda e che deve essere maneggiata solo con l´impugnatura come per la griglia. La vaschetta raccogligocce separa la zona cottura superiore da quella inferiore e impedisce il surriscaldamento della zona inferiore. - Page 95 L’utilizzo di una griglia ad alta temperatura si differenzia fortemente dall’utilizzo di griglie elettriche disponibili in commercio. La potenza è di 10 volte superiore. Le fasi di preparazione di una bistecca sono fondamentalmente le seguenti: 1. Riscaldare il dispositivo 2. Preriscaldare la griglia per 2-3 minuti 3.
-
Page 96: Modalità Di Preparazione E Linee Guida Per L'installazione E L'utilizzo Dello Steakreaktor
MODALITÀ DI PREPARAZIONE E LINEE GUIDA PER L‘INSTALLAZIONE E L‘UTILIZZO DELLO STEAKREAKTOR Well Carne Peso Binario Rare* Medium** °C (per lato) Riposo Nota done*** Filetto 100 g 3 Min. 4 Min. 800 °C (bovino) Min. Min. 200 g 4 Min. 5 Min. - Page 97 Well Carne Peso Binario Rare* Medium** °C (per lato) Riposo Nota done*** Bistecca 200 g 3-4 Min. 850 °C La carne di maiale di collo rile- deve essere sempre (maiale) vante ben cotta. Pancetta 100 g 3-4 Min. 800 °C Se lo si desidera, il (maiale) rile-...
-
Page 98: Consigli
CONSIGLI • In genere sarebbe meglio che la carne abbia un certo spessore, che abbia molto grasso e che sia marmo- rizzata. • Si consiglia di salare e pepare solo dopo il processo di cottura. Naturalmente è possibile marinare prima la carne. Tuttavia una marinata troppa densa è sconsigliata. -
Page 99: Pulizia E Manutenzione
Spegnere e raffreddare Se il tempo impostato è scaduto oppure il pro- cesso di cottura è stato interrotto, le ventole restano in funzione. Questo è importante per fare in modo che l’unità non venga riscalda- ta ulteriormente dal calore residuo. Spegnere l’interruttore di rete solo dopo che le ventole si sono spente da sole. -
Page 100: Risoluzione Dei Problemi
RISOLUZIONE DEI PROBLEMI Problema Causa possibile Soluzione Formazione di fumo Gli alimenti toccano Spegnere il dispositivo e durante il funzionamento l’elemento riscaldante. posizionare di nuovo gli alimenti. Attenzione: gli alimenti, gli accessori e la griglia sono caldi. Gli alimenti producono Interrompere subito il fumo senza toccare processo di cottura e far... - Page 101 Problema Causa possibile Soluzione Le superfici esterne del Non è stato inserito Spegnere il dispositivo, dispositivo diventano l’inserto griglia. farlo raffreddare molto calde. completamente e inserire l’inserto griglia. Le fessure di aereazione Rimuovere tutti gli oggetti sono bloccate. che bloccano le fessure di aereazione.
-
Page 102: Smaltimento
SMALTIMENTO Se sul prodotto è presente la figura a sinistra (il cassonetto mobile sbarrato), si applica la direttiva europea 2012/19/UE. Questi prodotti non possono essere smaltiti con i rifiuti normali. Informarsi sulle disposizioni vigenti sulla raccolta separata di dispositivi elettrici ed elettronici. Non smaltire i vecchi dispositivi con i rifiuti domestici.
Need help?
Do you have a question about the Steakreaktor 2.0 and is the answer not in the manual?
Questions and answers