Advertisement
Quick Links
Advertisement

Related Manuals for Sanipex Bagno Design Revolution


Summary of Contents for Sanipex Bagno Design Revolution
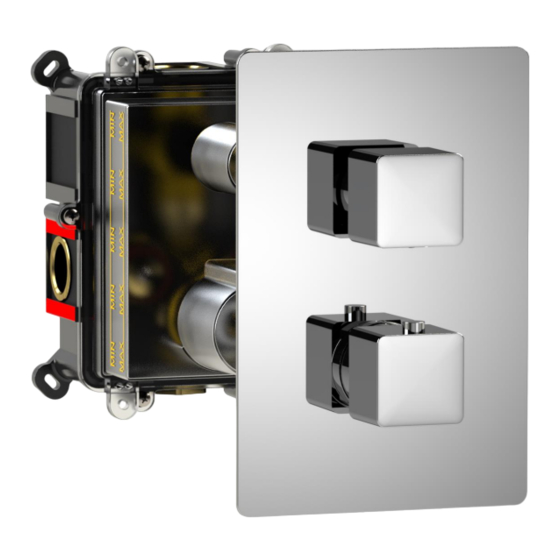
- Page 1 REVOLUTION Concealed part for thermostatic shower mixer with 2 Outlets...
-
Page 2: General Features
GENERAL FEATURES This mixer is suitable for all water heating systems provided it is installed correctly by a competent and qualified installer. OPERATING SPECIFICATIONS Hot water supply temperature: 85°C Maximum Advisable: 65°C Minimum: 5°C Minimum difference between hot and mixed temperature 10°C The temperature of the inlet hot water must be higher than the maximum mixed water temperature required from the outlet. -
Page 3: Installation
INSTALLATION Consider the thickness of the final coating (tiles, marble etc.) Keep a 135x100 mm hole in the wall to cut the protection and for the future maintenance of the product. - Page 4 The plate slides from a minimum of 21 mm to a maximum of 1mm.
- Page 5 Before fixing the box, screw into the mixer ports the correct fittings for the type of tube chosen for your hydraulic system. ATTENTION Fittings not supplied. Use a level to find the correct position For the in-wall installation, drill the wall and use the plugs and screws to fix the box to thewall...
- Page 6 For the frame installation use the screws to fix the box to the woods For the rear installation use the screw to fix the box to the drywall...
- Page 7 The box is made of plastic material ATTENTION Never expose box to open flame or excessive heat. In case of mixer ports NPT threaded, use fittings with a minimum length of 3”. Before tiling attach the seal to the wall with glue.
- Page 8 TRIM FIXING Once the mixer is installed in the wall, cut along the finished wall and remove the plastic guard. Put the silicone between the plastic guard and the finished wall.
- Page 9 • Fix the cover plate (1) on the threaded rod (2) and on the chromed ring (3). Screw the adapter (5) with the o-ring (4), until the plate is against the wall. • • Fix the brass insert (6) and fix the screw (7). •...
- Page 10 MAINTENANCE REPLACEMENT OF THE THERMOSTATIC CARTRIDGE AND VALVE HOLDER Before proceeding with the maintenance of the cartridge, remove the handles and the cover plate. See the instructions shown in section “TRIM FIXING”. THERMOSTATIC CARTRIDGE 1) Close the water inlets. With closures on the valve holders (3), screw for 7 turns the front screws with a flat screwdriver, in order to isolate the thermostatic cartridge.
- Page 11 TWO WAY DIVERTER...
- Page 12 MAINTENANCE-REPLACEMENT OF THE SHUT OFF Before proceeding with the maintenance of the shut off, remove the handles and the cover plate. See the instructions shown in section “TRIM FIXING”. 1) Close the water inlets. 2) Unscrew the threaded rod (1). 3) Unscrew the headwork (2) anti-clockwise, with a 17 wrench.
- Page 13 IMPORTANT-CLEANING OF THE MIXER After use the mixer should be maintained by wiping with a soft, damp, clean cloth. NO abrasive powders, detergents or polishes, cleaners containing alcohol, acid or corrosive chemicals should be used. In case of prolonged disuse of the mixer in winter time, it is recommended to close the system and empty the mixer to avoid damages caused by frost NOTES If these simple instructions are followed this mixer will give many years of...
-
Page 14: Troubleshooting
TROUBLE SHOOTING Cause Solution Problem a) Closed water inlets. a) Control the check valves. 1. Reduced or missing flow. b) Check if the inlet filters b) Blocked mixer. are cleaned. Check if the connecting Blocked connecting pipes. pipes are cleaned. Clean or replace the hand Blocked hand shower. - Page 15 Note:-...
- Page 16 INM-MIX-T302-CON-02-20...
Need help?
Do you have a question about the Bagno Design Revolution and is the answer not in the manual?
Questions and answers