Table of Contents
Advertisement
Quick Links
AT Control is a measuring and control system with nearly unlimited possibilities for the electronic control
of aquariums and terrariums. The basic version comprises a temperature controller, multiple timer
functions and a PC connection for programming and data display. Optional accessories are a pH
control, Redox (ORP) control, density control (for marine aquariums), conductivity control (for pure and
freshwater) and a level control. The parameter can be connected and the set points can be adjusted as
fix points or as a curve in the day-night-cycle. The complete programming can be made from the
Controller or directly from the keyboard of the PC.
1. Description of the system
The aquarium computer AT Control is a modular system. Starting from a basic unit, it can be enlarged
almost indefinitely.
The minimum for starting is the AT control set and one Power Box. Interface Boxes (for measuring of
pH, Redox (ORP), conductivity, density and level) can be added. If more mains sockets are needed,
more Power Boxes can be added as well. All system components are connected by USB connectors. A
USB Hub can be used to multiply these connections, if more, than the supplied 8 are needed.
Foto 1: AT Controller components and Connections
1. Controller
2. Power Box
3. USB Connections
4. PC Interface
5. CD ( Software for PC)
Operation manual for
Aquarium Computer AT Control
6. pH Interface (with connected probe)
7. mV Interface (with connected probe)
8. Conductivity Interface (with connected probe)
9. Density Interface(with connected probe)
10. Temperature and level probes
11. PC
1
Advertisement
Table of Contents

Related Manuals for Aqua Medic AT Control

Summary of Contents for Aqua Medic AT Control
- Page 1 Controller or directly from the keyboard of the PC. 1. Description of the system The aquarium computer AT Control is a modular system. Starting from a basic unit, it can be enlarged almost indefinitely. The minimum for starting is the AT control set and one Power Box. Interface Boxes (for measuring of pH, Redox (ORP), conductivity, density and level) can be added.
- Page 2 Holder for the controller USB cable to connect the controller with a Power Box PC Interface ( with serial connector) to connect the AT Control directly to a PC USB adapter to connect the PC Interface with a USB socket of a PC...
- Page 3 2. Connection. At first the batteries are placed into the controller (1) and the USB cable is connected, before the lid is closed. Then all components are secured safely near the aquarium. The Power Box (2) and the Controller (1) can be clipped into the holders, the Interface Boxes (5-8) can be fixed to smooth surfaces with Velcro.
- Page 4 USB adapter can be used to connect the Interface Box with the USB socket of the PC. Now, the AT Control Software has to be installed on the PC, from the delivered CD. If the USB adapter is used, the USB software from the 2 nd CD has to be installed as well.
-
Page 5: Power Box
6. Overview about the menu of the AT Control page Main menu • Deutsch settings language English • time Date/Time date • Temperature Graphic period pH value Redox (ORP) Density Conductivity • Password • Brightness Display Contrast Screen Mode Scrolling Time •... - Page 6 Page • Level * Change name • Programs • Alarm • Measuring unit • Remove level sensor • About • pH value* Change name • Programs • Data record • Alarm • Calibrate Sensor • Remove pH sensor • About •...
- Page 7 PC. The AT Control Software has to be installed before the unit can be connected to the PC. It is also possible to program the AT control via the buttons of the controller.
-
Page 8: Settings Menu
The Menu can be left by pressing the ESC key. Fig 7 ______Password_______ With this menu, the AT control can be protected with a password against undesired changes by accident or by purpose! Move the cursor to “activate Pin” and press “Enter”... - Page 9 By pressing the ↑ - key and confirming with “Enter“a screen is Activate Pin opened asking for a PIN. With the arrow keys, the Pin can be created as a combination of the number 0, 1, 2 and 3. After pressing “Enter”, the key has to be repeated, and then it is Waiting Time activated.
- Page 10 In this menu all settings can be reset to the pre-set values. Just Would you like move the arrow keys to confirm and press Enter. to reset all settings? The Menu can be left by pressing the ESC key.. Enter: confirm Esc: Cancel Fig 15 “about“...
- Page 11 Menu Power Unit ______Power Box_____ This screen is only displayed, if more than one power box is connected. Choose the desired box with the arrow keys and press “Enter”. The Menu can be left by pressing the ESC key. The following screen appears. LE01: LE 01 LE 02: LE 02 LE 03: LE 03...
-
Page 12: Manual Commands
____plugs____ In this screen, the single plugs can be renamed. Choose a plug with the cursor. As described above, a letter can be chosen with ↑ and ↓ 1: Heater . The next letter is addressed with → Enter“ Cooler If the name is completed, it is confirmed with “Enter”. -
Page 13: Program Timer
Program Timer If the menu “Program Timer” is chosen in the menu of the Power Plugs________ Box, the screen appears showing the plugs. Choose a plug with the arrow keys ( here (2) and confirm with “Enter” 1: Heater Cooler 3: CO 4: Redox 5: Light, HQI... -
Page 14: Wave Effect
If you want to modify or delete an existing program, choose the line ____show /modify /delete “show “modify/delete” with Enter. The first timer program, set on this plug is shown on the screen. By pressing the arrow buttons all timer programs set on this plus are displayed one by one. -
Page 15: Summer Function
Tide Effect To simulate a tide effect, 2 pumps are switched alternately in ____Tide Effect___ periods of 6h 50 m. Choose “Insert” and confirm with Enter. 6 h 50 m 0 s insert Fig 33 In this screen the two pumps (plugs) are addressed for the tidal pumps. -
Page 16: Function Keys
Function keys In the menu function keys, functions can be defined and addressed ____Func. Keys______ to arrow keys → ← and↓↑. These functions are the switching on ↓ : and off of plugs or groups of plugs for a defined time period (e.g. feeding break) or up to a manual command (maintenance break) ↑... - Page 17 Agenda In this menu, you can write down notes, which are displayed after a ____Agenda ______ certain time or at a certain date as a reminder in the display. To write them into the Agenda, choose Agenda in the main menu and confirm with Enter.
-
Page 18: Temperature Menu
Temperature control with the AT Control AT Control is supplied with a very comfortable temperature control program, with almost unlimited possibilities. Several heaters or cooling devices can be connected to one sensor and operated individually. The set point can be varied in the day-night cycle, which a night shut down Examples: Gravel Heater for planted aquariums. - Page 19 20°° (8pm) is decreased for approx. 2 ° - compared with the temperature in the afternoon. You can save the edited curve with Enter. The AT Control will now use the curve as ∆ set point and switch the heater and the cooler in a way that the actual temperature is close to the curve (+/- the edited hysteresis).
-
Page 20: Calibrate Sensor
Independently from the programmed temperature set points, alarm values can be programmed. If these values are under or overcome, ______Alarm__________ the AT Control shows Alarm. Either by flashing the display and/or by sound. The screen for temperature alarm is chosen in the temperature menu and confirmed. -
Page 21: Level Menu
ESC: Cancel Fig 56 about The last screen of the temperature menu shows the software and the hardware version installed. AT Control SW Version: 5.0 Press any key to continue Fig 57 Level menu The menu for the level sensor is programmed similar to the temperature menu. -
Page 22: Measuring Unit
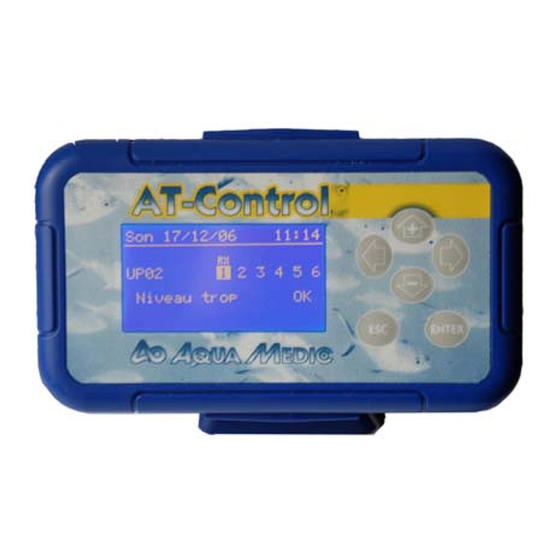
Level programs To program the level sensor, choose “insert” and confirm. In the next screen (61) the cursor shows “off” and flashes. With the _______Level________ ↓↑ keys, the display can be adjusted to „LIV 1“ and „LIV 2“ . Insert „off“... - Page 23 If the level sensor activates the plug, however the connected device Sensor program error (pump) cannot reach the desired level in the programmed Max Time, the plug is blocked. The display shows: Sensor program Error Level – with sound. There is a problem. Solve the problem first and then deblock the plug.
- Page 24 Disconnect Level Sensor If the level sensor is disconnected from the Power Box ( or the cable is damaged), the screen Device connected is shown. Confirm Device disconnected with Enter. The display switches to the basic screen and a flashing? is shown at the left bottom.
- Page 25 AT Control With the connection of a pH Interface Box and a pH electrode, the AT control can be supplied with a pH control. If both is connected to the Power Box, the pH control is automatically recognised.
- Page 26 Independently from the programmed pH set points, alarm values can be programmed. If these values are under or overcome , the ______Alarm__________ AT Control shows Alarm. Either by flashing the display and/or by sound. The screen for pH- alarm is chosen in the pH- menu and confirmed.
- Page 27 If a pH sensor is reconnected after some time, it will be automatically be recognised as new component. Enter: confirm ESC: Cancel Fig 81 AT Control About: Here, the software version of the pH control is shown. SW Version : 7.0 Press any key to continue Fig 82...
- Page 28 Redox (ORP) Menu ________Redox________ To get to the Redox (ORP) Menu, choose “Redox (ORP)” in the main menu. In this menu, you can program a Redox (ORP) control Change Name – if you have connected a Redox (ORP) Interface and a Redox Programs (ORP) electrode.
- Page 29 Independently from the programmed Redox set points, alarm values can be programmed. If these values are under or overcome, ______Alarm__________ the AT Control shows Alarm. Either by flashing the display and/or by sound. The screen for Redox- alarm is chosen in the Redox- menu and confirmed.
- Page 30 If a Redox sensor is reconnected after some time, it will be automatically be recognised as new component. Enter: confirm ESC: Cancel Fig 93 AT Control About: Here, the software version of the Redox control is shown. SW Version : 7.0 Press any key to continue Fig 94...
- Page 31 Conductivity menu – Density menu Conductivity and density are parameter to describe the amount of salts dissolved in water. Both are identical measurements. AT Control makes a difference between Conductivity and Density to achieve a better accuracy. The Conductivity measurement using the Conductivity interface and the Conductivity Electrode are used for low conductivity (freshwater and pure water).
- Page 32 Independently from the programmed conductivity set points, alarm values can be programmed. If these values are under or overcome ______Alarm__________ the AT Control shows Alarm. Either by flashing the display and/or by sound. The screen for conductivity - alarm is chosen in the conductivity - menu and confirmed.
- Page 33 Enter: confirm ESC: cancel Fig 106 About: Here, the software version of the Conductivity control is AT Control shown. SW Version : 7.0 Press any key to continue Fig 107...
Need help?
Do you have a question about the AT Control and is the answer not in the manual?
Questions and answers