Table of Contents
Advertisement
Quick Links
Advertisement
Table of Contents

Related Manuals for Siren Marine 3 Pro

Summary of Contents for Siren Marine 3 Pro
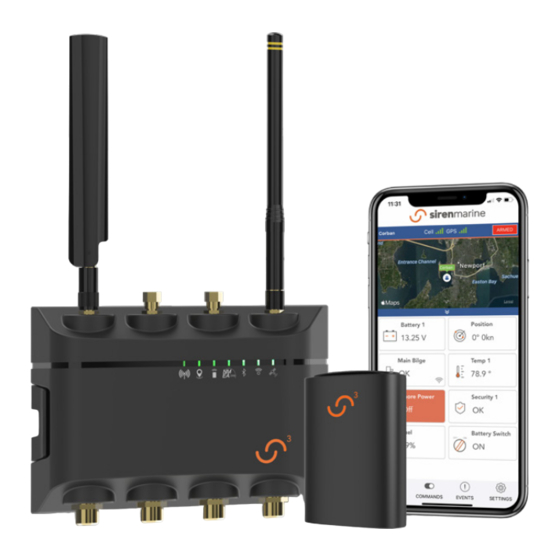
- Page 1 Siren 3 Pro Installation Guide...
- Page 2 Position 321º 0kn Battery 0.09 V Main Bilge Temp 1 78.9º...
-
Page 3: Table Of Contents
Table of Contents Peace of Mind with Siren 3 Pro Standard Features ..........4 Smart Boat Technology Package Contents ..............7 Wiring Cable 1 ................ 8 Antenna Connections ............. 9 Siren Marine is revolutionizing the boating experience with our Connected Mounting &... -
Page 4: Siren 3 Pro Standard Features
As part of our power-saving routine, the LED indicator on the Siren 3 Pro will turn off after five minutes. To restart the LEDs, double-tap the face of the unit with two firm taps. - Page 5 Tank Levels Control Devices With an NMEA 2000 connection, monitor fuel, The Siren 3 Pro has four hardwired control water, and waste tank levels. outputs. These control outputs can be Bilge Pump Monitoring connected to an appropriate AC or DC...
- Page 6 NMEA 2000 data line. An NMEA 2000 cable and T-connector are required for this feature. Optional NMEA 2000 connection hardware available at sirenmarine.com. Additional NMEA 2000 capabilities are continuously being developed by Siren Marine and will be delivered by Siren Marine’s powerful Over the Air (OTA) upgrade portal.
-
Page 7: Package Contents
Package Contents Wiring Cable 1 Cellular & Wireless Sensor Main Device & Connection Hardware Antennas (installation required) Mounting Bracket & Mobile App Guide Installation Guide Mounting Hardware Siren 3 Pro Installation Guide Siren 3 Pro Mobile App Guide... -
Page 8: Wiring Cable 1
Battery 1 (+) Installation Instructions Brown Input Battery 2 (+) Unscrew the wiring cable connector cap on the Siren 3 Pro Gray Input Remote Arm/Disarm device to expose the cable connector (this will be labeled Harness 1 on the back of the device). -
Page 9: Antenna Connections
Antenna Connections (Required) The Siren 3 Pro comes with an external cellular antenna and an external wireless sensor antenna. These antennas are required and are not interchangable. The Siren 3 Pro features an internal GPS antenna that is used for most installations. If the device is being mounted where it is not possible to receive a GPS signal, an external Siren GPS antenna can be used as an alternative. -
Page 10: Mounting & Installation
The Siren 3 Pro device is supplied with a mounting bracket and (4) #5 3/4” stainless flat head Phillips mounting screws. We recommend the Siren 3 Pro be installed in a covered area, such as under the helm or in a cabinet and away from metal material that may cause signal interference. -
Page 11: Getting Started
Getting Started Requirements Before you begin, ensure that you have the necessary equipment and subscription needed to operate your Siren 3 Pro: Siren 3 Pro 12-36 VDC Siren Marine Siren Marine Main Device Wiring Cable 1 Battery/ Subscription Mobile App... -
Page 12: Battery Connection
Note: Power must be fused for device protection. The Wiring Cable 1 has two inline fuses included for this purpose. Important: Do not wire the Siren 3 Pro to the switched side of a battery switch. Ensure the Siren 3 Pro is connected to 24/7 power. - Page 13 The Battery 1 connection powers the Siren 3 Pro and can be monitored through the Siren Marine App. This battery is displayed on the app in the Battery 1 tile by default. Please see the Siren Marine App Guide to learn...
-
Page 14: Sensors And Inputs
“3” above the Siren Marine logo on each wireless sensor module. The Siren 3 Pro can connect to a variety of external inputs and sensors with wired and wireless options. Each input will be displayed on the Siren Marine App or the SirenFleet (fleet.sirenmarine.com) portal to indicate behavior and status. - Page 15 In the dialog box, rename the sensor to your preference, then select “Add”. To add additional sensors, repeat above steps. For more information on utilizing the Siren Marine App, please reference the supplied Siren Marine App Guide. Battery Sensor Bilge Sensor...
-
Page 16: Battery 2 Input
Battery 2 Input The Siren 3 Pro has the ability to monitor two 12-36 VDC batteries with hard-wired connections. Please note the Battery 1 input (red wire) is required to power the unit, while Battery 2 (brown wire) is used for battery voltage monitoring only. -
Page 17: Manual Arm/Disarm Switch
Battery 2 Input (Continued) Wireless Sensor Installation Before connecting a wireless battery sensor to a battery, pair the sensor to your Siren Marine App using the QR scanning process outlined in the wireless sensor pairing guidelines on page 15. Once you have successfully paired and mounted the wireless sensor, connect the positive (+) lead on the sensor tail (red) to the positive (+) post on the battery source. -
Page 18: Ignition 1 Input (Displays Engine 1 Hours)
To monitor engine hours from a negative (-) source, use the Siren Marine PAM-4 DC Relay. Please reference the AC and DC relay on the support page at sirenmarine.com. -
Page 19: Security 1, 2, & 3
Note: When the entry point is opened, a notification will be sent to the Siren Marine App. There are 4 output relays that can be programmed by mobile app to alert if a security sensor has been triggered. These can be used to switch on lights, sirens or... -
Page 20: High Water
Note: Notifications will be sent to the Siren Marine App if the water level in the bilge rises above the preset level or if water... -
Page 21: Shore Power
Wiring Cable 1 (See page 8) or the yellow wire of Wiring Cable 2. The Siren Marine AC Shore Power Relay is installed by wiring directly from the shore power circuit breaker. Please reference the installation guide supplied with the Shore Power Relay for more detail. -
Page 22: Temperature
Plug the temperature sensor tail into the wireless module and tighten the two hex screws. If using the wireless temperature sensor without the temperature sensor tail, select the “internal” option when prompted while pairing the sensor to the Siren Marine App. Select the “external” option if using the sensor tail. Install the wireless sensor battery. -
Page 23: Relay Control Outputs (#1, #2, #3, #4)
The Siren 3 Pro has the ability to control the power supply for up to four separate circuits. Each output on the Siren 3 Pro unit has a max rating of .5 amps. Most loads will require the use of a Siren Marine DC or AC power relay. -
Page 24: Bilge Pump Sensor
Status LED Indicators The Siren 3 Pro has seven LED indicators which show the status of connectivity to all wireless connections. (see page 25 for complete LED indication table). While the unit is powering on, you will see the LEDs illuminate in order while connections are being... - Page 25 Depending on the sensors that you connect to your Siren 3 Pro, some of the LEDs may not be applicable (for example, a satellite module is required for satellite connection). If you do not have a system connected that...
-
Page 26: Technical Specifications
Technical Specifications General Dimensions 6.5 in x 4.5 in x 1.25 in 165 mm x 114.3 mm x 31.75 mm Weight 1 lb. 0.5 kg Environmental Temperature (Operating) +5°F to +131°F -15°C to +55°C Temperature (Storage) -40°F to +185°F -40°C to +85°C Humidity 0 to 90% RH Electrical... - Page 27 Wireless Communication Signal Standard Antenna Cellular 4G/5G LTE, with fall back to 3G External WiFi Access Point or Client (future functionality) Internal Bluetooth Bluetooth Low Energy (BLE) (future functionality) Internal Wireless Sensor 917 and 868 MHz bands External Wired Communication Interface Standard Connector...
- Page 28 Wired Inputs Wired Outputs Wireless Sensors Battery 1 (+) Blue Sea Battery Switch (#7713) Magnetic Reed Switch (Entry) Battery 2 (+) Relay Output 1 Bilge Pump Activity Battery Gnd (-) Relay Output 2 Temperature High Water 1 Relay Output 3 High Water High Water 2 Relay Output 4...
- Page 29 Siren Marine System Server means the servers and other hardware and infrastructure needed in order to provide the Service. • Siren Marine Device is any and all hardware that is sold by or distributed through Siren Marine LLC. Includes the Siren 3 Pro, Siren 3, and all accessory sensors that are paired with the Siren Marine base unit.
- Page 30 The Service is cancelled, the Siren Marine System may be sent to Service Provider or Distributor for a replacement SIM card. A minimum service fee of US $100.00 will be charged for this. In case the Siren Marine Device and/or its internal SIM card are lost or stolen, the End User is required to immediately notify the Service Provider.
- Page 31 Liabilities The Service Provider is not liable for any goods stolen or damages incurred as a result of the Service not being available. Siren Marine is not liable for defects in the Siren Marine Device or in the Service. The End User recognizes that factors outside the Service Providers control may affect the quality of the Service.
- Page 32 Welcome to the Connected Boat Welcome to the Connected Boat ® ® Welcome to the Connected Boat ® Peace of Mind with Smart Boat Technology Peace of Mind with Smart Boat Technology Peace of Mind with Smart Boat Technology Peace of Mind with Smart Boat Technology Technical Support 401.619.4774 Battery...
Need help?
Do you have a question about the 3 Pro and is the answer not in the manual?
Questions and answers