Panasonic SC-AK230 Operating Instructions Manual
Hide thumbs
Also See for SC-AK230:
- Operating instructions manual (16 pages) ,
- Operating instructions manual (16 pages) ,
- Operating instructions manual (16 pages)
Table of Contents
Advertisement
Available languages
Available languages
Quick Links
: Para zonas donde se utilizan fuentes de alimentación
PL
de 120 V.
GCP : Para zonas donde se utilizan fuentes de alimentación
de 110-127/220-240 V.
Antes de conectar, operar o ajustar este producto, sírvase leer estas
instrucciones completamente.
Guarde este manual para su consulta en el futuro.
PL
GCP
Sp
En
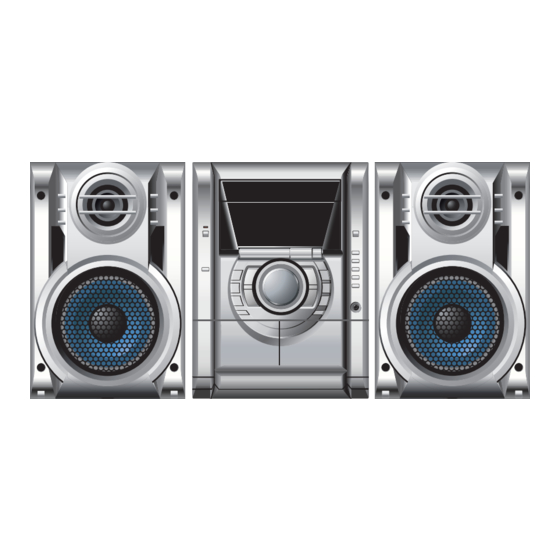
Sistema estéreo con
reproductor de discos
Instrucciones de funcionamiento
Índice
INSTRUCCIONES IMPORTANTES DE SEGURIDAD ........... 3
Accesorios suministrados ................................................... 3
El mando a distancia ............................................................ 3
Preparación ........................................................................... 4
Controles del panel delantero ............................................. 5
Información de los discos ................................................... 6
Discos .................................................................................... 6
Reproducción básica ........................................................... 6
Reproducción con salto de álbum ....................................... 7
Visualización de discos compactos ..................................... 7
(Función del modo de reproducción) ............................... 7
Reproducción programada .................................................. 8
Repetición de reproducción ................................................. 8
Marcación de una pista ....................................................... 8
Función INTRO (Exploración de álbumes) .......................... 9
Función de búsqueda de títulos .......................................... 9
Radio ................................................................................... 10
Casetes ................................................................................ 11
Puesta de la hora ................................................................ 11
Temporizadores .................................................................. 12
Calidad de sonido/campo de sonido ................................ 13
Otras funciones .................................................................. 13
Conexión de un aparato exterior ....................................... 13
Utilización de un aparato exterior ...................................... 13
Utilización de los auriculares (no suministrados) ............... 13
alimentación ................................................................... 13
Funciones convenientes .................................................... 13
Guía para la localización de las fallas .............................. 14
Especificaciones técnicas ................................................. 15
Mantenimiento .................................................................... 15
compactos
SC-AK230
Modelo
RQT7800-3M
G1004HS3055
Advertisement
Chapters
Table of Contents

Related Manuals for Panasonic SC-AK230


Summary of Contents for Panasonic SC-AK230
-
Page 1: Table Of Contents
Sistema estéreo con reproductor de discos compactos Instrucciones de funcionamiento SC-AK230 Modelo Índice INSTRUCCIONES IMPORTANTES DE SEGURIDAD ... 3 Accesorios suministrados ........... 3 El mando a distancia ............3 Preparación ................4 Apagado y encendido de la función de demostración ..4 Controles del panel delantero .......... - Page 2 Cambie el ajuste del voltaje según el voltaje de CA empleado en su área. Consulte la página 4. SC-AK230: Tenga en cuenta que el aparato se estropeará seriamente o no funcionará de la forma apropiada si no se hace este ajuste correctamente.
-
Page 3: Instrucciones Importantes De Seguridad
INSTRUCCIONES IMPORTANTES DE SEGURIDAD Lea las siguientes instrucciones de funcionamiento cuidadosamente y la tercera punta fueron provistas para su seguridad. Si la clavija antes de usar la unidad. Siga las instrucciones de seguridad de la suministrada no se ajusta a su tomacorriente, consulte a un unidad y aplique las instrucciones de seguridad listadas abajo. -
Page 4: Preparación
Preparación Conecte el cable de alimentación de CA sólo después de haber hecho todas las demás conexiones. Conexiones de antenas opcionales (A página 10) Preparación Retuerza y tire de la punta de vinilo de los cables de la antena y de los altavoces. O BIEN Si los cables del altavoz no tienen la cubierta de vinilo, conéctelas directamente a los terminales. -
Page 5: Controles Del Panel Delantero
Controles del panel delantero Aparato principal 1 Visualizador 2 Indicador de alimentación de CA [AC IN] Este indicador se encenderá cuando el aparato esté conectado a la alimentación de CA. Interruptor de alimentación en espera/conectada [f f f f f /I, POWER] Pulse este interruptor para cambiar el aparato del modo de alimentación conectada al modo de alimentación en espera o viceversa. -
Page 6: Información De Los Discos
Información de los discos Información sobre MP3 Selección de disco Este aparato puede reproducir archivos MP3 grabados en Este aparato puede reproducir discos CD-R y CD-RW de audio CD-R/RW con un ordenador. del formato MP3 y CD-DA (audio digital) que hayan sido finalizados Los archivos son tratados como pistas y las carpetas como álbumes. -
Page 7: Reproducción Con Salto De Álbum
Discos Para escuchar discos compactos y pistas específicos (Función del modo de reproducción) a ALL-DISC: Se reproducen en orden consecutivo todos los discos cargados, desde el disco seleccionado hasta el disco final \ . b 1-SONG: Se reproduce una pista seleccionada del disco seleccionado. -
Page 8: Reproducción Programada
Discos • Para añadir una pista al programa Siga los pasos 2 y 3. Siga los pasos 2 ~ 4. • Para cancelar la última pista DISC Pulse [DEL]. • Para cancelar todas las pistas PROGRAM Pulse [L, CLEAR]. Botones numerados Mientras parpadea “CLEAR ALL”, pulse de nuevo el botón para REPEAT... -
Page 9: Función Intro (Exploración De Álbumes)
Función INTRO Introducción de caracteres (Exploración de álbumes) Usted puede introducir una palabra clave que tenga un máximo de 8 caracteres para buscar títulos de álbumes/pistas. Sólo puede introducir Puede encontrar un álbum escuchando durante 10 segundos la primera mayúsculas, pero el aparato también busca minúsculas. pista de todos los álbumes del disco actual. -
Page 10: Radio
Radio Presintonización de emisoras g/REW/3, Mando a distancia solamente f/FF/4 Hay dos formas de presintonizar emisoras. Presintonización automática: Se presintonizan todas las emisoras que la radio puede recibir. TUNER, BAND L, STOP Presintonización manual: Usted puede seleccionar las emisoras a presintonizar y el orden en que a, REC DECK1/2 quiera presintonizarlas. -
Page 11: Casetes
Casetes Reproducción Para detener la grabación Pulse [L, STOP]. Para reproducir cintas podrá utilizar la platina 1 o la 2. Si la cinta termina antes que el disco Use cintas de posición normal. El disco sigue reproduciéndose. Pulse [L, STOP] para pararlo. Las cintas de posición alta y de posición metal pueden reproducirse, pero el aparato no podrá... -
Page 12: Temporizadores
Temporizadores Pulse [f f f f f ] para apagar el aparato. El aparato deberá estar apagado para que funcionen los temporizadores. Auriculares • Temporizador de reproducción: (no suministrados) SUPER La reproducción empieza con la condición establecida y a la SOUND EQ hora puesta, con el volumen aumentando poco a poco hasta alcanzar el nivel establecido. -
Page 13: Calidad De Sonido/Campo De Sonido
Calidad de sonido/campo de sonido Utilización de los ajustes de calidad Para realzar la calidad del sonido de sonido/campo de sonido incorporados Puede realzar los efectos graves y agudos del sonido. Pulse [SUPER SOUND EQ]. Mando a distancia solamente Mando a distancia: Pulse [S.SOUND EQ]. Pulse [PRESET EQ] para seleccionar un ajuste. -
Page 14: Guía Para La Localización De Las Fallas
Guía para la localización de las fallas Antes de solicitar el servicio de reparaciones, haga las comprobaciones de la tabla siguiente. Si no puede solucionar el problema como se describe a continuación, o si se produce algo que no se indica en la tabla, consulte el directorio adjunto para localizar el Centro de Servicio Autorizado más conveniente o póngase en contacto con su concesionario. -
Page 15: Especificaciones Técnicas
Especificaciones técnicas SECCIÓN DE LA PLATINA DE CASETE SECCIÓN DE ALTAVOCES SECCIÓN DEL AMPLIFICADOR Potencia de salida RMS Sistema de pistas 4 pistas, 2 canales Tipo Sistema de 2 altavoces de 2 vías Distorsión armónica total 10%, Cabezas (Reflejo de graves) 5 Ω... - Page 16 Matsushita Electric Industrial Co., Ltd. Web Site: http://www.panasonic.co.jp/global/ RQT7800...
- Page 17 CD Stereo System Operating Instructions SC-AK230 Model No. Table of contents IMPORTANT SAFETY INSTRUCTIONS ......... 3 Supplied accessories ............3 The remote control ..............3 Set-up ..................4 Turning the demo function on/off ........4 Front panel controls .............. 5 Disc information ..............
- Page 18 These operating instructions are applicable to the following systems. Unless otherwise indicated, illustrations in these operating instructions CAUTION: are of SC-AK230: Change the voltage setting to suit the AC voltage in your area. See page 4. Note that the unit will be seriously damaged or fail...
-
Page 19: Important Safety Instructions
IMPORTANT SAFETY INSTRUCTIONS Read these operating instructions carefully before using the unit. Follow for your safety. If the provided plug does not fit into your outlet, the safety instructions on the unit and the applicable safety instructions consult an electrician for replacement of the obsolete outlet. listed below. -
Page 20: Set-Up
Set-up Connect the AC power supply cord only after all other connections have been made. Optional antenna connections (A page 10) Preparation Twist and pull off the vinyl tip of the antenna wires and speaker cords. If the speaker cords do not have vinyl tips, directly connect them to the terminals. AC power supply cord AM loop antenna Appliance inlet... -
Page 21: Front Panel Controls
Front panel controls Main unit 1 Display 2 AC supply indicator [AC IN] This indicator lights when the unit is connected to the AC mains supply. Standby/on switch [f f f f f /I, POWER] Press to switch the unit from on to standby mode or vice versa. In standby mode, the unit is still consuming a small amount of power. -
Page 22: Disc Information
Disc Information Disc selection MP3 information This unit can play MP3 files recorded on CD-R/RW with a computer. This unit can play MP3 and CD-DA (digital audio) format audio Files are treated as tracks and folders are treated as albums. CD-R and CD-RW that have been finalized (a process that enables This unit can access up to 999 tracks, 255 albums and 20 sessions. -
Page 23: Album Skip Play
Discs To listen to specific discs and tracks (Play Mode function) a ALL-DISC: Plays all loaded discs in succession from the selected disc to the final disc \. b 1-SONG: Plays one selected track on the selected disc. c 1-ALBUM: Plays one selected album on the selected disc. -
Page 24: Program Play
Discs • To add to the program Do steps 2 and 3. Do steps 2 ~ 4. DISC • To clear the last track PROGRAM Press [DEL]. Numbered • buttons To clear all tracks REPEAT Press [L, CLEAR]. While “CLEAR ALL” is blinking, press the button again to clear all tracks. :/J, CD Note L, CLEAR... -
Page 25: Intro Function (Album Scan)
INTRO function (Album scan) Entering characters You can enter a keyword of up to 8 characters for album/track title You can find an album by listening to the first track of all albums in the search. You can only enter upper case letters but the unit also searches current disc for 10 seconds each. -
Page 26: Radio
Radio Preset tuning g/REW/3, Remote control only f/FF/4 There are two methods of pre-setting stations. Automatic presetting : All the stations the tuner can receive are preset. Manual presetting : You can select the stations to preset and the TUNER, BAND L, STOP order they are preset in. -
Page 27: Cassettes
Cassettes Plackback To stop recording Press [L, STOP]. You can use either deck 1 or deck 2 for tape playback. If the tape finishes before the disc Use normal position tapes. The disc continues playing. Press [L, STOP] to stop it. High position and metal position tapes can be played, but the unit will To record on the other side of the tape not be able to do full justice to the characteristics of these tapes. -
Page 28: Timers
Timers Press [f f f f f ] to turn the unit off. The unit must be off for the timers to operate. • Headphones Play timer: Play will start in the set condition at the set time (not included) with volume increasing gradually to the set level. -
Page 29: Sound Quality/Sound Field
Sound quality/sound field Enhancing the sound quality Using the built-in sound quality/sound field settings You can enhance the bass and treble effect of the sound. Press [SUPER SOUND EQ]. Remote control only Remote control: Press [S.SOUND EQ]. Press [PRESET EQ] to select a setting. The button light comes on. -
Page 30: Troubleshooting Guide
Troubleshooting guide Before requesting service, make the checks below. If you can’t fix the system as described below, or if something not listed here occurs, refer to the enclosed directory to locate an Authorized Service Center convenient to you or contact your dealer. Reference pages are shown as black circled numbers 4. -
Page 31: Specifications
Specifications CASSETTE DECK SECTION SPEAKER SECTION AMPLIFIER SECTION Track system 4 track, 2 channel Type 2 way, 2 speaker system (Bass reflex) RMS output power 5 Ω Heads THD 10%, both channels driven Impedance 100 W per channel (5 Ω) 1 kHz Record/playback Solid permalloy head... - Page 32 Matsushita Electric Industrial Co., Ltd. Web Site: http://www.panasonic.co.jp/global/ RQT7800...
Need help?
Do you have a question about the SC-AK230 and is the answer not in the manual?
Questions and answers