Advertisement
Quick Links
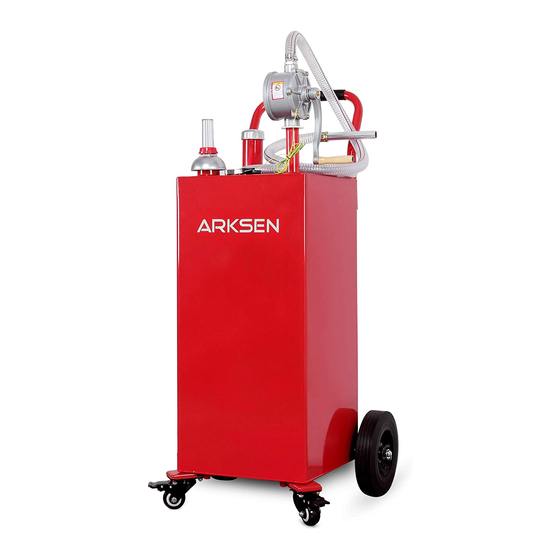
35 Gallon Gas Caddy
OWNER'S MANUAL
⚠
WARNING! CAUTION!
Read carefully and understand all ASSEMBLY AND/OR OPERATION
INSTRUCTION before using the product. Failure to follow the safety rules
and other basic safety precautions may result in serious personal injury.
Item# 002-AU-30035 / GAS35
Advertisement

Summary of Contents for ARKSEN 002-AU-30035/GAS35
- Page 1 35 Gallon Gas Caddy OWNER’S MANUAL ⚠ WARNING! CAUTION! Read carefully and understand all ASSEMBLY AND/OR OPERATION INSTRUCTION before using the product. Failure to follow the safety rules and other basic safety precautions may result in serious personal injury. Item# 002-AU-30035 / GAS35...
- Page 2 owner’s manual Thank you for purchasing our product. This manual covers operation and maintenance information about the product. Read carefully and understand all instruction before using the product. All information in this publication is based on the latest product information available at the time of approval for printing.
- Page 3 owner’s manual IMPORTANT SAFETY INSTRUCTION READ THIS MANUAL CAREFULLY BEFORE INSTALLING, OPERATING OR SERVICING When using this product, basic precautions should always be followed, including the following; • This product is not intended for use by persons (including children) with reduced physical, sensory or mental capabilities, or lack of experience and knowledge, unless they have been given supervision or instruction concerning using the product by a person responsible of their safety.
- Page 4 owner’s manual PARTS AND FEATURES A. Hose clamp B. 3.5M Plastic wired tube C. Tube connector D. Earth wire with clip E. Plastic nut F. Fuel measure gauge G. Oil pump H. Plastic dome I. Metal floater J. Lock nut K.
- Page 5 owner’s manual...
- Page 6 owner’s manual ASSEMBLY GUIDE STEP 1 Insert the wheel axle to the caddy. Put a washer to the end of the axle. STEP 2 Put the rubber wheel to the end of the wheel axle. Secure it in place with washer and cap nut. Repeat the same step for the other wheel.
- Page 7 owner’s manual STEP 3 Remove the nuts from the bottom of the caddy. Attach the foot, then secure using the removed nuts. STEP 4 Assemble the 3” universal wheel on the foot. Secure the wheels on the foot using M8 nuts.
- Page 8 owner’s manual STEP 5 Screw the oil pump on the pump pipe. Make sure they are aligned before screwing to prevent cross threading. STEP 6 Screw the pump connector on the oil pump. Careful to prevent cross threading.
- Page 9 owner’s manual STEP 7 Attach the pump handle to the oil pump. STEP 8 Attach the wired tube to the connector. Secure it by tightening the hose clamp.
- Page 10 owner’s manual STEP 9 Attach the plastic dome and fuel measure gauge to the gas caddy. STEP 10 Insert the oil filter into the oil inlet, then cover it with the fuel cap.
- Page 11 owner’s manual STEP 11 Attach the handle to the gas caddy and lock it in place.
- Page 12 owner’s manual FINISHED...

Need help?
Do you have a question about the 002-AU-30035/GAS35 and is the answer not in the manual?
Questions and answers
After dispensing 15-20 gallons, am unable to pump any more fuel using the rotary pump. Does the pickup tubing go to the bottom of the tank. Is the pickup tube metal or something else. Having to refill with a 1/2 tank of fuel is getting old.
@Juan boquet Do you sell a motorized/battery powered pump for the tank
My tank is pumping very slowly or not at all. i replaced the pump already and is still not working
Slow or no pumping in the ARKSEN 002-AU-30035/GAS35 tank after replacing the pump could be caused by improper assembly, such as cross-threading of the oil pump or pump connector, loose fittings or threaded connections causing air leaks, or failure to secure the hose clamp on the wired tube. Ensure all components are properly aligned, tightened, and leak-free.
This answer is automatically generated
I need a replacement3.5 M plastic wired tube for my 35 gallon gas caddy which cracked then broke and cannot find where to purchase