Table of Contents
Advertisement
Quick Links
Advertisement
Table of Contents

Related Manuals for Reacha DIY

Summary of Contents for Reacha DIY
- Page 1 Operating instructions video assembly...
- Page 3 We are very pleased that you have chosen a handcart and bicycle trailer from reacha.de. We have carefully designed our frame made in Bavaria as well as the other parts of our products in order to ensure the best possible handling and a long service life. Please read the following...
-
Page 4: Table Of Contents
4. Transport and storage 5. Accessories 6. Road traffic licensing regulations 7. Maintenance, care and disposal 8. Technical specifications 9. Guarantee and warranty 10. Imprint NO PASSENGER TRANSPORT reacha cargo trailers are not designed or approved for passenger transport, especially not for children! -
Page 5: Description
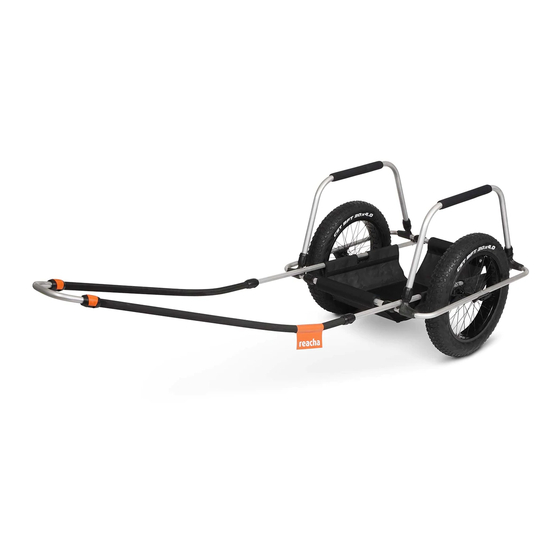
DESCRIPTION DESCRIPTION These operating instructions refer to products and accessories of the "reacha" series with the following product packages: reacha DIY, reacha cargo 20, reacha street 26, reacha beach 24. Components Mainframe – Wheel frame right Tow bar extension Mainframe – Wheel frame left... - Page 6 BEFORE THE FIRST USE Intended Use Reacha is a cargo trailer for manual operation. It can also be used as a bike trailer with the optional bike connector. According to these instructions, all packages are intended to be as a hand-trailer or optional as a bike trailer during the day on paved roads for transporting loads.
-
Page 7: Before The First Use
DESCRIPTION The liability of good goods tegernsee GmbH for damages resulting from non-compliance of these specifications is excluded. BEFORE THE FIRST USE Symbols and warnings WARNING ! This symbol indicates a potential hazard to your life or health, if the appropriate instructions are not followed or if proper precautions are not taken. - Page 8 Inform yourself about the legal regulations of the country or the region, in which you want to use the reacha. Reacha is an un-braked trailer. The lighter the bike and the driver, the higher the risk that the loaded reacha will cause the rear wheel of the bike to burst.
- Page 9 DESCRIPTION Correct way of driving as a bike trailer If you are going to use the reacha as a bike trailer, slowly get used to its handling and dimensions, initially without any load on the trailer and on quiet roads.
- Page 10 Changes and modifications The reacha must not be modified or altered. Extensions are also impermissible. The use of the reacha with wheels other than the supplied ones is permitted, only if they meet the requirements for use with reacha (see page 15).
-
Page 11: Unpacking And Initial Assembly
Check delivery condition The reacha is delivered in a carton in a disassembled state. Remove all package cushioning and packaging material and spread all parts. The wheels may be packed in a separate box. - Page 12 UNPACKING AND INITIAL ASSEMBLY General snap-lock operation 1. Hold the clip of the snap-lock on the gripping surfaces with one finger each. 2. Press with both thumbs away from the pipe perpendicular to the pipe axis to open the clip. 3.
- Page 13 UNPACKING AND INITIAL ASSEMBLY Assembling mainframe For assembly you can check our video or follow the description below. Video: https://youtu.be/oRrCPIIwDYQ Description: Place the wheel frames and the trunk with the connecting pipes on the floor as shown in the picture. Pay attention to the alignment of the trunk: short side (A) below;...
- Page 14 UNPACKING AND INITIAL ASSEMBLY NOTE If you want to use a bow with your reacha, you must first attach the bow adapters to the mainframe. Follow the instructions on page 25 ff. 2. Guide the side ends of a wheel frame first into the connecting pipes in the trunk.
- Page 15 Tow bar assembly 1. Use both bars (left and right) and the bar extension to assemble the tow bar. Make sure the bar with the Reacha logo is on the right side (see picture 1) 2. Guide the bar extension with the holes upwards into the respective straight end of the bars.
- Page 16 Wheel assembly WARNING ! The wheel mounts of the reacha are designed for wheels with a hub width of 100mm, with a minimum diameter of 20 " and a maximum diameter of 26". The width of the tires must not exceed 4.0 ". The tightening torque for mounting must be between 5.0 and 7.5 Nm.
- Page 17 UNPACKING AND INITIAL ASSEMBLY General on quick releases The wheel mount is optimized for use with quick releases. These are already included in the supplied wheels. However, wheels with lock-nuts can also be used. If you want to mount your own wheels, use only those which correspond with the above mentioned specifications.
- Page 18 UNPACKING AND INITIAL ASSEMBLY 1. Open the hand lever (A), hold it firmly with one hand and unscrew the lock-nut (B) counter-clockwise until the hub fits into the recess of the wheel mount. 2. Place the hub in the wheel mount such that it sits firmly in the dropout.
- Page 19 UNPACKING AND INITIAL ASSEMBLY Trunk assembly 1. Open the Velcro of a sidewall and fold the two ends over the inner tube of the wheel mount Position the Velcro strips on above the other and lock them by pressing them together. Follow the same procedure on the other side.
- Page 20 UNPACKING AND INITIAL ASSEMBLY CAUTION ! In case of heavily punctured load of the trunk bottom, the plastic plate inserted in it should ideally be replaced by a wooden board with the following dimensions: 51.5 cm in length, 38.5 cm in width and 6-10 mm in height.
- Page 21 WARNING ! The mainframe of the reacha has a maximum inner width of 780 cm and outer width of 1075 cm. This setting is reached when 6 holes are visible per bar. Never set the mainframe wider than this setting, otherwise the mainframe will not be sufficiently stable.
- Page 22 UNPACKING AND INITIAL ASSEMBLY 1. Open all snap locks on the tow bar (A) and (B). 2. Pull the wheel frame evenly at the front and rear of the mainframe's connecting pipes. Make sure that no more than 6 holes are visible. Otherwise, sufficient stability is not guaranteed.
-
Page 23: Transport And Storage
TRANSPORT AND STORAGE TRANSPORT AND STORAGE The reacha can be disassembled for transport and storage. 1. Open the quick releases of the wheels and take them out of the wheel mounts. 2. Set the mainframe back to the middle setting to reduce tension in the spar. - Page 24 TRANSPORT AND STORAGE 1. For this purpose, lay the trunk on the floor. On one side there are Velcro pointing upward, which you will use for closing the transport bag. 2. Place the loose frame components in the trunk. 3. Fold the side of the trunk against the above-described Velcro over the frame parts.
- Page 25 Avoid keeping it in direct sunlight for a long period of time, as this could damage the textile of the trunk. Never leave your reacha in the rain for a long time, as this can damage the textile trunk.
-
Page 26: Accessories
ACCESSORIES ACCESSORIES You must first pre-assemble the two Bow connectors (A) on the mainframe before using the bow (B) for the first time. The steps mentioned on the following pages are required for this purpose. WARNING ! The bow must be assembled properly; otherwise there is a risk of accidents with damage and life-threatening injuries. - Page 27 ACCESSORIES Initial assembly 1. Disassemble the wheel frame on which you want to attach the bow by screwing on the screw connection (C), consisting of a raised countersunk screw and a round nut, each with hexagon socket, and thus loosen the two connections of the tubes. 2.
- Page 28 ACCESSORIES top again and the side with the short one below. The saddle discs are to be positioned between the tubes again. Attaching the bows The wheel frame is now ready for attaching the bows: 1. Open the snap-locks of the bow and put the bow on the bow- connector.
- Page 29 ACCESSORIES Attaching the reacha pro bows The bow of the reacha pro model is based on the standard bow but comes with an additional aluminium plate attached to it. For mounting the bow follow the steps on page 27 (Attaching the bow). In addition, bend the aluminium plate inwards (A) while sliding it onto the second bow-connector (B).
- Page 30 ACCESSORIES Bike Connector Assembly to the reacha 1. The bike connector connects the trolley to a bike and must be first attached to the tow bar extension. The delivery contents include the length-adjustable bike connector (A) with a two-part adapter sleeve (B).
- Page 31 ACCESSORIES 4. Place the second half of the adapter sleeve on the tow bar extension and close the cross connector. 5. Tighten the four screws of the cross connector only as much that it can still be turned. 6. Now turn the bike connector forward by approx. 180°. 7.
- Page 32 Always remove the bike connector from the bike when you take off your bike. Otherwise, the bike connector gets twisted and may get damaged. Please also note the general information regarding the use of reacha in road traffic on pages 5 ff. of this instruction.
-
Page 33: Road Traffic Licensing Regulations
ROAD TRAFFIC LICENSING REGULATIONS ROAD TRAFFIC LICENSING REGULATIONS While using the reacha as a bike trailer the lighting must follow the road traffic licensing regulations in your respective country. Therefore, a DIN certified reflector set including clamps is delivered together with the bike connector (1). -
Page 34: Maintenance, Care And Disposal
Disposal We hope you will enjoy your reacha for a long time. If you want to put it out of service, be sure to dispose of it properly. If you have any questions,... -
Page 35: Technical Specifications
TECHNISCHE DATEN TECHNICAL SPECIFICATIONS Overall dimensions small 1860 mm x 795 mm (smallest setting with spar and wheels) Overall dimensions Large 2360 mm x 1075 mm (largest setting with spar and wheels) Packing size disassembled 1200 mm x 600 mm x200 mm (L x B x H) Inner dimensions trunk 530 mm x 380 mm x 200 mm... -
Page 36: Guarantee And Warranty
The duration of the legal warranty depends on the respective country-specific regulations. Reacha contains parts or components that are subject to natural wear even in normal use. However, this wear and tear is very much dependent on the individual type and intensity of use and the respective status of maintenance and care. -
Page 37: Imprint
IMPRINT IMPRINT good goods tegernsee UG (limited liability) Flößergasse 6a 81369 Munich Managing director: Florian Zibert Commercial register: Munich HRB 234 658 Contact: hello@reacha.de Status: August 2020... - Page 39 August 2015, when our journey started And now we wish you lots of fun and joy with your reacha! If you have any questions, feedback or suggestions for us, feel free to contact us anytime at hello@reacha.de. Your reacha Team...
Need help?
Do you have a question about the DIY and is the answer not in the manual?
Questions and answers