Table of Contents
Advertisement
Quick Links
Advertisement
Table of Contents

Summary of Contents for HOLDFAST SUN KING Folding Frame Clothesline
- Page 1 Folding Frame Clothesline Double and Single Product Manual...
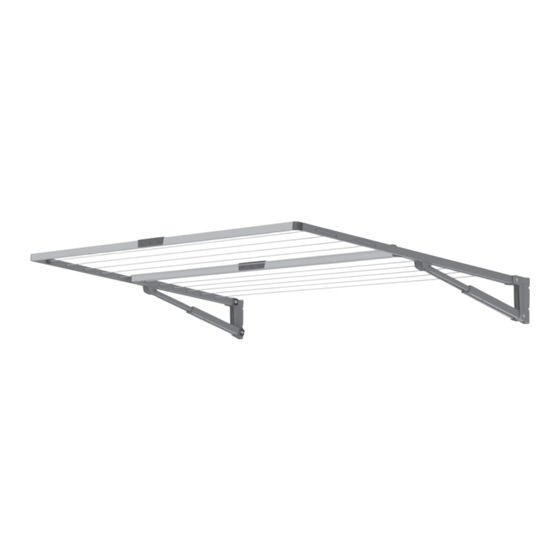
- Page 2 Introduction Congratulations Warning Congratulations on the purchase of your • Do not allow children or pets to swing on Sun King Folding Clothesline, which will the clothesline or items of laundry. bring you many years of trouble-free and • Ensure when raising and lowering your efficient drying.
-
Page 3: Carton Contents
Carton Contents and Installation Carton Contents Check all components are supplied in your carton. Refer to the chart below for quantities. Folding Clothesline Double Single Mount Bracket Arm – LH Arm – RH Arm Inner – LH – Arm Inner – RH –... -
Page 4: Installation
Installation Step 1 – Select a suitable location • Your Folding Clothesline can be mounted to either a wall or post kit (sold separately). • You must check to ensure you have sufficient space in your backyard to install your clothesline. - Page 5 Installation Step 2 – Installing your mount brackets The following instructions are provided for installing your mount brackets to either; • Brick or masonry walls (Step 3) • Stud walls (Step 4) • Post kits (Step 5) Due to the range of wall construction materials available, or if you have any doubt, consult your local hardware store.
- Page 6 Installation Step 3 – Fixing to a brick or masonry wall 3.1 Double check to ensure you have sufficient clearance and the area is free from pipes and other obstructions. 3.2 Mark the position of the mount bracket hole centres on the wall. If you are replacing an existing Sun King Folding Frame product using the original fasteners, ensure they are suitable and still in good condition.
- Page 7 Installation Step 4 – Fixing to a stud wall 4.1 Double check to ensure you have sufficient clearance and the area is free from pipes and other obstructions. 4.2 Locate the vertical studs in your wall. 4.3 Determine if you need to adjust your product width. You may need to reduce the width of your Folding Clothesline to match existing stud centres, (refer to step 7 on page 11 for details).
- Page 8 Installation Step 5 – Fixing to a post kit Post kits for Folding Clotheslines are available as optional accessories. 5.1 Install and assemble the post kit as per the separate instructions provided with the kit. 5.2 Install the mount brackets as shown. Refer Fig. 6. Fig.
- Page 9 Assembly Step 6 – Assemble the spreader bars On the Double Folding Clothesline ensure the spreader bars match (Fig 11). 6.1 Dis-assemble the spreader handle from the spreader joiner using the hex key 4mm. Refer Fig. 7. 6.2 Insert the spreader joiner into the spreader bar and then fasten with the spreader handle as shown.
- Page 10 Assembly Step 6 – Continued 6.6 Assemble the second spreader bar and secure the fastener. Again, you may need to tap the end gently with a hammer, as it’s designed to be a ‘tight’ fit. Refer Fig. 10. Fig. 10 Ensure fastener hole is in correct orientation Double Folding Clothesline...
- Page 11 Assembly Step 7 – Adjusting the width of your Folding Clothesline 7.1 Your Folding Clothesline width can be reduced to suit your specific installation needs or to align with existing stud centres. The standard mount hole centres for your Folding Clothesline model are shown in the table on page 5.
- Page 12 Assembly Step 8 – Fit arms to mount brackets 8.1 Attach the arms to the top of the mount brackets as shown, using the fasteners and 5mm Hex key provided. Refer to Fig. 13 and Fig. 14. Ensure head of bolt is on outside of arm. End of bolt must go through to at least the outside of the nut when tightened.
- Page 13 Assembly Step 9 – Assemble corners into spreader bar 9.1 Remove corner caps by gently levering with a screwdriver. Refer Fig. 15. 9.2 Insert and secure the corners into both ends of the spreader bar, using Hex key 5mm (ensure bolts are firmly tightened). Refer Fig. 16. Fig.
- Page 14 Assembly Step 10 – Assemble spreader bar to arms Fig. 17 10.1 Lift and rotate each arm up until the strut clicks once to indicate it has engaged, then lower ‘click’ gently to the ‘horizontal’ position. Refer Fig. 17. 10.2 Insert the spreader bar and corners into the arm ends and secure using hex key 5mm.
- Page 15 Line Assembly Step 11 – Attaching the line Each Folding Clothesline product has individual line configurations and threading patterns, as shown. Refer Fig. 20. Each line is fastened to a line tie-off, then threaded through the arms and tensioned/fastened to the other line tie-off. Fig.
- Page 16 Line Assembly Step 11 – Continued 11.1 Insert the PVC line into the slot of the 11.2 Loop the line around the groove in the line tie-o saddle. Pull through line tie-o saddle. Pull tight to prevent the 12.2 Insert the line into the slot of the line tie o 15cm+ of excess line for tensioning.
-
Page 17: Operation
Operation Step 12 – Using your Folding Clothesline 12.1 To lower the clothesline (Fig. 21) A Loosely grip the spreader bar handle. B Raise the frame until you hear both struts ‘click’ once to indicate they have disengaged. C Now lower the frame gently to its folded position. 12.2 To raise the clothesline (Fig. -
Page 18: Care And Maintenance
Care and Maintenance Care and Maintenance Sun King Handy Hints Regularly inspect all components and check Place smaller items of clothing on the lines for wear and tear or damage. Ensure fasteners nearest to the wall or posts and work your are secure. -
Page 19: Warranty
In the event of a claim, you must take the For goods purchased within New Zealand, this product with proof of purchase and an warranty is provided by Holdfast NZ Limited , explanation of the fault to the place of 14 Avalon Drive, Nawton, Hamilton. Phone purchase or contact Holdfast NZ Limited and 0800 70 10 80. - Page 20 Contacts Holdfast Contacts HOLDFAST NZ LTD 14 Avalon Drive, SH 1, Nawton 3200 PO Box 4206, Hamilton East 3247 Hamilton, New Zealand Ph: (07) 847 5540, Fax (07) 847 0324 Free Phone: 0800 70 10 80 Email: sales@holdfast.co.nz www.holdfast.co.nz Holdfast NZ LTD...
Need help?
Do you have a question about the SUN KING Folding Frame Clothesline and is the answer not in the manual?
Questions and answers