Table of Contents
Advertisement
Quick Links
Advertisement
Table of Contents

Summary of Contents for Alcatel-Lucent Enterprise OpenTouch 8254 DECT Handset
- Page 1 8254 DECT Handset OpenTouch™ Suite for MLE User Manual 8AL90387ENAAed01 – 06/2020...
- Page 2 (see chapter: Using the telephone in GAP mode). Operating conditions This approved DECT telephone is intended to be used with an Alcatel-Lucent Enterprise cordless PABX. The following conditions must be respected, notably concerning the use of radioelectric frequencies: • Changes or modifications to the equipment not expressly approved by the party responsible for compliance could void the user's authority to operate the equipment.
-
Page 3: Table Of Contents
Getting to know your telephone Getting to know your telephone Phone description Status icons MENU icons Call icons Accessing the MENU and navigating Getting started Unboxing Installing the battery in the telephone Charging your telephone battery 2.3.1 Charging the battery on a single charger 2.3.2 Charging the battery on a dual charger 2.3.3... - Page 4 Getting to know your telephone Programming your telephone Identify the terminal you are on Initializing your voice mailbox Change your voice mailbox password Adjusting the audio functions 5.4.1 Choose the tune 5.4.2 Adjusting the ringer volume 5.4.3 Adjust the buzzer/ringer mode according to your needs 5.4.4 Switching rapidly from ring mode to vibrate mode and vice-versa Activating headset mode...
- Page 5 Getting to know your telephone 8.14.3 Deleting a contact 8.15 Speed dial management 8.15.1 Add a contact to a speed-dial key 8.15.2 Delete programmed speed dial keys 8.16 Customizing and adjusting your telephone 8.16.1 Choosing your melody 8.16.2 Adjusting the ringer volume 8.16.3 Selecting language 8.16.4...
-
Page 6: Phone Description
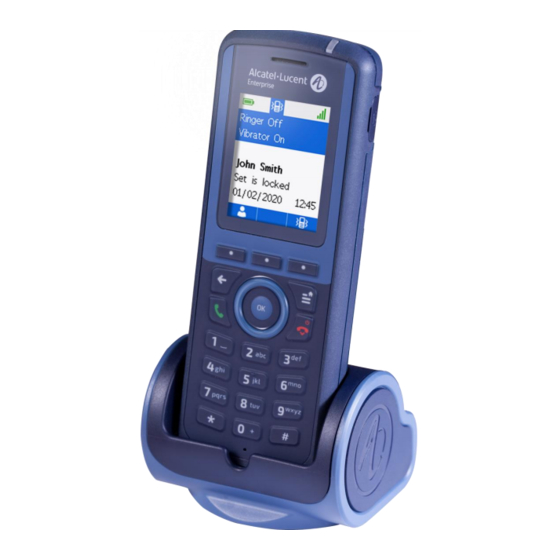
Getting to know your telephone 1 Getting to know your telephone 1.1 Phone description • Make a call. • Answer the call. • Long press (feature depending on the system): redial last number or access the redial list. • Switching between two calls (Broker call). •... - Page 7 Getting to know your telephone Fixed softkeys. The following icons are displayed depending on the status of the handset. Select the corresponding softkey to access the feature. • Short press: access the company directory (access the dial by name feature). •...
-
Page 8: Status Icons
Getting to know your telephone 1.2 Status icons The status icons are displayed on the welcome screen and indicate the status of the telephone. Battery charge level ( > > > In charge (Flashing icon). New event(s) - callback request, voice mail, text mail, missed call. Call diversion activated. -
Page 9: Menu Icons
Getting to know your telephone 1.3 MENU icons The MENU is accessible from the welcome screen by pressing the Menu key. It provides access to all the functions available on your system. All icons are described in their unselected → state. -
Page 10: Call Icons
Getting to know your telephone 1.4 Call icons Making a call. The example is given for the first call (line 1). Receiving a call. The example is given for the first call (line 1). Call on hold. The example is given for the first call (line 1). When you make a second call, your first contact is put on hold. -
Page 11: Accessing The Menu And Navigating
Getting to know your telephone 1.5 Accessing the MENU and navigating The screen descriptions are given as examples and are not exact representations of what can be displayed on your handset. Access the menu. Press the Access menu key (short press). -
Page 12: Getting Started
Getting started 2 Getting started In order to have a fully operational 8254 DECT handset, make sure that you have the following items with your handset: the battery, the AC/DC adapter, and the power supply. 2.1 Unboxing • The 8254 DECT Handset with the The safety and regulatory fixed belt clip. -
Page 13: Charging Your Telephone Battery
Getting started Inserting the battery: • Position the battery 'connectors ' side as shown in the drawing (A). • Terminate the installation of the battery in its compartment by pressing as shown in the drawing (B). Replace the cover. Make sure that the lock is correctly positioned. 2.3 Charging your telephone battery The charger is sold separately. -
Page 14: Charging The Battery On A Dual Charger
Getting started 2.3.2 Charging the battery on a dual charger Place the handset into the Dual Charger front slot facing you. If you have a spare battery, you can charge it at the same time. Place the spare battery pack in the back slot, charging contacts down. Push the spare battery forward and downward under the clip to keep it on charge (A). -
Page 15: Switching On Your Telephone
Getting started 2.4 Switching on your telephone • Press the switch on/off key (Long press). • Your telephone is switched on. If the display fails to light up or the battery icon is flashing, recharge the battery. If the radio reception icon doesn't appear on the telephone display: •... -
Page 16: Using Your Telephone
Using your telephone 3 Using your telephone 3.1 Identify the terminal you are on • Displays your telephone number (Long press). • Access MENU. • Services • Displays your telephone number. 3.2 Messaging portal The messaging portal allows you to access and manage features such as voice messages, text messaging, or missed calls. - Page 17 Using your telephone Accessing the features of the messaging portal • Use the left/right navigation keys to select the desired tab. • Call log: Consulting external missed calls. Enter your password if required (Depending on the system configuration and your preferences).
-
Page 18: Call Log
Using your telephone 3.3 Call log • Access MENU. • Call log • < Incoming calls. • > Outgoing calls. 3.4 Making a call • Dial. p r s t uv • Send the call. → Call. You can use the 'OK' key to make the call: To make an external call, dial the outside line access code before dialing your contact number. -
Page 19: Calling Your Caller By Name (Company Directory)
Using your telephone 3.6 Calling your caller by name (company directory) Quick access: • Access MENU. • Contacts short press • Phone Book • Enter the first letters of the name, name-first name or the initials of your caller. p r s t uv •... -
Page 20: Redialing
Using your telephone 3.8 Redialing Call back one of the last numbers dialed. Quick access: • Access MENU. • Long press Dialed • Select the number in the list. • Display information about the selected contact (number, date of the last call). •... -
Page 21: Sending Text Message If Internal Number Is Busy
Using your telephone • Access to callback requests. • Names of the contacts who leave a callback request are listed. • Select a contact. • Delete: delete the callback request. • Call back: call back the contact. • Back: to return to the home page. The message icon disappears once all new events have been consulted. -
Page 22: Send A Voice Message Copy
Using your telephone • Select the type of message to send (Fixed Messages, Prg Messages, New Message). • Follow information displayed on the screen. If selected message has to be completed: • Confirm access to the message to be completed. •... -
Page 23: Consulting Your Voice Mailbox
Using your telephone 3.16 Consulting your voice mailbox When you have received a message, the message icon is displayed on the welcome screen. The orange LED on your telephone flashes to indicate there is a message. • Select the message icon in the notification area. •... -
Page 24: Forwarding Calls To Another Number (Immediate Forward)
Using your telephone • Confirm access to 'Options'. • From the options menu, you can erase the message, callback the message sender, answer the message or read the next message. The message icon disappears once the message has been read. 3.18 Forwarding calls to another number (immediate forward) The number can be your home, mobile, voice mailbox or an internal extension (operator, etc.). -
Page 25: Example Of Diversion On Busy
Using your telephone 3.19.2 Example of diversion on busy • Access MENU. • Forward • Confirm access to immediate diversion. • Select the 'List of diversions' icon. • Confirm. • Fwd on Busy • Dial the number of your contact (dial, directories, last numbers dialed...). p r s t uv •... -
Page 26: Program Your Associate Number
Using your telephone 3.22 Program your associate number The associated number can be a phone set number, the voice mail number or the pager number. It can be used as overflow number. • Access MENU. • Services • Use the left-right navigation keys to select the feature. •... -
Page 27: Cancelling All Forwards
Using your telephone 3.24 Cancelling all forwards • Access MENU. • Forward • Select the 'Diversion cancellation' icon. • Deact Forward • Confirm. 3.25 Answering the general bell When the operator is absent, incoming external calls are diverted to a general bell. You can answer these calls: •... -
Page 28: Hunting Groups
Using your telephone If the telephone ringing is not in your pick-up group: • Pick Up • Dial a Number • Enter number of ringing telephone. p r s t uv • Apply. If the telephone ringing is in your own pick-up group: •... -
Page 29: During A Conversation
During a conversation 4 During a conversation During a call and without losing the connection, there are several ways to access the options offered by your system, using: • The list of icons at the top of the screen (use the left-right navigation keys). •... -
Page 30: Receiving A Second Call
During a conversation 4.2 Receiving a second call You are in conversation and a caller is trying to contact you: A beep is sent and the caller's name is displayed for 3 seconds. • Answer the call. • The first call is on hold. Over 3 seconds, move with the navigate-left-right key to the receiving a second call icon, to see the identity of the second caller (and off-hook if necessary): 4.3 Switching between two calls (Broker call) -
Page 31: Three-Way Conference With Internal And/Or External Contacts (Conference)
During a conversation 4.5 Three-way conference with internal and/or external contacts (conference) During a conversation, a second call is on hold: • Conference • You are in conference mode. Cancel conference and return to first contact (If conference is active): •... -
Page 32: Activate/Deactivate Voice Frequency
During a conversation 4.7 Activate/deactivate voice frequency This feature depends on the system configuration. If necessary, contact your administrator. During a call, you sometimes have to send DTMF signals, for example, for a voice message service, an automatic switchboard or when remotely consulting an answering machine: •... -
Page 33: Programming Your Telephone
Programming your telephone 5 Programming your telephone 5.1 Identify the terminal you are on • Displays your telephone number (long press). 5.2 Initializing your voice mailbox Before starting initialization, make sure the administrator has created a voice mailbox. • You can use the Message icon on the welcome screen to initialize your voice mailbox. •... -
Page 34: Change Your Voice Mailbox Password
Programming your telephone 5.3 Change your voice mailbox password • Access MENU. • Services • Password • Enter the old password. • Enter the new password. p r s t uv • Enter new password again to confirm. • Apply. Please contact your administrator for your initial voice mailbox password. -
Page 35: Adjust The Buzzer/Ringer Mode According To Your Needs
Programming your telephone 5.4.3 Adjust the buzzer/ringer mode according to your needs • Press on the ringer/vibrate key. • Off: ringer and buzzer are deactivated. • Ring only: rings only. • Vibrate then ring: the handset vibrates and then rings. •... -
Page 36: Adjusting Your Telephone Functions
Programming your telephone 5.6 Adjusting your telephone functions • Access MENU. • Settings • Select the function* you want and use the On/Off softkeys to activate or deactivate the function. • Select the function* you want and press the OK key to enter the function menu to configure the function. -
Page 37: Adjusting Keypad
• Select System: selecting your telephone system. Your telephone can be programmed to function on 4 different DECT systems (Alcatel-Lucent Enterprise or GAP). To let the phone choose the best system, select: Auto. select. -
Page 38: Programming Your Personal Directory
Programming your telephone 5.8 Programming your personal directory Your personal directory can contain up to 42 numbers. • Access MENU. • Contacts • Personal Dir • Use one of the following: o If the personal directory is empty, select the 'OK' key to create a new contact. o If the personal directory is not empty, select an existing record ('OK' key). -
Page 39: Erase A Record From The Personal Directory
Programming your telephone 5.10 Erase a record from the personal directory • Access MENU. • Contacts • Personal Dir • Select the record to erase. • Apply. • Delete • Confirm. 5.11 Programming an appointment reminder • Access MENU. • Alarms •... -
Page 40: Locking Your Telephone
Programming your telephone To cancel your appointment call-back request: • Access MENU. • Alarms • Cancel an appointment • Apply. 5.12 Locking your telephone Locking features on your terminal (System lock) This service enables you to prohibit outside calls and any programming changes on your telephone: •... -
Page 41: Modifying Your Personal Code
Programming your telephone 5.13 Modifying your personal code • Access MENU. • Services • Password • Enter the old password (Please refer to the administrator for your password). p r s t uv • Enter the new password (Twice). p r s t uv •... -
Page 42: Alarm Notification Call
Alarm notification call 6 Alarm notification call Your phone is able to receive a notification call sent by an alarm server. Notification calls have the highest priority over any other calls. This is very useful for urgent calls, such as a patient who is trying to reach medical staff, for example. -
Page 43: Configure The Forced Ring Of Incoming Notification Call
Alarm notification call • Alarm Ringing mode Select ringing mode (off, beep, vibrate, and/or ring). “Off”: Use the current handset settings (default value). • Normal alarm / Urgent alarm / Very urgent alarm Select the ring to associate to the normal, urgent, or very urgent alarm (choice 1 to 4). •... -
Page 44: Reset All Alarm Parameters
Alarm notification call • • Enter the new password. p r s t uv • • Confirm the new password. p r s t uv • 6.6 Reset all alarm parameters This feature allows resetting of all alarm parameters to default factory settings. •... -
Page 45: Registering The Telephone
7.1 Registering the telephone on a system for the first time For the mobile telephone to function, it must be registered on at least one Alcatel-Lucent Enterprise or GAP system (registration operation). Your telephone has not yet been registered on any system if, when... -
Page 46: Registering The Telephone On Other Systems
The telephone can be registered on several systems (maximum of 4). Note: the input is usually reserved for use with your main Alcatel-Lucent Enterprise system. You can select the other inputs to register the telephone under another system (Alcatel-Lucent Enterprise or other system). -
Page 47: Selecting Your Telephone System
During registration phase in a multi-system environment, all systems are scanned without priority. The system is selected when the signal strength is above a certain level and registration matches. 7.3 Selecting your telephone system Your telephone can be programmed to function on 4 different DECT systems (Alcatel-Lucent Enterprise or GAP). •... -
Page 48: Deregister
Registering the telephone 7.5 Deregister • Access MENU. • Install • Enter the PIN Code. • p r s t uv Apply (Ok). • Deregister • Select the network. • Delete registrat.? • (No: to cancel). • Apply (Ok). 7.6 Power mode You are advised not to select the 50 mW power mode unless required. -
Page 49: Using The Telephone In Gap Mode
Using the telephone in GAP mode 8 Using the telephone in GAP mode Your telephone complies with the GAP standard and can be used in simplified mode on another DECT/GAP system (other PABX or indoor relay unit). This chapter describes the features when connected to a compatible GAP system. -
Page 50: Phone Description
Using the telephone in GAP mode 8.1 Phone description • Make a call. • Answer the call. • Long press (feature depending on the system): redial last number or access the redial list. • Switching between two calls (Broker call). •... - Page 51 Using the telephone in GAP mode Fixed softkeys. The following icons are displayed depending on the status of the handset. Select the corresponding softkey to access the feature. • In idle mode or in communication mode: access to the personal or company directory.
-
Page 52: Status Icons
Using the telephone in GAP mode 8.2 Status icons The status icons are displayed on the welcome screen and indicate the status of the telephone. Battery charge level ( > > > In charge (flashing icon). New event(s) - callback request, voice mail, text mail, missed call. Missed calls. -
Page 53: Menu Icons
Using the telephone in GAP mode 8.3 MENU icons The MENU is accessible from the welcome screen by pressing the Menu key (short press). It provides access to all the functions available on your system. All icons are described in their unselected →... -
Page 54: Accessing The Menu And Navigating
Using the telephone in GAP mode 8.4 Accessing the MENU and navigating The screen descriptions are given as examples and are not exact representations of what can be displayed on your handset. Access the menu. Press the Access menu key. Select a function in the MENU. -
Page 55: Making A Call
Using the telephone in GAP mode 8.5 Making a call • Dial. p r s t uv • Send the call. You are in communication. • Hang up. 8.6 Receiving a call You are receiving a call. • Use one of the following: o Answer the call by selecting the 'answer' key. -
Page 56: Calling Your Caller By Name (Company Directory)
Using the telephone in GAP mode 8.8 Calling your caller by name (company directory) Quick access: • Access MENU. • Contacts • Central directory • Enter the first letters of the name, name-first name or the initials of your caller. p r s t uv •... -
Page 57: Manage The Call Log
Using the telephone in GAP mode 8.11.1 Manage the call log • Select an entry. • Call Call the contact. • View Display the log details. • More or 'OK' key Save contact If the contact is not in your local directory, you can save them as a new local contact. -
Page 58: Add New Contact
Using the telephone in GAP mode 8.14.1 Add new contact • More • Add contact • Apply (press the OK key or softkey: Select). • Name: To edit the text, use the OK key or the following softkey: Edit. • Enter the name of your contact (up to 24 characters) p r s t uv •... -
Page 59: Deleting A Contact
Using the telephone in GAP mode • Save • (No: to cancel). • Return to idle. To key in the name: the keys in the keypad include letters that you can display by pressing them successively (example: press '8' twice to display the letter 'U'.) Press and hold the # key to switch from lowercase to uppercase mode, and from uppercase mode to numbering mode (abc →... -
Page 60: Delete Programmed Speed Dial Keys
Using the telephone in GAP mode 8.15.2 Delete programmed speed dial keys • Access to the personal speed dial (long press) • Select the speed-dial key to delete. • Delete • Return to idle. 8.16 Customizing and adjusting your telephone 8.16.1 Choosing your melody •... -
Page 61: Other Features
Using the telephone in GAP mode 8.16.4 Other features • Access MENU. • Ring • Vibrate/Ring: you can adjust the buzzer/ringer mode according to your needs. • Ascending ringing: activate or deactivate the ascending ringtone (Progressive ringing) / Off). • sound: define the keypad tone (off, click or tone). - Page 62 (Normal, Any key, On earpiece, On handsfree). • Select System: Selecting your telephone system. Your telephone can be programmed to function on 4 different DECT systems (Alcatel-Lucent Enterprise or GAP). To let the phone choose the best system, select: Auto. select. •...
-
Page 63: List Of Accessories
List of accessories 9 List of accessories 9.1 Belt clip When you purchase your phone, it is equipped with a belt clip on the back. You can remove this belt clip and replace it with a specific cover. The cover is not provided with the handset. -
Page 64: Vertical Pouch
List of accessories 9.5 Vertical pouch Your phone can also be carried in a protective case with swivel clip. It is recommended to use the protective case if your telephone is to be used in an industrial environment (presence of dust, filings, vapors of diverse origins or its at the risk of being dropped). -
Page 65: How To Dock Your Phone On The Desk Support
List of accessories 9.6.1 How to dock your phone on the desk support Put your phone on its support. Plug the USB cable into a 5V socket (AC/DC adaptor, computer, …). The AC/DC adaptor is not provided with the set. Please contact your provider for a recommended AC/DC adaptator. -
Page 66: Initial Charge
List of accessories 9.8.2 Initial charge Place the telephone in the charging holder. The battery is charging. The battery is charged. Maximum battery performance is only reached after around 10 charge/discharge cycles. These batteries contain polluting substances: do not dispose of them in a dustbin - take them to a specialized collection point. -
Page 67: Headphone / External Microphone
D Audio (left) 9.10 Cleaning and disinfecting your telephone This chapter provides guidelines for cleaning or disinfecting Alcatel-Lucent Enterprise terminals to protect products and optimize performance. The final result will depend on each user’s personal procedures, for which ALE cannot be held responsible. -
Page 68: Ordering Information
Ordering information 10 Ordering information This list is not exhaustive and may change at any moment. 8254 DECT Handset 3BN67370AA 82x4 DECT Handset desktop charger 3BN67371AA 82x4 DECT Handset dual desktop charger 3BN67372AA 82x4 DECT Handset belt clip 3BN67374AA 82x4 DECT Handset swivel clip 3BN67375AA 82x4 DECT Handset belt clip cover (box of 10) 3BN67376AA... -
Page 69: Declaration Of Compliance
Declaration of compliance 11 Declaration of compliance This equipment uses DECT frequency range that depends on country: 1880 - 1900 Mhz in Europe, 1920 - 1930 MHz in US/Canada, 1910 - 1930 MHz in LATAM, 1910 - 1920 MHz in Brazil. The equivalent isotropically radiated power at the antenna is less than 110 mW or 250 mW (it depends on the country). -
Page 70: Quick Guide
• Long press (features depending on the system): access to personal speed dial / access the DTMF feature during a conversation. • Green steady: the phone is on the charger and the battery is fully charged. • Red steady: the phone is on the charger and the battery is charging. •... - Page 71 Status icons Alarms: Calling from your personal directory (PersSpDial). The status icons are displayed on the welcome screen and Programming an appointment reminder. Calling your caller by name (company directory). indicate the status of the telephone. Call log: Programming your personal directory (PersSpDial).
- Page 72 • When you are on a call, you can initiate a second call. • Used to retrieve the first caller when you are speaking to the second caller. • Green steady: the phone is on the charger and the battery is fully charged.
- Page 73 Features Status icons MENU icons Access the messaging portal. Access MENU. It provides access to all the functions The status icons are displayed on the welcome screen and Consult and send voice and text messages. available on your system. indicate the status of the telephone. Answered incoming calls.
Need help?
Do you have a question about the OpenTouch 8254 DECT Handset and is the answer not in the manual?
Questions and answers