Table of Contents
Advertisement
PRINTER'S INSTRUCTIONS: INSTRUCTIONS, USER GUIDE, 2GIG-STZ-1 - P/N: 10028238 Rev-C
INK: BLACK; PANTONE 3005 C - MATERIAL: 60 LB. MEAD BOND - SIZE: 8.500" X 5.500" - TOL. +/- 0.125"- SCALE: 1-1 - FOLDING: ALBUM FOLD: BINDING: SADDLE STITCH
2GIG ® Security & Automation System
2GIG Z-Wave Plus™ Battery Powered Thermostat
User Guide
Advertisement
Table of Contents

Related Manuals for Nortek Security & Control 2GIG Z-Wave Plus 2GIG-STZ-1

Summary of Contents for Nortek Security & Control 2GIG Z-Wave Plus 2GIG-STZ-1
- Page 1 PRINTER’S INSTRUCTIONS: INSTRUCTIONS, USER GUIDE, 2GIG-STZ-1 - P/N: 10028238 Rev-C INK: BLACK; PANTONE 3005 C - MATERIAL: 60 LB. MEAD BOND - SIZE: 8.500” X 5.500” - TOL. +/- 0.125”- SCALE: 1-1 - FOLDING: ALBUM FOLD: BINDING: SADDLE STITCH 2GIG ® Security & Automation System 2GIG Z-Wave Plus™...
-
Page 2: Table Of Contents
Table of Contents Typical Wiring for Standard Gas/Electric HVAC System . . . . . . . . . . . . . . . . . . . . . . . . . . . . . . . . . . . . 2 2GIG-STZ-1 Typical Wiring for Heat Pump HVAC System . -
Page 3: Typical Wiring For Standard Gas/Electric Hvac System
Typical Wiring for Standard Gas/Electric HVAC System Typical Wiring for Heat Pump HVAC System STANDARD HVAC SYSTEM HEAT PUMP HVAC SYSTEM TYPICAL THERMOSTAT WIRING COLORS. TYPICAL THERMOSTAT WIRING COLORS. CAUTION: VERIFY THAT ORIGINAL WIRING CAUTION: VERIFY THAT ORIGINAL WIRING THERMOSTAT CONNECTION THERMOSTAT CONNECTION MATCHES. -
Page 4: Thermostat Power
Remove Existing Thermostat Thermostat Power • Turn the thermostat power off. This is usually done at the heating/cooling system or circuit The thermostat can be powered by either 24VAC from the HVAC system or from four (4) type AA internal batteries. DO NOT use this thermostat for line voltage controls (120/240VAC). breaker panel. -
Page 5: Install The Back Panel
Install the Back Panel Standard HVAC System Connections Remove the back panel of the thermostat by gripping and pulling to separate the Back Panel. Note: For typical connections to a Standard HVAC system, refer to the diagram on page 2. Figure 3. -
Page 6: Dual Transformer Systems
Heat Pump HVAC System Connections Dual Transformer Systems For HVAC systems that have separate heating and cooling systems with their own 24VAC transformers, Note: For typical connections to a Heat Pump HVAC system, refer to the diagram on page 3. there is an “R”... -
Page 7: Mount The Thermostat
Mount the Thermostat Thermostat Setup Menus Install the thermostat body/front panel onto the wall mounted base by firmly pressing in place until The thermostat must be set up for the correct HVAC system type for proper operation. it snaps all around the edges. The thermostat is now ready to program. Preset HVAC System settings Figure 11. -
Page 8: Entering Menu Mode
Entering Menu Mode Touch and hold MODE to access the menu options. To select options: To change the System setup, you'll need to go to the thermostat's Menu Mode and select SYSTEM. • Use the buttons to scroll to the desired setting. •... -
Page 9: Z-Wave Setup
Z-Wave Setup Removing from a Z-Wave Network This section details steps to include the thermostat into Z-Wave network after installation and initial To remove the thermostat from the network, use the following steps. setup have been completed. 1. Set your primary controller to exclude or remove mode to remove the thermostat as a node on Note: Before adding the thermostat to a Z-Wave Network, check to make sure it does not already your network (see your controller’s user manual for detailed instructions). -
Page 10: Clock Menu
Clock Menu Advanced System Settings Menu Use the clock menu to set thermostat’s internal clock. The Advanced System Settings Menu provides for addition system setup options. These settings can affect system operation and should only be changed by qualified HVAC installers. Figure 17. -
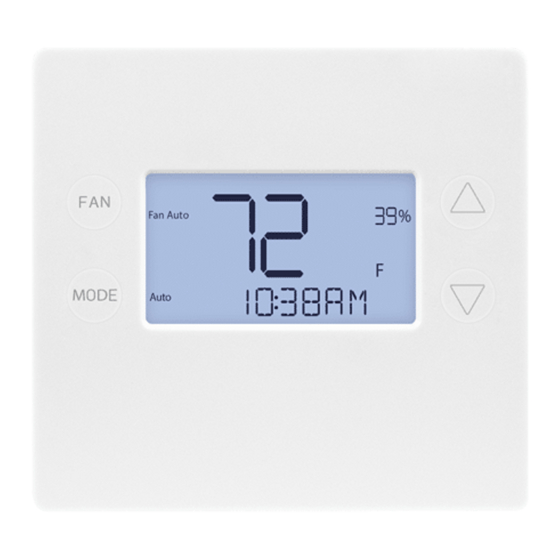
Page 11: Thermostat Operation
Thermostat Operation Advanced System Settings Menu (Continued) Main Thermostat Screen Figure 18. Main Screen Feature Description Range REL. HUMIDITY Delta from Set point that stage 2 heating off FAHRENHEIT OR CELSIUS ROOM TEMPERATURE 32 - 46°F TEMPERATURE SETPOINT Heat Stage 2 off (This will be Aux Stage off Threshold, if Aux Heat Threshold Enable &... -
Page 12: Setting The System Mode
Setting the System Mode Setting the Heating or Cooling Temperature Setpoint To change the setpoint, touch the buttons. The screen will switch to the setpoint change Figure 20. Setting the System Mode screen, and show the current setpoint of the current heating or cooling mode. Adjust the setpoint temperature up or down with the ... -
Page 13: Setting The Fan Mode
Setting the Fan Mode User Customization Figure 23. Fan Setting Figure 24. Selecting Menu Mode Select TOUCH TO CHOOSE TO SELECT THE Fan Auto FAN ON OR FAN AUTO MENU MODE, TOUCH AND HOLD THE MODE S E T U P Done BUTTON UNTIL THE SETUP SCREEN IS... -
Page 14: Error Display
Specifications Error Display If any error occurs (hardware, software, Z-Wave, improper use), the thermostat would display the Programmable thermostat for: Error Screen. While in Error Screen, no operation can be performed and all relays will be turn off. Type 24VAC 3H/2C non-heat pump or 24VAC 3H/2C heat pump systems After the issue has been resolved, the thermostat will return to Main Screen. -
Page 15: Z-Wave Information
Z-Wave Information Supported Command Classes and Security • This thermostat can be operated in any Z-Wave network with other Z-Wave certified devices All supported command classes are available in S0, S2 unauthenticated and S2 authenticated from other manufacturers. All non-battery operated devices within the network will act as security class. -
Page 16: Regulatory Information
Limited Warranty Regulatory Information What is Covered? FCC ID: EF400203 Nortek Security & Control (“NSC”) warrants to consumers who purchase this product for personal, This device complies with Part 15 of the FCC Rules. Operation is subject to the following two family or household purposes new from NSC directly or from an authorized NSC dealer, that the conditions: (1) This device may not cause harmful interference, and (2) This device must accept any product will be free from defects in materials and workmanship for a period of (1) year from the... - Page 17 or dial Copyright © 2020 Nortek Security & Control 10028238 Rev-C...
Need help?
Do you have a question about the 2GIG Z-Wave Plus 2GIG-STZ-1 and is the answer not in the manual?
Questions and answers