Table of Contents
Advertisement
Quick Links
Advertisement
Table of Contents

Related Manuals for Vivitar Freelance VS17G


Summary of Contents for Vivitar Freelance VS17G
-
Page 1: Digital Camera
VS17G / VS18B Digital Camera User‟s Manual © 2009 Sakar International, Inc. All rights reserved. Windows and the Windows logo are registered trademarks of Microsoft Corporation. All other trademarks are the property of their respective companies. Freelance... -
Page 2: Table Of Contents
Table of Contents Introduction ... 2 Key Features ... 2 What your digital camera includes ... 3 Computer System Requirements for Windows XP ... 3 Computer System Requirements for Windows Vista ... 4 Computer System Requirements for Macintosh ... 4 A Quick Look at your Digital Camera... -
Page 3: Introduction
Introduction Thank you for purchasing the VS17G, VS18B Freelance Vivitar Digital Camera. Everything you need to take quality digital photos and videos is included with your device. Please read this manual carefully FIRST in order to get the most out of your digital camera. -
Page 4: What Your Digital Camera Includes
What your digital camera includes Digital Camera Image Zone software Installation CD USB cable Neck strap Warranty card Quick Start Guide Computer System Requirements for Windows XP To be able to download photos and videos to your PC, you will need the following minimum configuration: ... -
Page 5: Computer System Requirements For Windows Vista
Computer System Requirements for Windows Vista To be able to download photos and videos to your PC your will need the following minimum configuration: Windows Vista 800MHz processor and 512 MB of system memory 20GB hard drive with at least 15GB of available space ... -
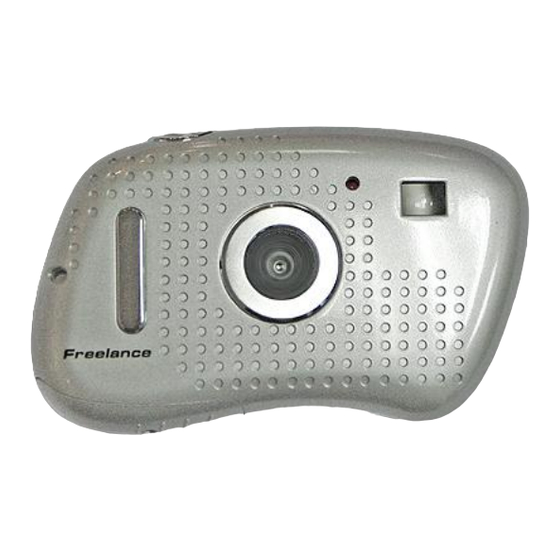
Page 6: A Quick Look At Your Digital Camera
A Quick Look at your Digital Camera... -
Page 7: Inserting Batteries
Inserting Batteries Open the camera‟s battery compartment cover on the bottom of the camera and insert 2 new AAA alkaline batteries according to the polarity shown. Close the cover and press the Power/Menu button to power on the camera. After powered on, if you want to make changes to the camera‟s default settings, please read the instructions of this manual. - Page 8 Below is an explanation for each of the Submenus on the Main Menu. Camera Submenu Take Photo Self-Timer AVI(Video) Continuous Capture...
- Page 9 Press the Power/Menu button to enter the Main Menu. By default the camera icon is automatically selected. Press the Shutter button to toggle through the following various options within the camera submenu. Press the Power/Menu button to select and save the mode of your choice. The LCD screen will show your choice with a symbol in the upper left corner.
- Page 10 Press the Up button until the Resolution Modification icon is selected and then press the Shutter button to toggle between the different resolution options. Press the Power/Menu button again to select and save the desired resolution. Options within the Resolution Modification Submenu are as follows: SXGA (1280x1024) VGA (640x480) QVGA (320x240)
- Page 11 Press the Shutter button to toggle between the different compression rate options. Press the Power/Menu button again to select and save the desired compression. Options within the Compression Rate Submenu are as follows: Non-Compression Mode Compression Mode Frequency (Anti-Flicker) Submenu Press the Power/Menu button to enter the Main Menu.
- Page 12 50Hz 60Hz Note: 60Hz is suitable for the U.S. and Asia, and 50Hz for Europe and Japan. Select the correct frequency for the present conditions you find yourself. Delete All Submenu Press the Power/Menu button to enter the Main Menu. Press the Up button until the Delete All icon is selected.
- Page 13 Battery Capacity Icons An icon will appear on the top right corner of your LCD screen, showing the amount of battery power available. Once the battery indicator falls below 35% it is advisable to download the images to your computer as quickly as possible so as not to lose them.
-
Page 14: Capturing Photos
Capturing Photos TAKING INDIVIDUAL PHOTOS You can compose your shot using the LCD screen. Hold the camera steady and press the shutter button. A beep will sound and the red LED indicator on the front of the camera will light up, indicating that the photo has been taken. Do not move the camera until you hear the beep. - Page 15 CONTINUOUS SHOT Your camera can be set up to take 3 photos in one continuous shot. Select the Continuous shot mode from the camera menu options on the LCD screen. Press the Power/Menu button. Toggle between the camera modes by pressing the Shutter button until the continuous shot icon appears in the top left corner.
- Page 16 Press the Power/Menu button. Toggle between the camera modes by pressing the Shutter button until the Timer icon appears in the top left corner. Press the Power/Menu button to save your choice. When the Timer icon appears in the top left corner you can now prepare your shot.
- Page 17 SLEEP MODE (Automatic Power-Saving) The digital device will go into Sleep Mode automatically after approximately 30 seconds of inactivity. This mode uses low energy consumption in order to prolong the device‟s battery life. To reactivate the device, simply press the Power/Menu button. (Manual Power-Saving) Press and hold the Power/Menu button for 3 seconds.
-
Page 18: Capturing Video
Capturing Video In order to capture Videos with this Camera the camera has to be set to the Video mode. Select the Video mode from the camera menu options on the LCD screen. Press the Power/Menu button. Toggle between the camera modes by pressing the Shutter button until the video icon appears in the top left corner. -
Page 19: Install The Image Zone Software And Camera Driver
Install the Image Zone Software and camera driver Warning: Do not plug your camera into the computer until the Image Zone software installation is complete. Insert the installation CD into your CD-ROM drive. The Image Zone will begin to install. Please review the license terms. -
Page 20: Get Photos And Videos From Your Camera To Your Computer
The first time you connect the device to the computer you will have to wait a few moments until the computer recognizes the device. Get photos and videos from your camera to your computer Do not disconnect the cable during transfer. Doing so will cancel the transfer of any files on their way to your computer. -
Page 21: Get Started
The “Get media from device” window opens. Both photos and videos (if you have captured any) will get downloaded. Select your camera model from the device window. If your camera is the only device connected then it will be selected automatically. Select a location on the computer where to place the new photo and video files. - Page 22 support video, when plugged into your computer. On PC: The webcam driver is installed on your computer when you install the Image Zonefor this device. Open your web conferencing application to activate the video camera option. The LCD screen will turn blue and the webcam icon will appear. Place your camera and begin to use.
-
Page 23: Sakar Warranty Card
Note: Use the Control menu / Video settings option of this web conferencing application to change the settings if needed. If you have a built-in camera on your computer, use the settings option of your web conferencing application to choose this „Dual Mode Camera‟. ... - Page 24 Edison, NJ 08817 TECHNICAL SUPPORT: For technical support issues please visit our website at www.vivitar.com. You can find manuals, software and FAQ‟s at the website. Can‟t find what you are looking for? E-mail us at technical support team members will answer your questions. For phone support in the US please call 1-800-592- 9541, in the UK call 0800 917 4831.
-
Page 25: Technical Specifications
Technical Specifications Image Sensor Image Resolution Focus Image Variation Lens Aperture Illumination File Format File Storage Storage capability Interface Power Supply Operating Systems Frequently Asked Questions Q: I have taken photos, but my computer says "No photos in camera." What do I do? 1.3M Pixels (1280X1024) SXGA 1280x1024, 640x480, 320x240 f=8.3mm... - Page 26 First, ensure that you have taken photos with your camera. Press the shutter button a few times to take some sample photos and try again. If you still get a no photos error, this indicates that the software was not installed correctly or your computer may not meet the minimum system requirements (see the Computer System Requirements section of this manual).