
Subscribe to Our Youtube Channel
Related Manuals for Bosch DFS097K51


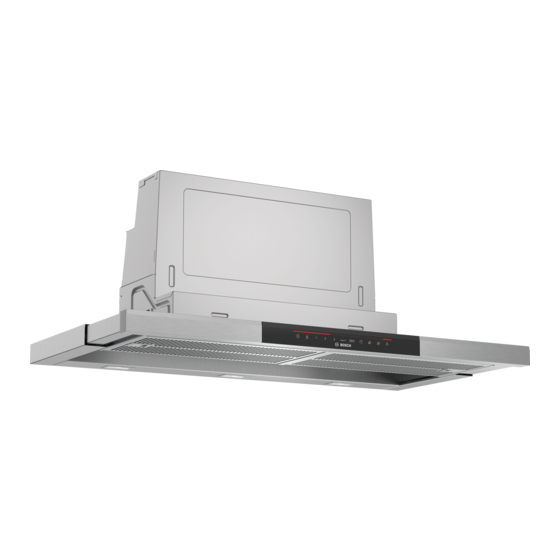
Summary of Contents for Bosch DFS097K51
- Page 1 Extractor hood DFS097K51 DFS067K51 DFS098K54 DFS068K54 [en] User manual and assembly instructions...
-
Page 2: Table Of Contents
en Safety The appliance can only be used safely if it is Table of contents correctly installed according to the safety in- structions. The installer is responsible for en- suring that the appliance works perfectly at its USER MANUAL installation location. Only use this appliance: Safety ................ - Page 3 Safety en into the open through an exhaust gas sys- ▶ Do not install the appliance near a tem (e.g. a chimney). With the extractor solid fuel heating appliance (e.g. wood- hood switched on, air is extracted from or coal-burning) unless the heating ap- the kitchen and the adjacent rooms.
-
Page 4: Avoiding Material Damage
en Avoiding material damage ¡ Changes to the electrical or mechanical ¡ Incorrect repairs are dangerous. assembly are dangerous and may lead to ▶ Repairs to the appliance should only malfunctions. be carried out by trained specialist ▶ Do not make any changes to the elec- staff. -
Page 5: Operating Modes
Operating modes en Information about current disposal methods are If cooking produces large amounts of steam, select a available from your specialist dealer or local author- higher fan speed in good time. ity. The odours are distributed around the room less. Switch the appliance off when you are not using it. -
Page 6: Familiarising Yourself With Your Appliance
en Familiarising yourself with your appliance Familiarising yourself with your appliance Familiarise yourself with the parts of your appliance. Controls The controls are used to configure all functions of your appliance and to obtain information about the operat- ing status. Switching the appliance on or off Switching on intensive mode 2 Switching automatic mode on or off Switching on the fan run-on... -
Page 7: Cleaning And Servicing
Cleaning and servicing en Press and hold and at the same time for Requirements ▶ approx. three seconds until a signal sounds. ¡ After the appliance has been switched off, ap- pears in the display for the grease filter. Sensor control ¡... -
Page 8: Troubleshooting
en Troubleshooting Clean stainless steel surfaces in the direction of ATTENTION! ‒ the finish using a sponge cloth and hot soapy The grease filters may become damaged if they are water. squeezed. Clean painted surfaces using a damp sponge Do not squeeze the grease filters. ▶... -
Page 9: Customer Service
Customer Service en If the power cord of this appliance is damaged, it ▶ must be replaced by the manufacturer, the manufac- turer's Customer Service or a similarly qualified per- son in order to prevent any risk. Malfunctions Fault Cause troubleshooting The appliance is not working. -
Page 10: Disposal
You will find a comprehensive range of products for your appliance in our online shop or from our after- your appliance in our brochures and online: sales service. www.bosch-home.com Disposal Find out here how to dispose of old appliances cor- This appliance is labelled in accord- rectly. - Page 11 Installation instructions en sure. Toxic gases from the flue or the ex- ▶ Observe the specifications for your traction shaft are sucked back into the liv- cooking appliance. If gas and electric ing space. hobs are being operated together, the largest specified clearance applies. ▶...
- Page 12 en Installation instructions ¡ To prevent condensate from returning, fit the ex- ▶ "Call Customer Service." → Page 9 haust air pipe from the appliance with a 1° gradient. ▶ Repairs to the appliance should only Round pipes be carried out by trained specialist Use round pipes with an inner diameter of 150 mm (re- staff.
- Page 13 Installation instructions en ¡ To optimally detect the cooking vapours, install the If the cabinet base is in place, remove it. appliance in the middle of the hob. Remove any shavings. ¡ In order to freely access the appliance for servicing, Use the enclosed mounting part to mark the fasten- select an easy-to-reach installation site.
- Page 14 en Installation instructions Appliance width 90 cm: Pull the filter pull-out out Preparing the appliance completely towards the front. Also use two screws Insert the holders for the wall edging strip on the each on the left and right to screw the appliance to outside rear of the appliance into the cut-outs and the side upper cabinets from below.
- Page 15 Installation instructions en Shorten the spacers to the required dimension and Push in the fastening bolts using a flat-blade screw- insert them into the slot specified. driver and rotate by 90° until the fastening bolts un- clip. Removing the appliance Push in and turn the fastening bolts gently with your Cover the hob to prevent damage.
- Page 16 Expert advice for your Bosch home appliances, help with problems or a repair from Bosch experts. Find out everything about the many ways Bosch can support you: www.bosch-home.com/service Contact data of all countries are listed in the attached service directory.
Need help?
Do you have a question about the DFS097K51 and is the answer not in the manual?
Questions and answers