Table of Contents
Advertisement
Quick Links
Advertisement
Table of Contents

Related Manuals for AudioSonic CDV-77271


Summary of Contents for AudioSonic CDV-77271
- Page 1 2 CH DVD PLAYER MODEL:CDV-77271 PLEASE READ BEFORE OPERATING THIS EQUIPMENT.
-
Page 2: Warnings And Precautions
WARNINGS AND PRECAUTIONS Do not place the unit on top CAUTION of any soft, porous, or sensitive surfaces RISK OF ELECTRIC SHOCK to avoid damaging the surface. Use a DO NOT OPEN protective barrier between the unit and T h e l i g h t n i n g f l a s h w i t h surface to protect the surface. -
Page 3: Important Safety Instructions
IMPORTANT SAFETY INSTRUCTIONS 1. Read these Instructions. 13.Unplug this apparatus during lightning storms or when unused for long periods of 2. Keep these Instructions. time. 3. Heed all warnings. personnel. Servicing is required when 4. Follow all instructions. the apparatus has been damaged in any 5. - Page 4 These limits are designed to provide reasonable protection against harmful interference in a residential installation. This equipment generates, uses, and can radiate radio frequency energy and, if not installed and used in accordance with the instructions, may cause harmful interference to radio communications. However, there is no guarantee that interference will not occur in a particular installation.
-
Page 5: Product Overview
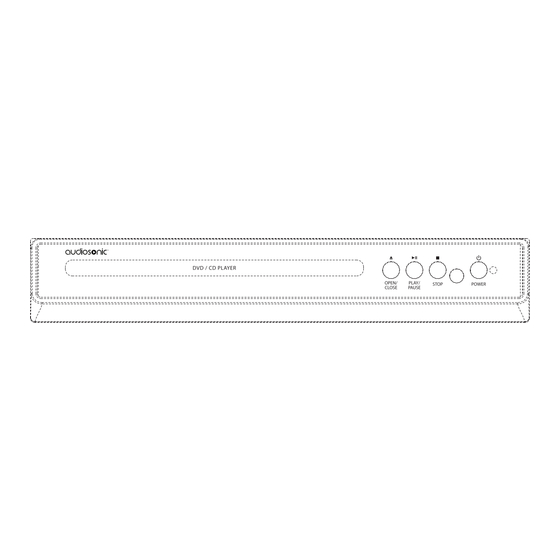
PRODUCT OVERVIEW Front View 3 4 5 6 7 1. Disc tray 5. Remote sensor OPEN/CLOSE button POWER button PLAY/PAUSE button 7. Power indicator STOP button Rear View 9. Video output 8. 2 Channel audio output Connect a composite VIDEO cable to Connect audio cables to a stereo the DVD player’s VIDEO socket to the system equipped with an AUDIO... -
Page 6: Remote Control
REMOTE CONTROL OPEN/CLOSE Button Press to open and close the disc tray. 2. 0-9 Buttons 10+ Button " ", press "10+" button twice and press "5" button to enter. 3. MENU Button Press to display the DVD main menu. ENTER Button PREV / NEXT Buttons F.BWD /... - Page 7 REMOTE CONTROL 17. POWER Button Turn the power on or restore the DVD player to standby mode. 18. VOL +/– Buttons To increase and decrease volume. 19. MUTE Button To mute or restore the sound output. 20. SETUP Button To access or exit the SETUP menu. 21.
-
Page 8: Handling The Batteries
REMOTE CONTROL Unscrew the screw on the battery door. compartment of the remote control. 3. Insert two "AAA" batteries (not included), following the (+) and (-) markings in the battery compartment. Close the battery compartment cover. Handling the Batteries personal injury or damage to property. the same time with new ones. -
Page 9: Making Connections
MAKING CONNECTIONS When connecting any external AV device or TV, do not connect the power cable to the wall outlet until all other connections are completed. Method 1: Connecting to a TV with an AV Cable White Red Yellow Television White AV Cable (included) Yellow... - Page 10 OPERATIONS--DVD PLAYBACK POWER ON THE PLAYER 1) Plug the AC plug into a wall outlet that has AC 110-240V~60/50 Hz. 2) Press the POWER button to turn on the DVD player. LOADING A DISC 1) Press the OPEN/CLOSE button to open the disc tray. Place a disc into the disc tray with the label facing up. * For a double sided disc, load the side which you wish to play facing down.
- Page 11 OPERATIONS--DVD PLAYBACK A-B REPEAT Repeat a section between point A and B within a Title/Chapter/Track. 1) Press the A-B button to choose a starting point (A). 2) Press the A-B button again to set an ending point (B) and complete the setting. The selected section A-B will be repeated.
- Page 12 OPERATIONS--CD PLAYBACK POWER ON THE PLAYER 1) Plug the AC plug into a wall outlet that has AC 110-240V~60/50 Hz. 2) Press the POWER button to turn on the DVD player. LOADING A DISC 1) Press the OPEN/CLOSE button to open the disc tray. Place a disc into the disc tray with the label facing up. * For a double sided disc, load the side which you wish to play facing down.
- Page 13 OPERATIONS--CD PLAYBACK AUDIO Press AUDIO button to switch the audio output. RANDOM During playback, press the RANDOM button repeatedly to turn the random mode On or Off. PROGRAM 1) During CD playback, press the PROG (program) button. The Program menu will appear as the below: EXIT START NEXT...
-
Page 14: Image Rotation
OPERATIONS-- DISC PLAYBACK When a JPEG (Image) disc is inserted into the DVD player,the slideshow will automatically start. Press the STOP button to enter the naivgation menu. - In the menu, use the UP or DOWN navigation buttons to select a file, then press the PLAY/PAUSE button to start the slide show. -
Page 15: System Setup
SYSTEM SETUP SETTING MENUS: NOTE: Preference page can only be opened when no disc is playing. Press the SETUP button and the settings menu will appear on the screen as below. Using the navigation buttons, select and highlight the function you wish to set or reset. Press ENTER to enter and confirm the selection. After setting, press the SETUP button to save the settings and exit. -
Page 16: Preference Setup Page
SYSTEM SETUP VIDEO SETUP PAGE OUTPUT MODE: If the DVD player is connected to the TV through a Video Jack, please set to CVBS. PREFERENCE SETUP PAGE NOTE: Preference page can only be opened when no disc is playing. 1) If TV type is selected, use the navigation and ENTER buttons to set to PAL, AUTO or NTSC. (NOTE: The TV system in the US, Canada and Mexico is NTSC). -
Page 17: Care And Maintainance
CARE AND MAINTAINANCE CARING FOR DISCS: Treat the discs carefully. Always hold the disc by its edges and the hole in the center. Never allow your fingers to come in contact with the shiny, unprinted side of the disc as this could lead to issues with the playback of the disc. - Do not attach adhesive tape, stickers etc. -
Page 18: Troubleshooting Guide
TROUBLESHOOTING GUIDE PROBLEM SOLUTION replacing. No operation can be 16 feet. p e r f o r m e d w i t h t h e remote control. several minutes to drain the microprocessor inside the remote control to reset it. Reinstall batteries and try to operate the remote control again. -
Page 19: Specifications
SPECIFICATIONS Power Source ..........AC 110 -240V~50/60Hz Power Consumption ........Power source of the Remote Control ....DC 3V, 2×AAA size batteries Signal System ..........NTSC / PAL / AUTO Operating Temperature ........+5° to+35°C Operating Humidity Range ......5% to 90% (no condensation) Compatible Discs.......... - Page 20 12 Month Warranty Thank you for your purchase from Kmart. Kmart Australia Ltd warrants your new product to be free from defects in materials and workmanship for the period stated above, from the date of purchase, provided that the product is used in accordance with accompanying recommendations or instructions where provided.
Need help?
Do you have a question about the CDV-77271 and is the answer not in the manual?
Questions and answers