Advertisement
Available languages
Available languages
Quick Links
Advertisement

Related Manuals for Steren STV-036


Summary of Contents for Steren STV-036
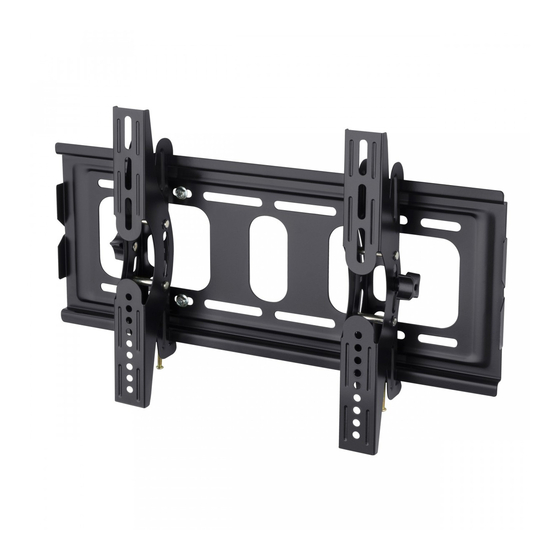
- Page 2 Soporte para pantalla LCD/LED de 25 a 45” . Por favor, revíselo completamente para estar seguro de cómo utilizar apropiadamente el producto. Para apoyo, compras y todo lo nuevo que tiene Steren, visite nuestro sitio web: www.steren.com La información que se muestra en este manual sirve únicamente como referencia sobre el producto.
- Page 3 IMPORTANTE - Durante el montaje, utilice sólo las piezas suministradas y fi je todas las piezas fi rmemente. - No olvide ninguna pieza durante el montaje. Instale todas las piezas tal como se indica. - No altere ni modifi que ninguna pieza. - Hay que tener cuidado especial cuando se instala en una pared a causa de su peso.
- Page 4 CONTENIDO...
-
Page 5: Instalación Del Soporte
INSTALACIÓN DEL SOPORTE 1. Localice el lugar donde desea instalar la pantalla. 2. Coloque la placa de soporte en la pared y marque los lugares donde se van a realizar las perforaciones, de forma que la placa quede completamente fi ja. 3. - Page 6 5. Coloque los seguros de las barras de movimiento en las barras de sujeción como se muestra en la fi gura, asegúrese de que el tornillo embone bien en la entrada cuadrada. Los seguros deben quedar en la parte exterior de las barras de sujeción de modo que pueda ajustarlos libremente.
- Page 7 barras están colocadas pantalla, engánchelas en la placa de soporte de la pared. Note que el gancho va en la parte superior. 8. Para asegurar los sujetadores a la pantalla coloque los dos tornillos sujetadores y apriete fi rmemente. AJUSTE DE ÁNGULOS DESPUÉS DE LA INSTALACIÓN 1.
- Page 8 1.- Para hacer efectiva la garantía, presente esta póliza y el producto, en donde fue adquirido o en Electrónica Steren S.A. de C.V. 2.- Electrónica Steren S.A de C.V. se compromete a reparar el producto en caso de estar defectuoso sin ningún cargo al consumidor. Los gastos de transportación serán cubiertos por el proveedor.
- Page 10 STV-036 Thank You on purchasing your new Steren product. This manual includes all the feature operations and troubleshooting necessary to install and operate your new Steren´s 25 to 45” LCD/LED TV stand. Please review this manual thoroughly to ensure proper installation and operation of this product.
- Page 11 IMPORTANT -Only use the supplied pieces and fasten them tightly. -Do not forget to use all pieces. Install all pieces as shown on this manual. -Do not try to modify any piece. -Take care about the weight of the bracket while mounting in a wall. -If you mount the bracket in a concrete wall, make sure to use the supplied anchors.
- Page 12 CONTENT...
-
Page 13: Bracket Installation
BRACKET INSTALLATION 1. Locate the place where you want to install the screen. 2. Place the backplate on the wall and mark the places where you have to drill. 3. Once you made the holes, insert anchors (C) in each one. 4. - Page 14 5. Place the movement bars knobs in the fastening bars as shown on the image; make sure the screw fi ts right into the square entry. The knobs must be place in the exterior part of the fastening bars, so you can adjust them without any trouble.
- Page 15 6. When the screen is securely mounted in the fastening bars, hook it up to the bottom plate. Note the hook must be placed in the upper side of the plate. 7. Tighten the screws so that the bracket is properly fi xed. ANGLE ADJUSTMENT AFTER INSTALLATION 1.
-
Page 16: Warranty
Part number: STV-036 Brand: Steren WARRANTY This Steren product is warranted under normal usage against defects in workmanship and materials to the original purchaser for one year from the date of purchase. CONDITIONS 1. This warranty card with all the required information, invoice, product box or package, and product, must be presented when warranty service is required.
Need help?
Do you have a question about the STV-036 and is the answer not in the manual?
Questions and answers