Table of Contents
Advertisement
Advertisement
Table of Contents

Related Manuals for usha Fashion Stitch


Summary of Contents for usha Fashion Stitch
- Page 1 INSTRUCTION BOOK...
- Page 2 IMPORTANT SAFETY INSTRUCTIONS This appliance is not intended for use by persons (including children) with reduced physical, sensory or mental capabilities, or lack of experience and knowledge, unless they have been given supervision or instruction concerning use of the appliance by a person responsible for their safety. Children should be supervised to ensure that they do not play with this sewing machine.
- Page 3 Do's and Don'ts 1. Always be aware of the up-and down movement of the needle and not turn your attention from the machine while it is running. 2. When leaving the sewing machine unattended, the main switch of the machine must be switched off or the plug must be removed from the socket-outlet.
-
Page 4: Table Of Contents
TABLE OF CONTENTS SECTIONⅠ Ⅰ Ⅰ Ⅰ Ⅰ ESSENTIAL PARTS SECTION Ⅴ Ⅴ Ⅴ Ⅴ Ⅴ DECORATIVE STITCHING Names of Parts .......... 3-4 Feather Stitch ..........31 Decorative Satin Stitch Patterns ....32 Stretch Stitch Patterns ......... 32 SECTIONⅡ Ⅱ Ⅱ Ⅱ Ⅱ GETTING READY TO SEW Connecting the Machine to the Power Supply 5 Foot Control ........... -
Page 5: Names Of Parts
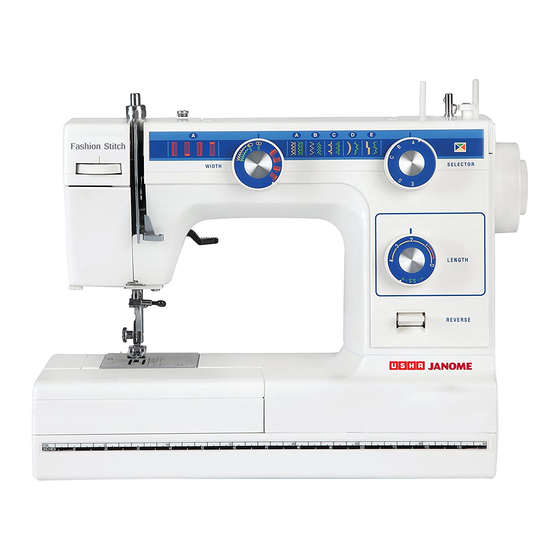
ESSENTIAL PARTS Names of Parts Reverse stitch lever Stitch length dial Pattern selector dial Bobbin winder stopper Bobbin winder spindle Spool pins Zigzag width dial Top cover Bobbin winder thread guide Thread take-up lever Pressure regulator Thread guide Thread tension dial Face plate Check spring holder Thread cutter... - Page 6 Carrying handle Thread guide Balance wheel Stop motion knob Machine socket Belt cover Presser foot lifter Needle clamp screw Free arm Presser foot 26 27 26 27...
-
Page 7: Connecting The Machine To The Power Supply
GETTING READY TO SEW Connecting the Machine to the Power Supply Before connecting the power, make sure the voltage and number of cycles of the machine conform to your electrical power. Fit the nonreversible plug into the machine socket and plug the power supply. How to set the spool pins Spool pins are separately packed to prevent any damage in transit. -
Page 8: Foot Control
Foot Control Sewing Light Sewing speed can be varied by the foot control. The sewing light is located behind the face The harder you press on the control, the faster plate . the machine runs. (A) ● To removel ....Unscrew ●... -
Page 9: Extension Table(Accessory Box)
Extension Table (Accessory Box) Extension Table Accessory Storage Box The extension table provides added sewing surface and be easily removed for free arm sewing. Sewing accessory are conveniently ● located under the extension table. For free arm sewing Pull the end of the extension table away from the machine, as illustrated. -
Page 10: Pressure Regulator
Pressure Regulator To increase pressure, push down the pressure To release pressure, push down the ring, then regulator button until suitable pressure is obtained. the button will spring up to its highest position. Setting Position The top of button should normally be pushed down to about 3/ 4 position from its highest position, except for the following: ●... -
Page 11: Dropping The Feed Dogs
Dropping the Feed Dogs The drop feed lever is located in the hook area. To raise the feed dogs, press down the lever and move it to the direction of arrow as illustrated. For dropping the feed dogs, press down the lever and move it to the direction of arrow as illustrated. -
Page 12: To Snap On And Snap Off The Presser Foot
To Snap On and Snap Off the Presser Foot Turn the balance wheel toward you to raise the needle to its highest position. Raise the presser foot. Press the lever on the back of the foot holder. The presser foot will drop off. When attaching the presser foot, set the pressure regulator button at the depressed position to the bottom. -
Page 13: Changing Needle
Changing Needles Raise the needle by turning the balance wheel toward you and lower the presser foot. Loosen the needle clamp screw by turning it toward you. Remove the needle from the clamp. Insert the new needle into the clamp, push it up as for as it will go and tighten the clamp screw firmly with the screwdriver. -
Page 14: Thread And Needle Chart
Thread and Needle Chart Fabrics Threads Needle Size Fine Silk Crepe de Chine, Voile Fine Cotton Light Lawn, Organdy, Georgette, Fine Synthetic weight Tricot Fine Cottton Covered Polyester 50 silk 50 to 80 Cotton Linens, Cotton, Pique, 50 to 60 Medium Serge, Double Knits, Synthetic... -
Page 15: Removing Or Inserting The Bobbin Case
Removing or Inserting the Bobbin Case Open the hook civer or the slide plate. Raise the needle by turning the balance wheel toward you. Take out the bobbin case by holding the latch. When inserting the bobbin case, place the horn into the recess of the hook race. -
Page 16: Winding The Bobbin
Winding the Bobbin Draw thread from spool. Pass the thread through the top cover thread guide. Guide the thread around the bobbin winder thread guide. Insert the thread through the hole in the bob- bin, threading from the inside to the outside. Put the bobbin on the bobbin winder spindle, and push it to the right. -
Page 17: Threading Bobbin Case
Threading Bobbin Case ① Place bobbin into bobbin case. Make sure the thread unwinds in the direction of arrow. ② Pull thread into bobbin case slot. ③Draw thread under tension spring and into the delivery eye ※ Leave about 10 cm (4 inches) of free thread. -
Page 18: Threading The Machine
Threading the Machine Raise the thread take-up lever to the highest point by turning the balance wheel towards you. Raise presser foot with presser foot lifter and pass the thread in the order from ① to ⑧ . Pass the thread through the top cover thread guide. Draw the thread around the thread guide and down into the tension. -
Page 19: Drawing Up Bobbin Thread
Drawing up Bobbin Thread ① Raise presser foot and hold the thread lightly with your left hand. ② Turn the balance wheel slowly towards you with your right hand until the needle goes down and continue turning balance wheel until the take-up lever is at its highest position. -
Page 20: Balancing Needle Thread Tension
Balancing Needle Thread Tension The needle thread and the bobbin thread should interlock in the center of two layers of fabric in straight seams. Set the desired number of the thread tension dial at setting mark. Loosen the needle thread tension by moving the dial to a lower number. -
Page 21: Zigzag Width Dial
Zigzag Width Dial Pattern Selector Dial Pattern Selector Dial 0 1 2 3 4 The stitch width for the zigzag Select the desired pattern at stitches ( ), the two needle the setting mark by turning positions ( center and left ) for the the pattern selector dial. -
Page 22: Straight Stitch Sewing
BASIC SEWING Straight Stitch Sewing Machine Setting 1.5 - 4 2 - 6 Raise the presser foot and position the fabric next to a stitching guide line on the needle plate. Lower the presser foot and smooth the threads toward the back. Gently guide the fabric along the guide line letting the fabric feed by itself. -
Page 23: Changing The Sewing Directions
Changing the Sewing Directions Zigzag Stitching Machine Setting Stop the machine and turn the balance wheel toward you to bring the needle down into the 2 - 5 fabrics. Raise the presser foot. Pivot the fabric around the needle to change sewing direction as desired. -
Page 24: Overcasting
UTILITY STITCHING Overcasting Machine Setting 1 - 2 3 - 7 This type of stitch is used on the seam allowance to prevent fabrics from fraying at raw edges. It can be used to finish a hem edge. -
Page 25: Tricot Stitch
Tricot Stitch Triple Strength Stitch Machine Setting Machine Setting 0.5 - 1.5 2 - 6 3 - 6 Place the fabric under the presser foot so that The stitch is sewn with two stitches forward and one stitch backward forming a seam that does the edge will be slightly inside the right hand side of the presser foot. -
Page 26: Buttonhole Stitching
Buttonhole Stitching Machine Setting Make a test buttonhole on a sample duplicating the fabric, interfacing and seams of the actual garment. Place the button on the fabric sample and mark the top and bottom to determine the buttonhole length. 1 - 5 Set the pattern selector dial at "... - Page 27 Set the pattern selector dial at " ". Sew up the right side of the buttonhole. Stop the machine when you are directly opposite the first stitch on the left hand side and raise the needle. Set the pattern selector dial at " ".
-
Page 28: Sewing Buttons
Sewing Buttons Tape the button over the placement mark. Machine Setting A pin can be placed on top of the foot to form a shank. Press down the drop feed lever and move it to the right for dropping the feed dogs. 3 - 7 Set the pattern selector at "... -
Page 29: Zipper Application
Zipper Application Machine Setting Pin or baste zipper tape to fabric and place it under the foot. Smooth the threads toward the back and lower the foot. To sew the left side of the zipper, guide the edge of the zipper along the zipper teeth and stitch through the garment and zipper tape. -
Page 30: Blind Stitch Hemming
Blind Stitch Hemming Machine Setting Fold up the desired amount and pin in place. Then fold the hem under the fabric as illustrated. Lower the presser foot, then loosen the foot holder screw to place the hem guide between the screw and the shank of foot holder. Tighten the screw making sure the wall of hem guide is placed in the middle of the toes of the presser foot. -
Page 31: Rolled Hem
Rolled Hem Machine Setting 1.5 - 4 3 - 6 Make a double 0.25cm (1/ 8") fold approximately 8cm ( 3") in length. Lower the needle into the fabric at the point where sewing is to begin, then lower the hemmer foot. - Page 32 Lower the hemmer foot, then sew by lifting up the edge of the fabric to keep it feeding smoothly and evenly. Trim about 0.7 cm (1/ 4") from corners as 0.7cm(1/4") illustrated, to reduce bulk. 0.7cm(1/4")
-
Page 33: Feather Stitch
DECORATIVE STITCHING Feather Stitch When sewn over a seam the feather stitch Machine Setting reinforces stretch and woven fabrics with a strong decorative stitch. It can be used to sew spandex undergarments or decoratively hem elastic fabric. Another common use for the feather stitch is patchwork quilting. -
Page 34: Decorative Satin Stitch Patterns
Decorative Satin Stitch Patterns Stretch Stitch Patterns Machine Setting Machine Setting 1 - 4 1 - 4 0.5 - 1 Sew a row of stitches and adjust the thread When forward and reverse feeds become tension so the upper thread should appear on unbalanced depending upon the type of the reverse side of the fabric. -
Page 35: Dismantling And Assembling Hook Race
CARE OF YOUR MACHINE Dismantling and Assembling Hook Race To dismantle hook race: Raise the needle to its highest position and open the hook cover or the slide plate. Open the hinged latch of bobbin case and take it out of the machine. Open the hook race ring holders outside and remove the hook race ring. -
Page 36: Cleaning The Feed Dogs
Cleaning the Feed Dogs Drive Belt Tension Remove the needle and the presser foot. Unscrew the needle plate set screws with a driver to take off the needle plate f rom the machine bed. 10mm (3/8") When replacing motor belt, please leave 10mm (3/8") slack. -
Page 37: Oiling The Machine
Oiling the Machine Open the face plate and life the carrying handle. Unscrew the 3 set screw and remove the top plate. Apply a few drops of fine quality sewing machine oil to the points indicated by the arrows in the figures. For a machine in constant use, oil two or three times a year. -
Page 38: Trouble Shooting
Trouble Shooting Condition Cause Reference The machine 1.Threads have been caught in hook mechanism. See Page 33 does not run 2.The feed dog is packed with lint. See Page 34 smoothly and is noisy. The needle 1.The needle thread is not threaded properly. See Page 16 thread breaks. - Page 39 Condition Cause Reference Seam puckering 1.The needle thread tension is too tight. See Page 18 2.The machine is not threaded correctly. See Page 16 3.The needle is too heavy for the cloth being sewn. See Page 12 4.The stitches are too coarse for the fabric being sewn. Make the stitches denser.
Need help?
Do you have a question about the Fashion Stitch and is the answer not in the manual?
Questions and answers