
Summary of Contents for AudioSonic SBB-03005
- Page 1 TV SOUND BAR MODEL:SBB-03005 PLEASE READ CAREFULLY BEFORE OPERATING THIS EQUIPMENT...
- Page 2 Important Safety Instructions CAUTION RISK OF ELECTRIC SHOCK DO NOT OPEN CAUTION: TO REDUCE THE ELECTRIC SHOCK, DO NOT REMOVE THE COVER (OR BACK). NO USER SERVICEABLE PARTS INSIDE. REFER SERVICING TO QUALIFIED SERVICE PERSONNEL. DANGEROUS VOLTAGE: The lighting flash with arrowhead symbol within an equilateral triangle is intended to alert the user to the presence of uninsulated “dangerous voltage”...
- Page 3 Important Safety Instructions Before using the unit, be sure to read all operating instructions carefully. Please note that these are general precautions and may not pertain to your unit. For example, this unit may not have the capability to be connected to an outdoor antenna. Read these instructions –...
- Page 4 PL A C I NG A ND MO U NTI NG Placing When placing the Sound Bar on an entertainment center, bookshelf, or any type of enclosed space, be sure to allow at least 2-3 inches of space around the Sound Bar for ventilation.
- Page 5 Mounting on the wooden wall 2 pieces screws (Included) 1. Mark the position of the mounting screws on the wall using a pencil. 2. Drill the supplied screws directly into the marks that you have made on the wall and leave approx. 0.3 inch length to hook the sound bar. 3.
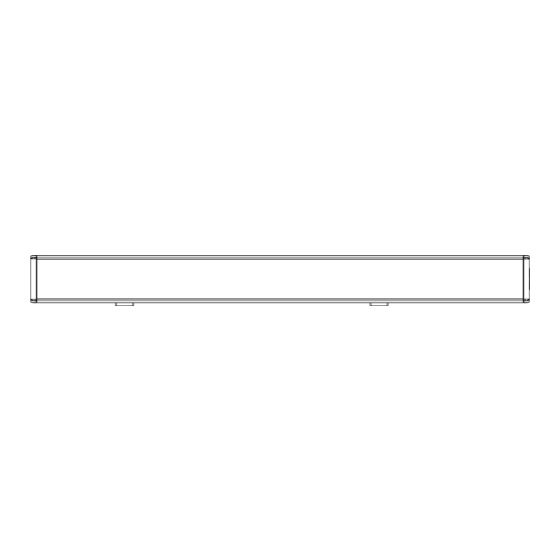
- Page 6 Front View Remote Sensor Indicator Back View DC IN 12V,2A AUX 1 ANT (Antenna) AUX 1 DC IN Side View FM SCAN VOLUME + AUX 2 POWER/SOURCE VOLUME -...
- Page 7 BASS- BASS+ TREBLE- TREBLE+ MO/ST (Power)/STANDBY Button (Mute) Button 2. Volume Down Button 9. Volume Up Button 10. Bass Up Button 3. SOURCE Button 11. PAIR Button 4. Bass Down Button 12. Treble Up Button 5. Treble Down Button (Presvious)/Tune Down Button 13.
- Page 8 -First Time Use Remove and discard the insulation tab as figure on the right. -Replacing Batteries For Remote Control 1. Push and slide out the battery holder as figure 1 below. 2. Replace the battery with a new CR2025 button cell as the polarity markings on the rear of the Remote Control.
- Page 9 GENERAL OPERATIONS 1. Connect one end of the AC power adaptor to the unit and the plug into a wall power outlet. Switch the power on. The red light indicator will light up. 2. Press the Power/SOURCE button on the unit or the Power button on the remote control to power on the unit from standby mode.
- Page 10 LISTEN TO FM RADIO 1. Power ON the unit. 2. Press the Power/SOURCE button on the unit or the SOURCE button on the remote control repeatedly until the color of Indicator turns to Green. 3. Press the FM SCAN button on the unit to auto search and play the next availble FM station. Repeat the same procedures until the desired radio station is searched and play.
- Page 11 AUX 1 : LISTEN TO TV/DVD/VCR/DVR 1. Connect the Aux out jacks from the external audio player ( such as TV, DVD player VCR …etc. ) to the AUX 1 jacks on the rear of unit by the supplied RCA Connection Cable as the figure below: To Audio Out Jacks white...
- Page 12 TROUBLESHOOTING GUIDE Check the followings before requesting service SYMPTOM POSSIBLE CAUSE POSSIBLE SOLUTION Power AC/DC adapter Connect the power AC/DC adapter not connected No power The unit is in Standby mode Press button to turn on the unit Raise volume level by pressing the VOL Volume in minimum position (Volume) + button Play the music/movie in the connected...
- Page 13 Power Source................... DC 12V; 2A, Radio Coverage....................FM 87.5 -108.0 MHz Audio Power........................20W(RMS) Bluetooth Effective Range in Open Aera..............Up to 32 feet Remote Effective Range.....................Up to 16 feet ACCESSORY: 1 x AC/DC Adaptor 1 x Remote Control 1 x Stereo Audio Connection Cable with 3.5mm stereo plugs 1 x User's Manual 1 x RCA Connection Cable 2 x Plastic Inserts ( For Wall Mount )
- Page 14 12 Month Warranty Thank you for your purchase from Kmart. Kmart Australia Ltd warrants your new product to be free from defects in materials and workmanship for the period stated above, from the date of purchase, provided that the product is used in accordance with accompanying recommendations or instructions where provided.
Need help?
Do you have a question about the SBB-03005 and is the answer not in the manual?
Questions and answers