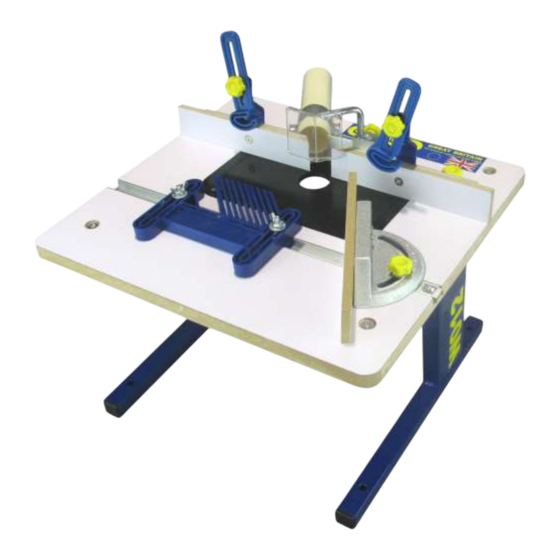
Summary of Contents for Charnwood W012
- Page 1 BENCH TOP ROUTER TABLE OWNERS MANUAL MODEL: W012 Charnwood, Cedar Court, Walker Road, Hilltop Industrial Estate, Bardon, Leicestershire, LE67 1TU Tel. 01530 516 926 Fax. 01530 516 929 email: sales@charnwood.net website: www.charnwood.net...
-
Page 2: General Safety Rules
GENERAL SAFETY RULES WARNING: Do not attempt to operate the machine until you have read thoroughly and understood completely all instructions, rules, etc. contained in this manual. Failure to comply may result in accidents involving fire, electric shock, or serious personal injury. Keep this owner's manual and review frequently for continuous safe operation. -
Page 3: Specification
17. Never leave the machine running unattended. Turn the power off. Do not leave the machine until it comes to a complete stop. 18. Do not use any power tools while under the effects of drugs, alcohol or medication. 19. Always wear a face or dust mask if operation creates a lot of dust and/or chips. Always operate the tool in a well ventilated area and provide for proper dust removal. - Page 4 ASSEMBLY INSTRUCTIONS All Parts are packed in one carton. Unpack the parts carefully and check that everything is present using the Parts List. If anything is missing contact the retailer immediately. ASSEMBLE THE LEGS Attach the 2 Legs to the Table using 4 countersunk screws M8x55mm, Washers M8, and Hex Nuts M8.
- Page 5 ASSEMBLE THE FENCE i) Remove the two M5 Wing Nuts and Washers holding the Wooden Fences to the Fence Base. ii) Attach the two Vertical Clamps and Vertical Clamp Supports and refit the Washers and Wing Nuts as shown in the picture.
- Page 6 v) The Fence Assembly is fixed with two M6 x 16 Knobs with washers which pass through the slots in the fence base and into the threaded inserts in the Table. There are two sets of threaded inserts in the table. The choice of which to use will depend on the type of job to be performed;...
- Page 7 iii) Align the centre of the hole in the insert plate with the centre of the hole in the face plate cover. Using the face plate cover as a template, mark out the fixing holes. The number and position of the holes will vary with each model of router.
- Page 8 vii) Install the desired cutter and set to the correct depth. Fit the router and insert plate into the table, securing with the four M6x16mm countersunk screws. Re-fit the fence and feather board. The maximum router height that can be fitted below this table is 260mm For unusually tall routers (such as the popular Trend model T4) it will be...
- Page 9 BASIC OPERATING INSTRUCTIONS 1) EDGING AND PROFILING One of the most common operations undertaken using a router is Edging or Profiling, i.e. running a shaped cutter along the edge of the workpiece. In many instance this is for decorative purposes but it can also be to make a joint or fitting such as a raised panel.
- Page 10 Please Note: Some workpieces may be too big to fit inside either the Top Clamps or the Feather board, i.e. larger than 90x50mm. Simply remove the clamp/Feather board from the table. The function of the clamps is twofold; to hold the workpiece securely against the cutter, whilst keeping the hands well away from it.
- Page 11 3) USING THE MITRE GUIDE For some operations it is not possible to use the fence as a guide, for example Trenching at an angle or cutting a Tenon where the width of the workpiece restricts good support from the fence. To do these jobs a sliding mitre guide is used which runs in the aluminium slot across the front of the table.
- Page 12 THE GOLDEN RULES; ALWAYS KEEP HANDS WELL AWAY FROM THE CUTTER ALWAYS USE A PUSH STICK WITH SMALL WORKPIECES ALWAYS FEED FROM RIGHT TO LEFT ONLY...
- Page 13 W012 Router Table Drawing 1...
- Page 14 W012 Router Table Drawing 2...
- Page 15 W012 PARTS LIST Part No. Description Qty. TABLE INSERT PLATE RUBBER BUNG COUNTERSUNK SCREW M6x16mm COUNTERSUNK SCREW M8x55mm WASHER M8 HEX NUT M8 FENCE BASE WOODEN FENCE VERTICAL CLAMP SUPPORT VERTICAL CLAMP WING NUT M6 FINGER PRESSURE KNOB M6x16mm WASHER M6 (LARGE)

Need help?
Do you have a question about the W012 and is the answer not in the manual?
Questions and answers