Table of Contents
Advertisement
Advertisement
Table of Contents

Related Manuals for Cooau CU-101

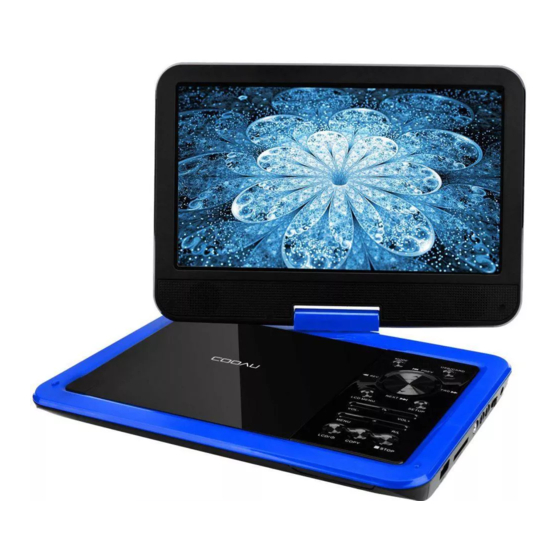
Summary of Contents for Cooau CU-101
- Page 3 CONTENT IMPORTANT SAFETY INSTRUCTIONS PRECAUTIONS AND WARNINGS PACKAGE CONTENTS PANEL REMOTE CONTROL REMOTE CONTROL BUTTONS MENU OPERATION TROUBLESHOOTING Service email: service@cooau.net...
- Page 5 IMPORTANT SAFETY INSTRUCTIONS When using electronic equipment, basic safety precautions should be followed, including the following: Read all instructions before using the unit. Use this unit only for intended as described in this manual. Do not operate if it has a damaged cord or plug, it is not working properly or has been damaged or dropped.
- Page 6 Ventilation: Slots and openings in the cabinet are provided for ventilation to ensure reliable operation of the product and to protect it from overheating. These openings should never be blocked by placing the product on a bed, sofa, rug, or other similar surface. This products should not be placed in a built-in installation such as a bookcase or rack unless proper ventilation is provided.
- Page 7 PRECAUTIONS AND WARNINGS Placement: To prevent fire or shock hazard, do not expose this appliance to rain ● or moisture. Do not expose this appliance to direct sunlight. ● Keep this appliance away from strong magnets, heat sources and ● excessive dust.
- Page 8 Cleaning unit: When cleaning, please make sure the unit is unplugged from the power source. Do not use chemicals or detergents when cleaning. Use a soft cloth lightly dampened with water to clean the exterior of the unit only and immediately wipe dry. Disc handling: Do not leave discs near heat sources, in direct sunlight, or in high ●...
- Page 9 PACKAGE CONTENTS AC ADAPTOR REMOTE CONTROL AV CABLE CAR ADAPTOR INSTRUCTION MANUAL...
- Page 10 BUTTON PANEL MODE DVD/USB/SD SELECT KEY MODE USB/CARD FAST BACKWARD/LEFT PREVIOUS KEY/UP FAST FORWARD/RIGHT ENTER/OK KEY NEXT KEY/DOWN LCD MENU LCD MENU SETUP STEP UP VOL- KEY VOL- VOL+ VOL+ KEY MENU MENU LCD ON/OFF SUBTITLE LCD/ STOP TITLE STOP OFF ON DC IN 12V CARD...
- Page 11 PANEL KEYS Common Keys functions on the panel. MODE Press repeatedly to switch the mode for AV IN or DVD. USB/CARD Press repeatedly to switch among the input of the Disc, SD card, USB source. MENU Press to return to the root menu for DVD. Direction Keys Use direction keys for: previous/next, fast forward/fast rewind.
- Page 12 ROMOTE CONTROL POWER MUTE ZOOM CARD/USB PROG COPY REPEAT SETUP MODE ENTER MENU VOL- VOL+ ON/OFF TITLE AUDIO GOTO RETURN POWER MENU CARD/USB STOP ZOOM VOLUME-/+ MUTE Fast Forward/Fast Rewind PROGRAM PREV/NEXT COPY Number Keys LCD ON/OFF REPEAT SUBTITLE SETUP AUDIO DIRECTION BUTTON GOTO...
- Page 13 The remote control requires two AAA type 1.5V lithium battery. Batteries are not included in the package. Battery installation and replacement for Remote as follows: Push the battery cover. Insert the battery into the receptacle, making sure the polarity matches the marks inside the component.
- Page 14 ROMOTE CONTROL BUTTONS POWER: Press it to power on/off the DVD player. CARD/USB: Press the key to switch between DVD, CARD and USB modes. ZOOM: For the DVD disc, short press to access the zoom function. You can select the 2X, 3X, 4X, 1/2, 1/3, 1/4. For the photo disc, press it to switch between the zoom 100%, 125%, 150%, 200%, 75%, 50% and normal status.
- Page 15 Fast Forward/Fast Rewind: Skips forward, consecutive short presses to go to 5-level speed( X2>X4->X8->X16>X32 ->PLAY); PREV/NEXT: Press to play previous chapter/title/track. Press to play next chapter/title/track. 0-9 Number Keys: Use the Numeric buttons to input a DVD chapter or CD track (invalid for some discs) and press PLAY/PAUSE button to confirm.
- Page 16 Bad/No disc: The player is equipped with automatic disc quality ● detection software. If the player detects a disc that is damaged or has a format problem, it may play the disc at a lower quality or stop playing completely, depending on how serious the damage is. Note: DVD disc production quality may vary and some discs may deviate from the industry standard.
- Page 17 The player will scan the disc, and then it will start playing automatically. If a disc menu appears on the screen, see “Using the disc menu” for details. If the disc is locked by parental controls, you must enter your password (see “SYSTEM SETUP”...
- Page 18 Play/Pause the Playback (DVD/VCD/CD/MP3) During the playback, press the PLAY/PAUSE button on the remote control to pause the playback. Press it again to resume playing. Volume Control Press the VOL+/- button on the player or the remote control to increase or decrease the volume level.
- Page 19 Repeat Playback (DVD/VCD/CD/ MP3/Xvid Disc) You can play a chapter/title/all/track on a disc repeatedly. Press Repeat button on the remote control repeatedly during playback to select a repeat mode. Depending on the kind of disc (DVD, VCD, CD, MP3 or Video photo discs), you have different repeat options.
- Page 20 Selecting Subtitle Languages (DVD) While playing a DVD disc that has been mastered with multiple subtitles, press the Subtitle button repeatedly to select the language of subtitle. Note: Only DVDs recorded with multi-language subtitles have this function. Changing the Audio Channel (CD/MP3/VCD) Press the Language button repeatedly during playback to select available audio channels provided by the disc (Left Mono, Right Mono, Mix-Mono or Stereo).
- Page 21 MP3/WMA Playing MP3/WMA/DIVX disc has a directory structure as shown in the picture. Press the Direction key to choose the root directory and then press the ENTER button to enter into the sub-directory. Press the Direction key to choose the track and then press the ENTER button to enjoy the music or movie.
- Page 22 Image Rotation During picture play, press the Direction key to rotate the picture. Remote Key Function Program TRANSITION Effect Stop Thumbnail Mode Next Picture Previous Picture Play Picture Mode Invert Mirror Connect to USB You can play or view the supported format, such as the MP3/WMA, Video in AVI and JPEG photos.
- Page 23 Note: Please make sure you have inserted the SD card correctly and it not be damaged. Always stop play or change to another mode before removing the USB/memory card. Rotate the Screen The screen can be rotated right 90 degrees and rotated left 180 degrees, when it is rotated left 180 degrees, it can be folded just like a “Pad".
- Page 24 Connecting Headphones The stereo headphone jacks have been provided on the player for private listening. To use the jacks, plug in the headphones with a stereo mini-jack 3.5mm plug into one of the headphone jacks and adjust the volume to a comfortable listening level.
- Page 25 Warning: Disconnect this car power adapter when the unit is not in use for a long ● period of time. Do not plug the car adapter to any DC24V cigarette lighter. Only a ● DC12V cigarette lighter socket can be used. Connecting the car adapter to a power supply with a different voltage would damage the unit.
- Page 26 Note: Only use the AC adapter and car adapter provided. ● Never dispose the battery in fire. ● Do not use the unit in high temperature or near heat sources. ● Danger of explosion exists if the battery is incorrectly replaced. Replace ●...
- Page 27 MENU OPERATION Press [SETUP] on the remote control or on the unit to show the setup menu. Press [LEFT] / [RIGHT] to select an item. The submenu of the selected item will be instantly shown. Press [UP] / [DOWN] to select an item in the submenu, then press [OK] / [ENTER] to enter.
- Page 28 16:9 wide: Select this option if the unit is connected to a wide-screen TV set. The wide-screen image will be displayed in full screen in its native aspect ratio while the 4:3 image will be stretched out horizontally to fit in the screen. Angle Mark Set this item to ON.
- Page 29 Audio Setup Page The Audio menu allows you to change the audio setup of the DVD. Speaker ● Down mix: Set down mix to LT/RT, Stereo. Dual Mono: Set down Stereo, L-Mono, R-Mono or Mix-Mono. Audio Setup Page - - Downmix LTRT Dual Mono...
- Page 30 Preference Page The preference menu option allows you to adjust the default DVD disc setting. (The setting is only available when no media is inside the unit.) TV Type Set TV Type to PAL, AUTO, or NTSC. ● Audio: Set the default audio language. ●...
- Page 31 DIVX Playback DIVX is a video (movies and video) recording format, which is commonly known as AVI. DIVX disc features high quality that is comparable with the DVD’s and larger capacity. For example: 1.5H movie In MPEG-1/2 format In DivX DVD(MPEG-2) About 1.5-2GB About 600-800MB...
- Page 32 Customer Service or a repair shop. Please refer to all warnings and precautions in the User Manual. Our company provides customers warranty of 12 MONTHS from the date of purchased. If there is any question, please don’t be hesitated to email us at service@cooau.net.
Need help?
Do you have a question about the CU-101 and is the answer not in the manual?
Questions and answers
How do I connect my DVD player to my Panasonic tv??